Table of Contents
Setting up Facebook Pixel and CAPI in your HighLevel funnel helps track customer interactions and enhances ad tracking accuracy.
Section 1: Setting Up Facebook Pixel in GHL #
- Open Facebook Business Manager:
- Access Facebook Business Manager (Meta Business Suite) and select the correct ad account.
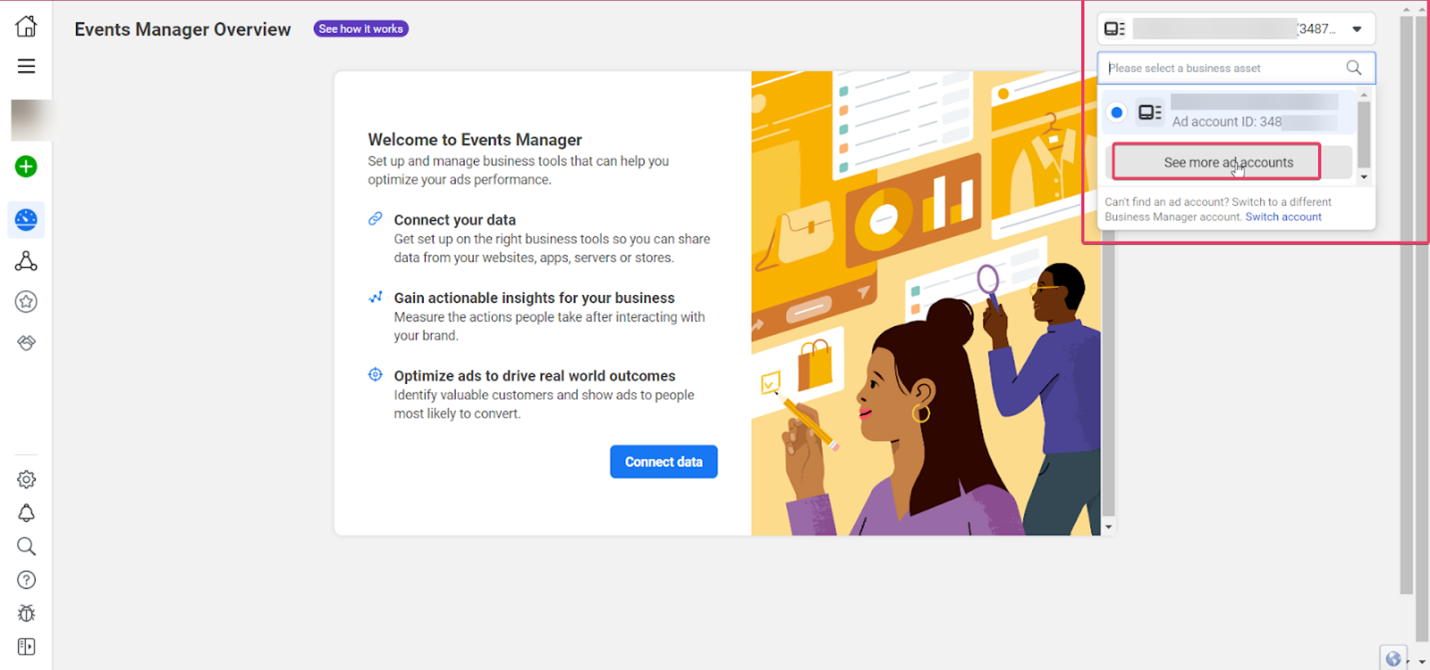
- Access Facebook Business Manager (Meta Business Suite) and select the correct ad account.
- Navigate to Events Manager:
- In the left sidebar, click Events Manager and choose Connect Data Sources.
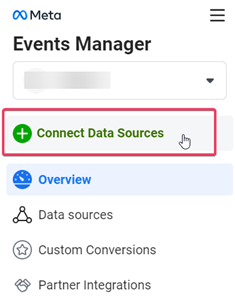
- In the left sidebar, click Events Manager and choose Connect Data Sources.
- Choose Data Source Type:
- Select Web as the data source type and click Next.
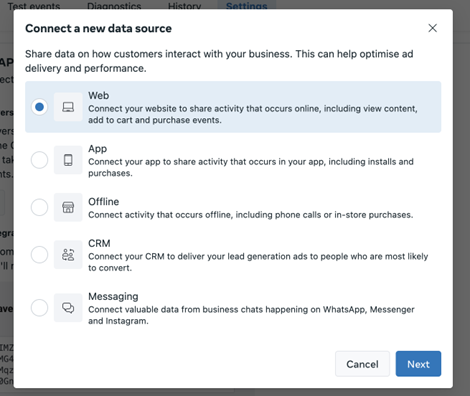
- Select Web as the data source type and click Next.
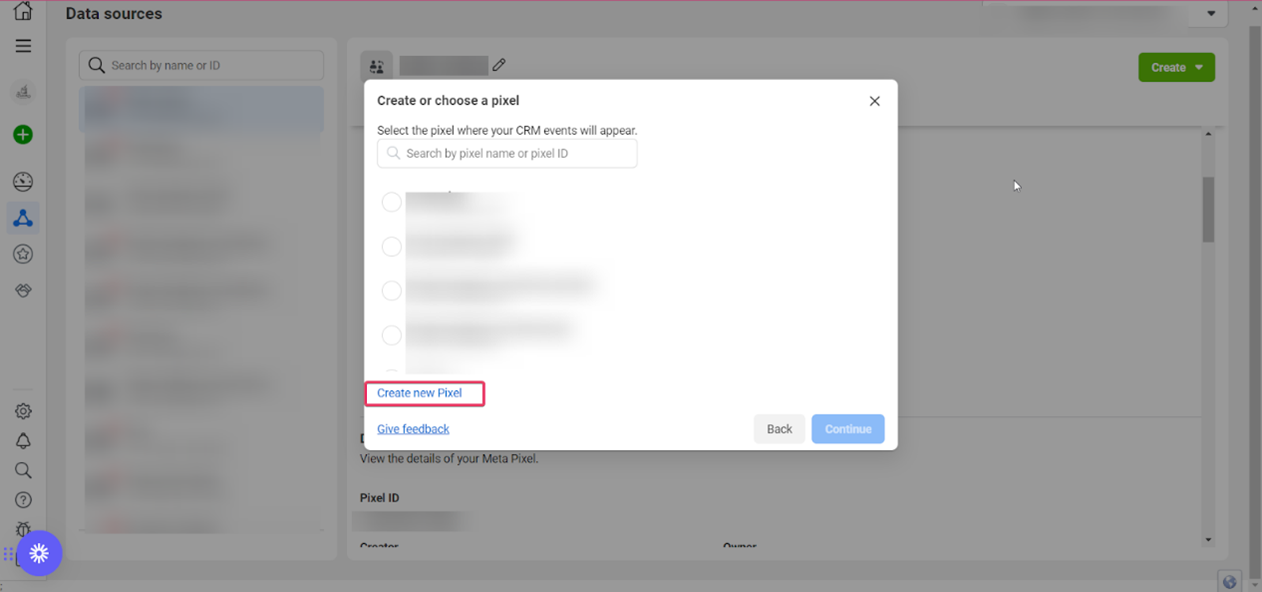
- Create a New Pixel:
- Choose an existing pixel or click Create New Pixel.
- Follow the prompts to add pixel details and click Continue.
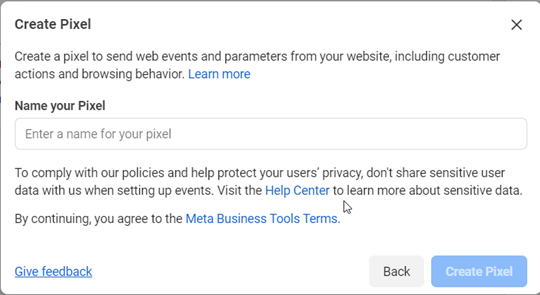
- Choose an existing pixel or click Create New Pixel.
- Add Your Funnel Domain:
- Enter your funnel’s URL (from GHL) and click Check. If valid, a green checkmark will appear.

- Click Next.
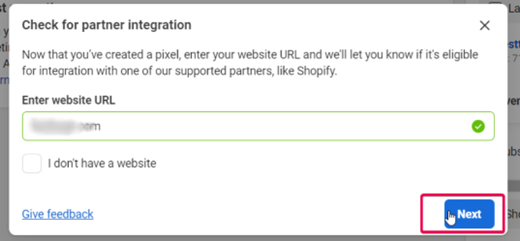
- Enter your funnel’s URL (from GHL) and click Check. If valid, a green checkmark will appear.
- Choose Connection Method:
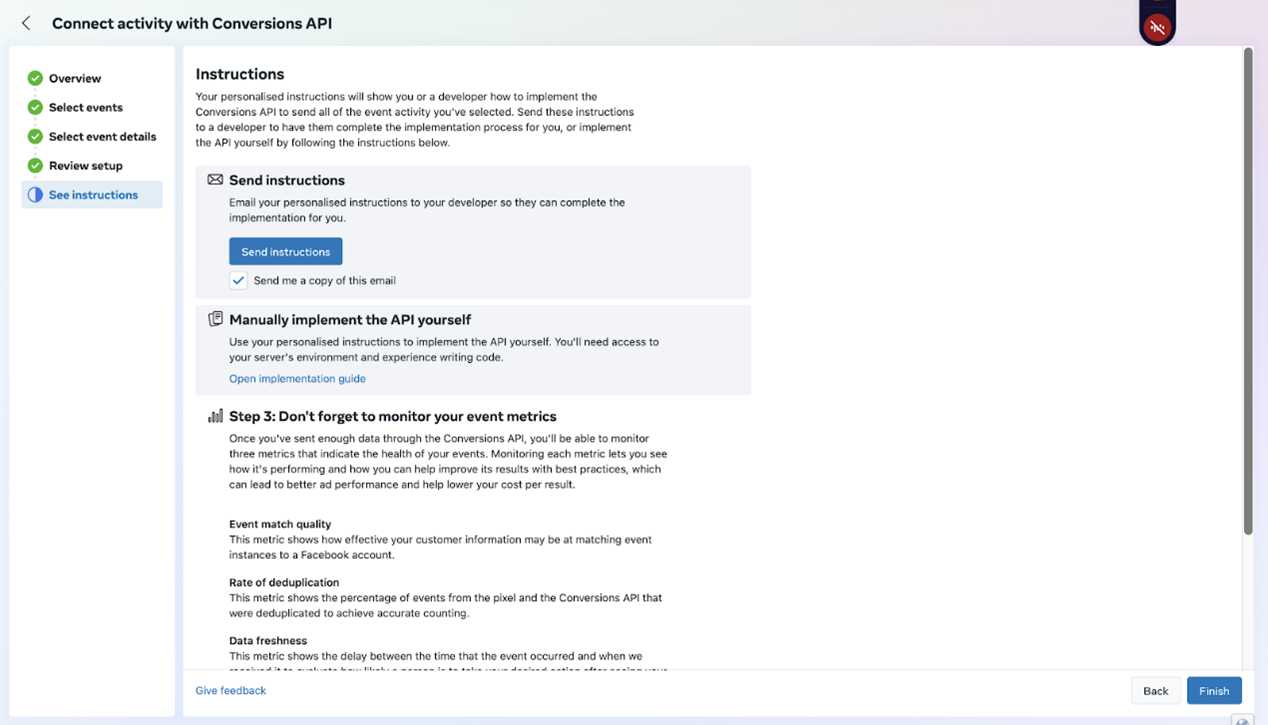
- Select Meta Pixel and Conversions API in the connection options.
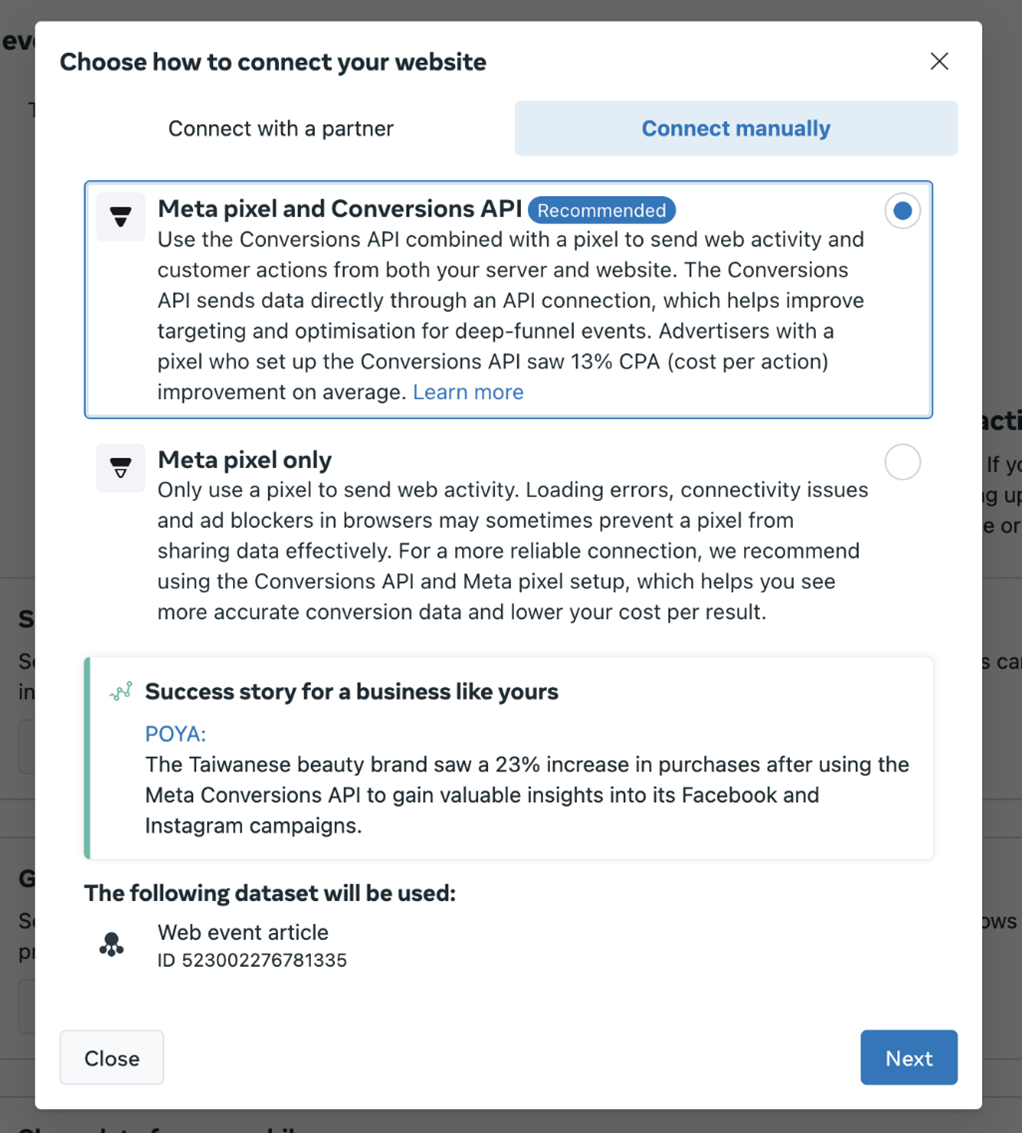
- then click See Instructions under CAPI.
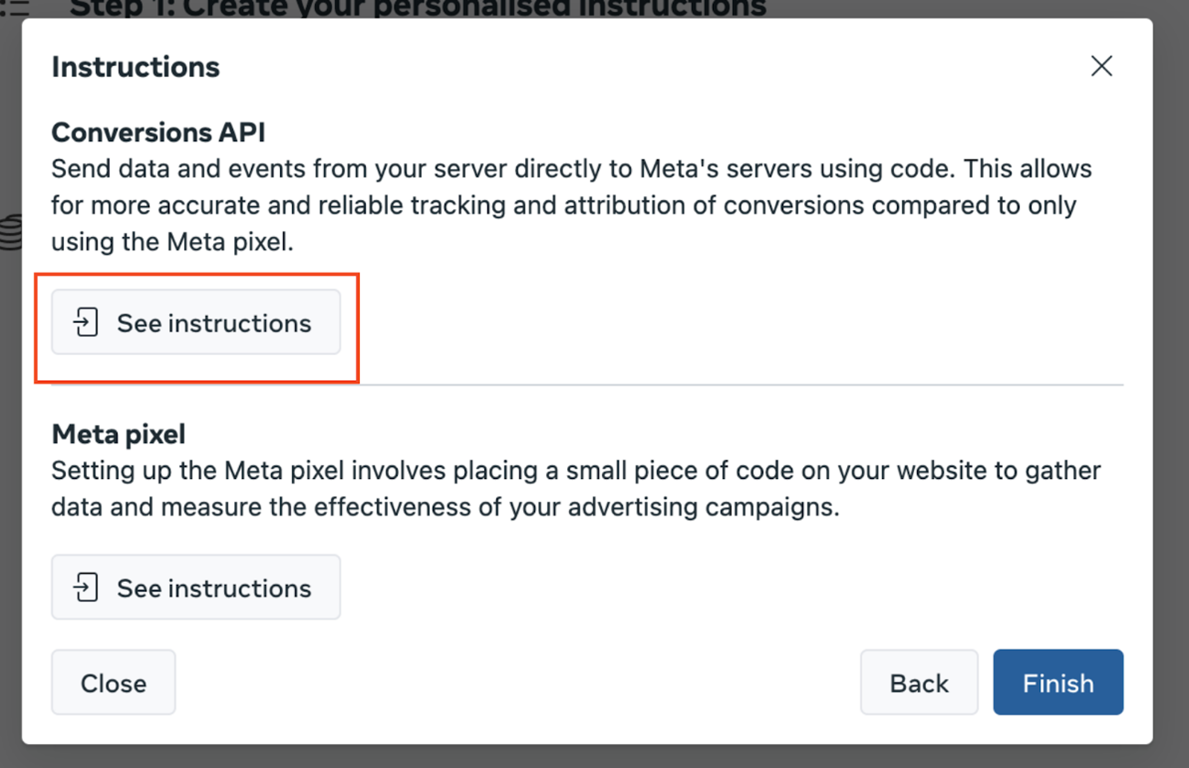
- Select Meta Pixel and Conversions API in the connection options.
- Configure Event Tracking:
- Select events to track (e.g., Page View, Lead, Purchase).
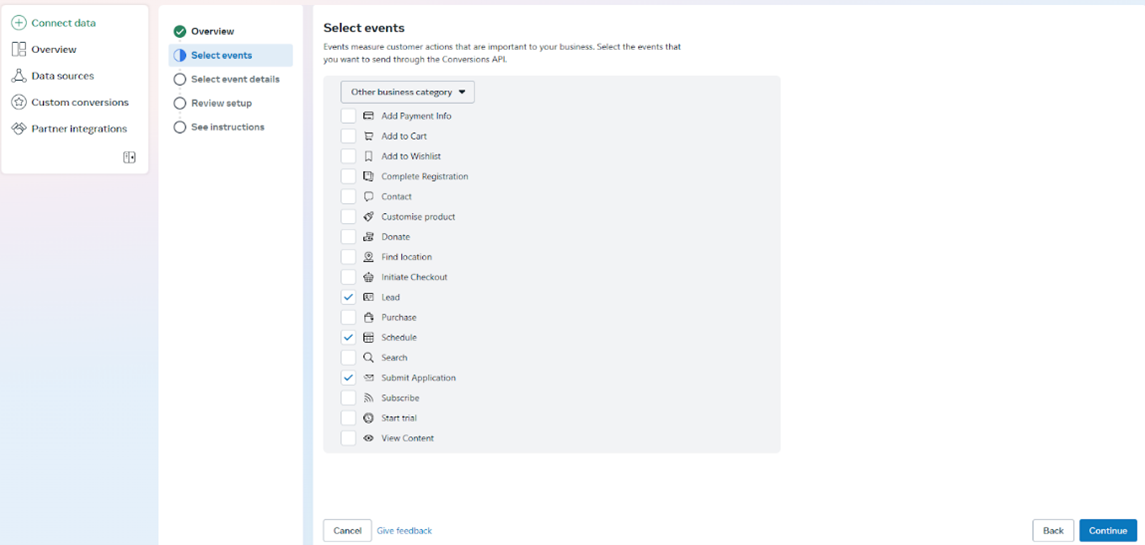
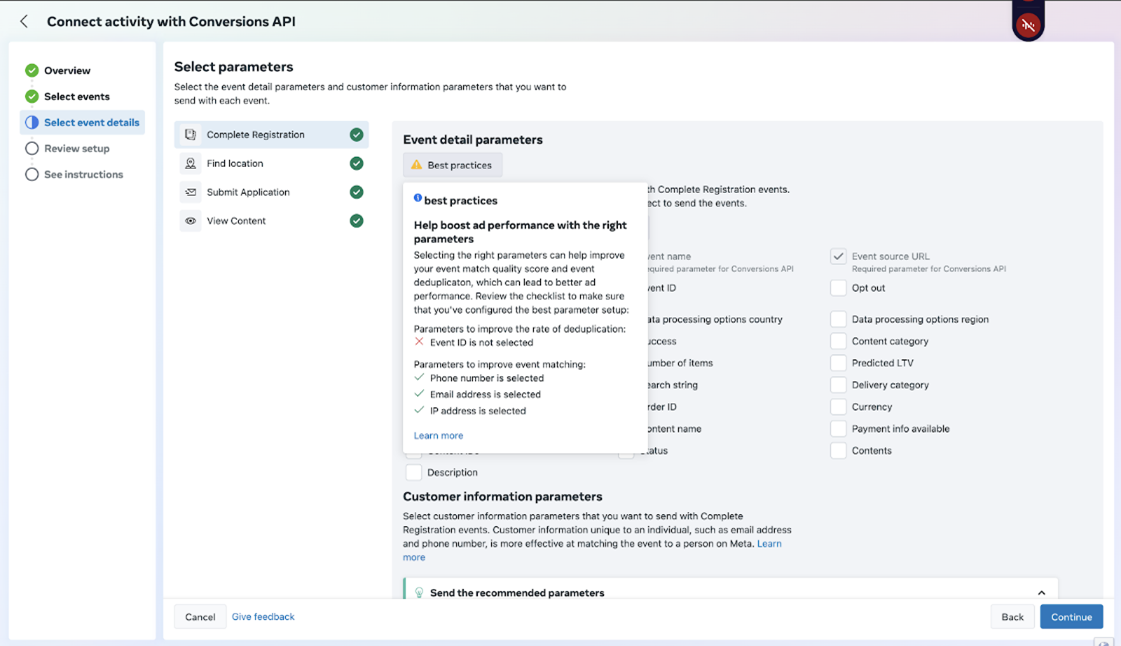
- Under Parameters, select Event ID and other recommended parameters like Email, Phone, IP Address, etc.
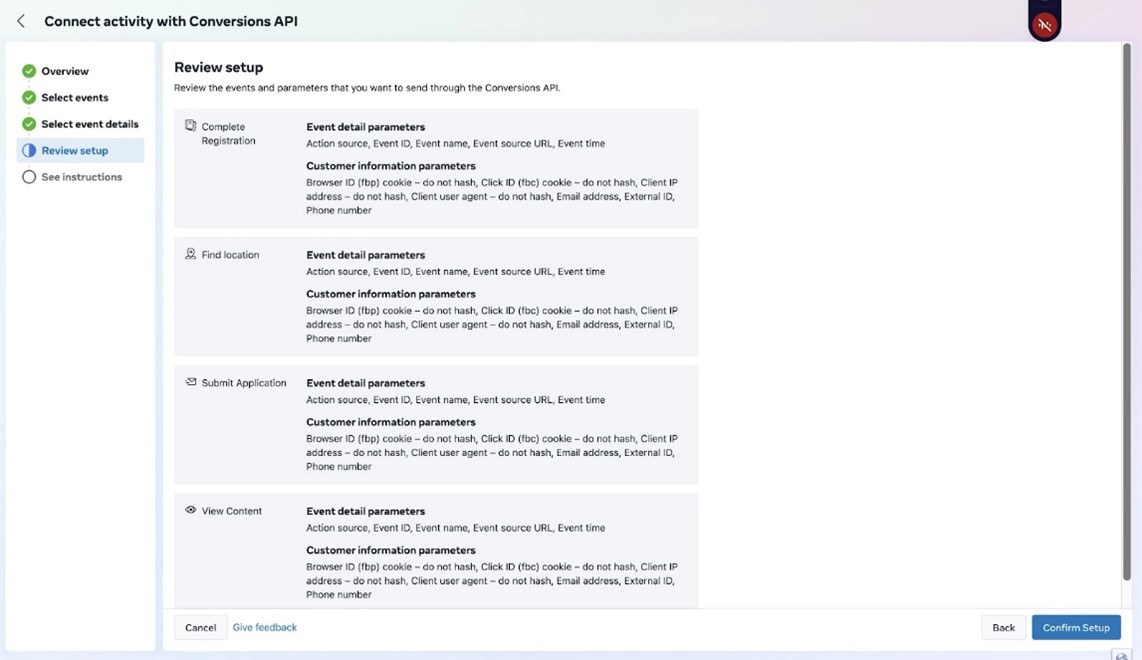
- Confirm settings and click Continue.
- Select events to track (e.g., Page View, Lead, Purchase).
- Finish and Set Up Pixel Code:
- Click Finish, then choose Install Code Manually.
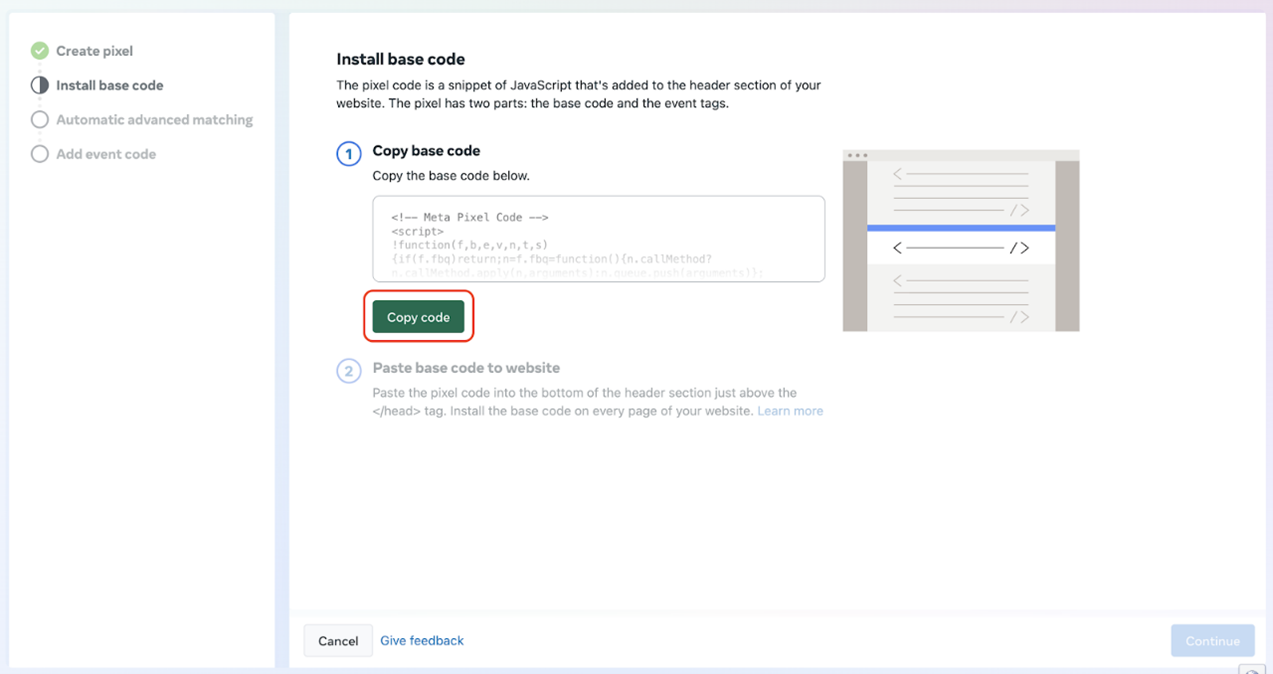
- Copy the provided pixel code.
- Click Finish, then choose Install Code Manually.
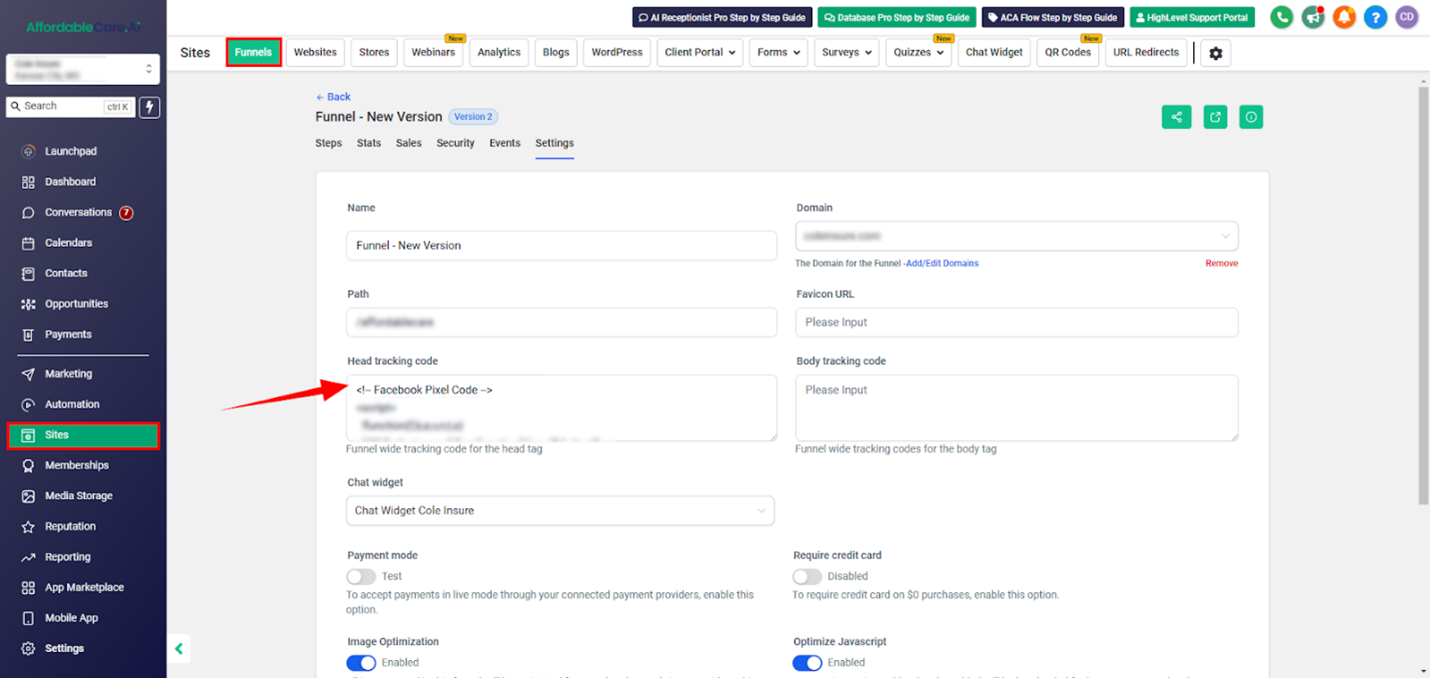
Step 2: Apply Pixel Code in HighLevel Funnel/Website #
- Access Your GHL Funnel:
- In GHL, go to the relevant Sub-Account. Navigate to Sites > Funnels or Websites (where the site is built).
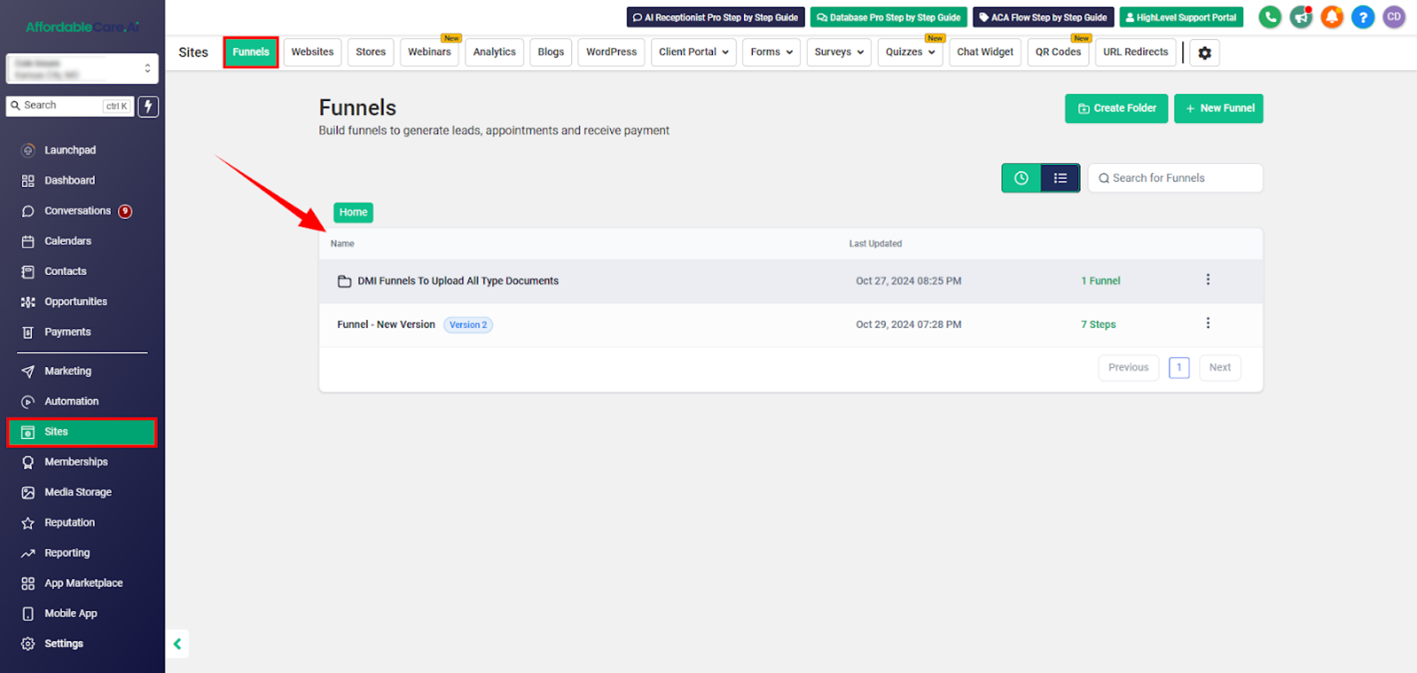
- In GHL, go to the relevant Sub-Account. Navigate to Sites > Funnels or Websites (where the site is built).
- Paste Pixel Code:
- In the Head tracking code section under funnel/website settings, paste the pixel code.
- Save changes to complete the Pixel setup.