- Step 1: Login into the Agent Portal
- Step 2: Copy your Agent Portal SSO link
- Step 3: Access Custom Menu Link Settings
- Step 4: Create a New Custom Menu Link
- Step 5: Enable Sidebar Display
- Step 6: Save Your Settings
- How to Change Custom Values in Your Snapshot
- How to Get a Phone Number for Your Sub-Account
- Agent Portal Set-Up
- Settings in the Agent Portal
- Client Records
Follow these steps to add an Agent Portal to a custom menu link in your agency account:
Step 1: Login into the Agent Portal #
- Access the agent portal https://portal.affordablecare.ai/ through your preferred web browser.
- Enter your username and password in the designated fields.
- Click the “Login” button to proceed

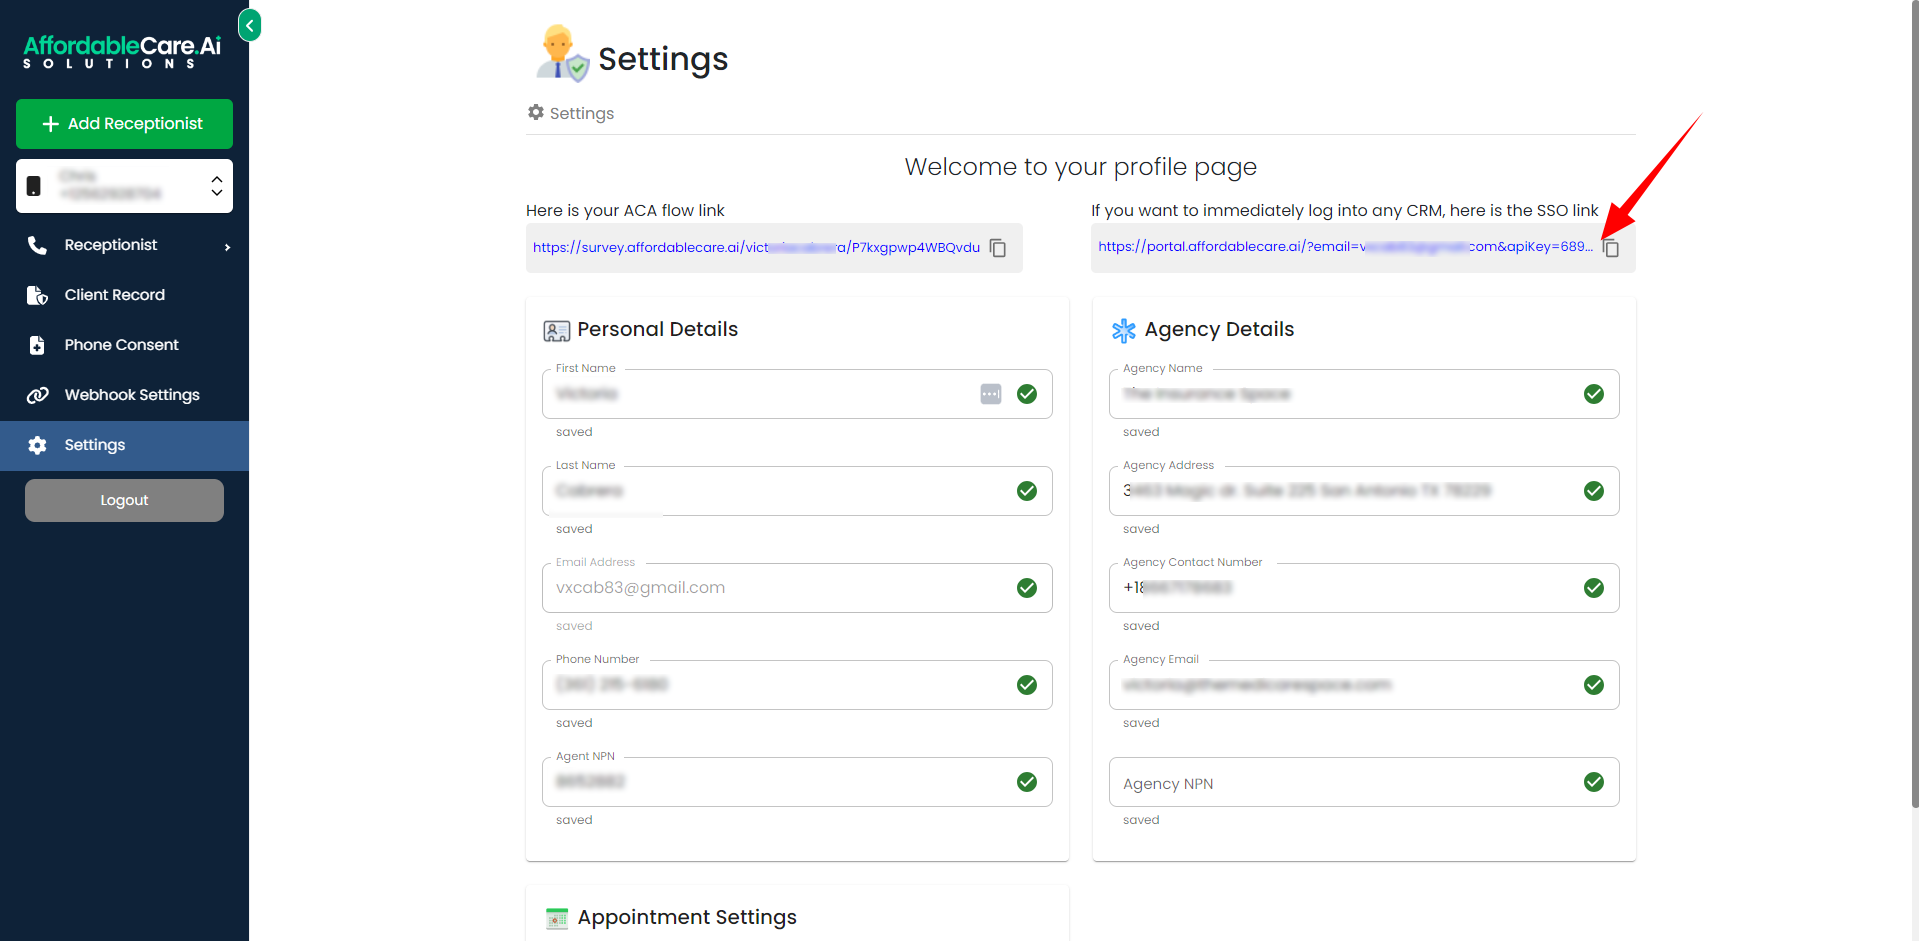
Step 2: Copy your Agent Portal SSO link #
- Navigate to the Agent Portal: Go to the settings tab in your agent portal.
- Copy the SSO Link: Locate and copy the Single Sign-On (SSO) link from the settings.
Step 3: Access Custom Menu Link Settings #
- Log into Your Agency Account: Start by logging into your agency account in HighLevel.
- Open Settings: Click on the Settings button.
- Navigate to Custom Menu Link: Scroll down and select Custom Menu Link from the settings menu.
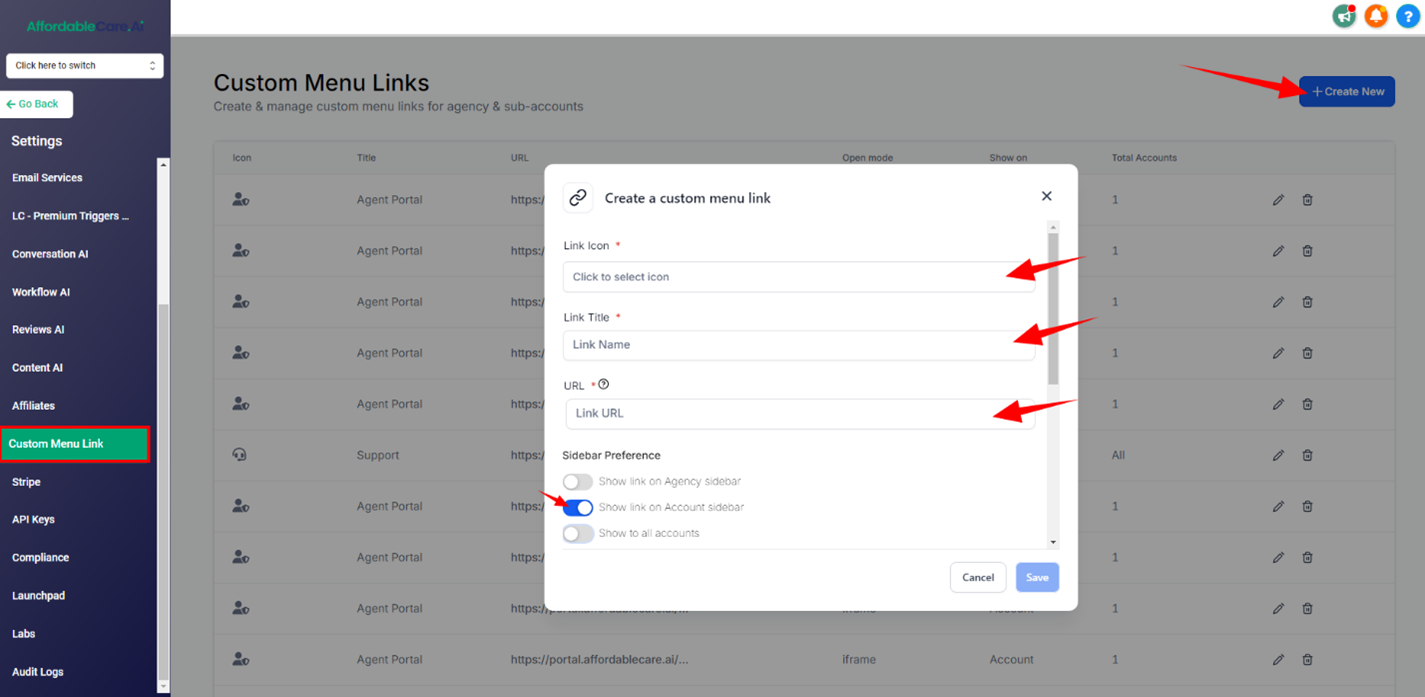
Step 4: Create a New Custom Menu Link #
- Create New Link: Click on the Create New button. A pop-up window will appear.
- Select an Icon: Choose an appropriate icon for your custom link.
- Add a Title: Enter a title for the link in the first input field.
- Add the Agent Portal URL: In the third input field, paste your Agent Portal URL link.
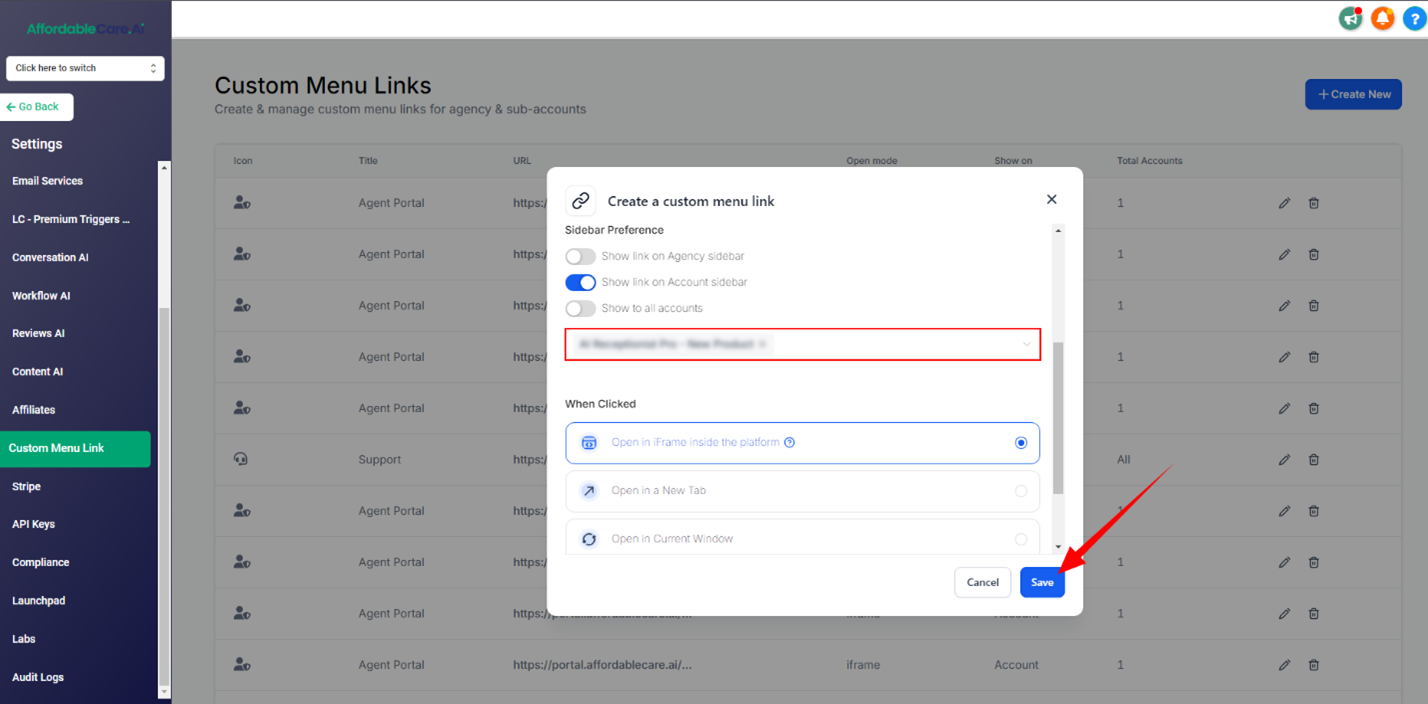
Step 5: Enable Sidebar Display #
- Show Link on Sidebar: Enable the option labeled Show link on account sidebar in the Sidebar Preference section.
- Select the Sub-Account: Choose the sub-account where you want the Agent Portal button to appear.
Step 6: Save Your Settings #
Once you’ve entered all the necessary details and selected your preferences, click Save.
How to Change Custom Values in Your Snapshot #
After importing a snapshot, the next crucial step is to update the custom values to reflect your specific business details. Here’s a step-by-step guide to help you through the process:
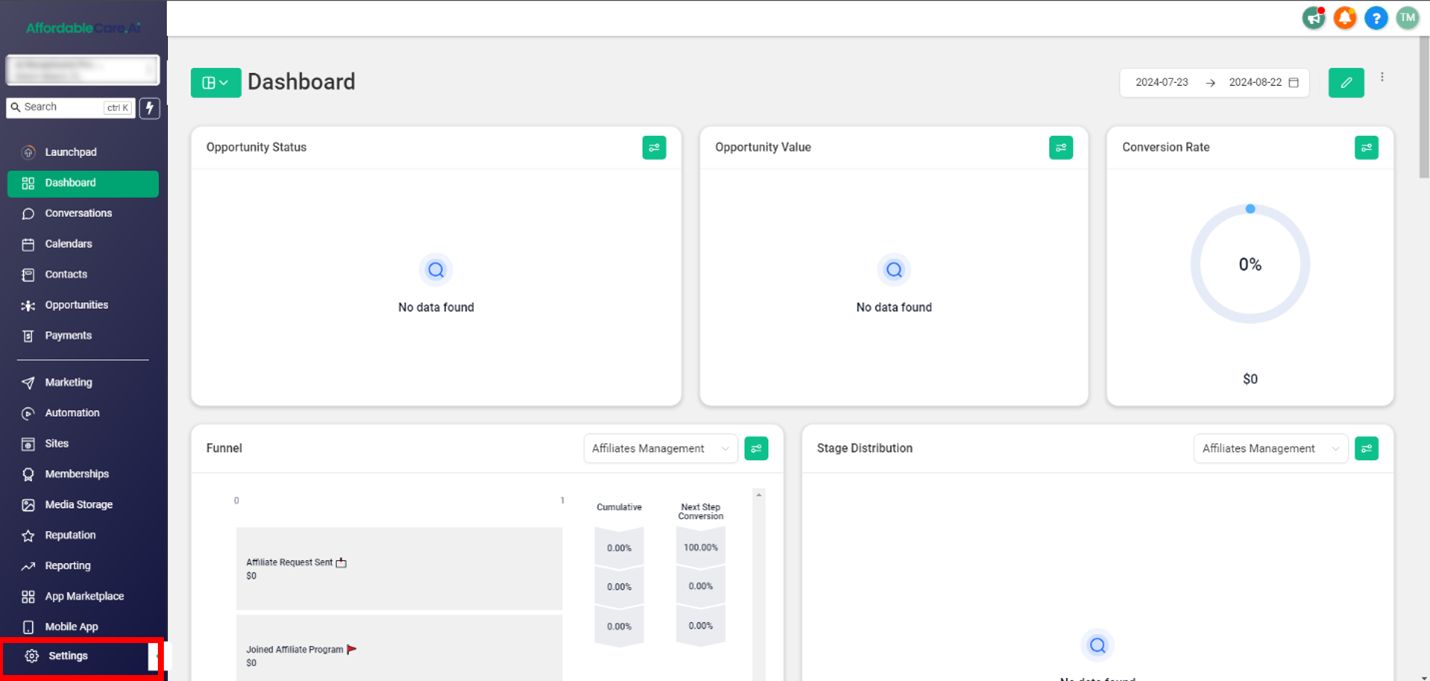
Step 1: Access the Settings #
Start by clicking on the Settings button in your dashboard. This action will open a new window where you will see an option labeled Custom Values.
Step 2: Open Custom Values #
Click on the Custom Values button. A window will appear displaying all the custom values associated with your snapshot.
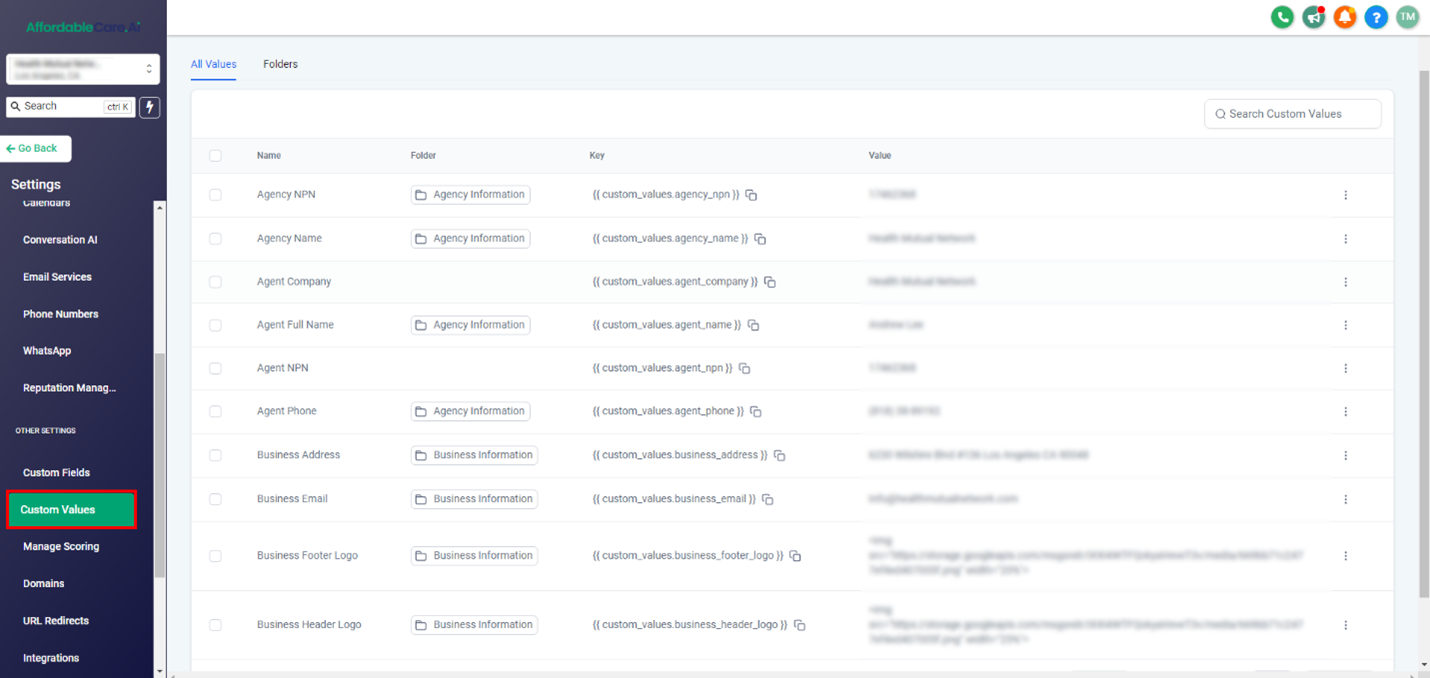
Step 3: Edit Custom Values #
To update the custom values with your business information, such as your agency details, NPN number, name, and other relevant business data, follow these steps:
- Click the three dots next to the custom value you wish to edit.
- Select Edit Custom Value from the dropdown menu.
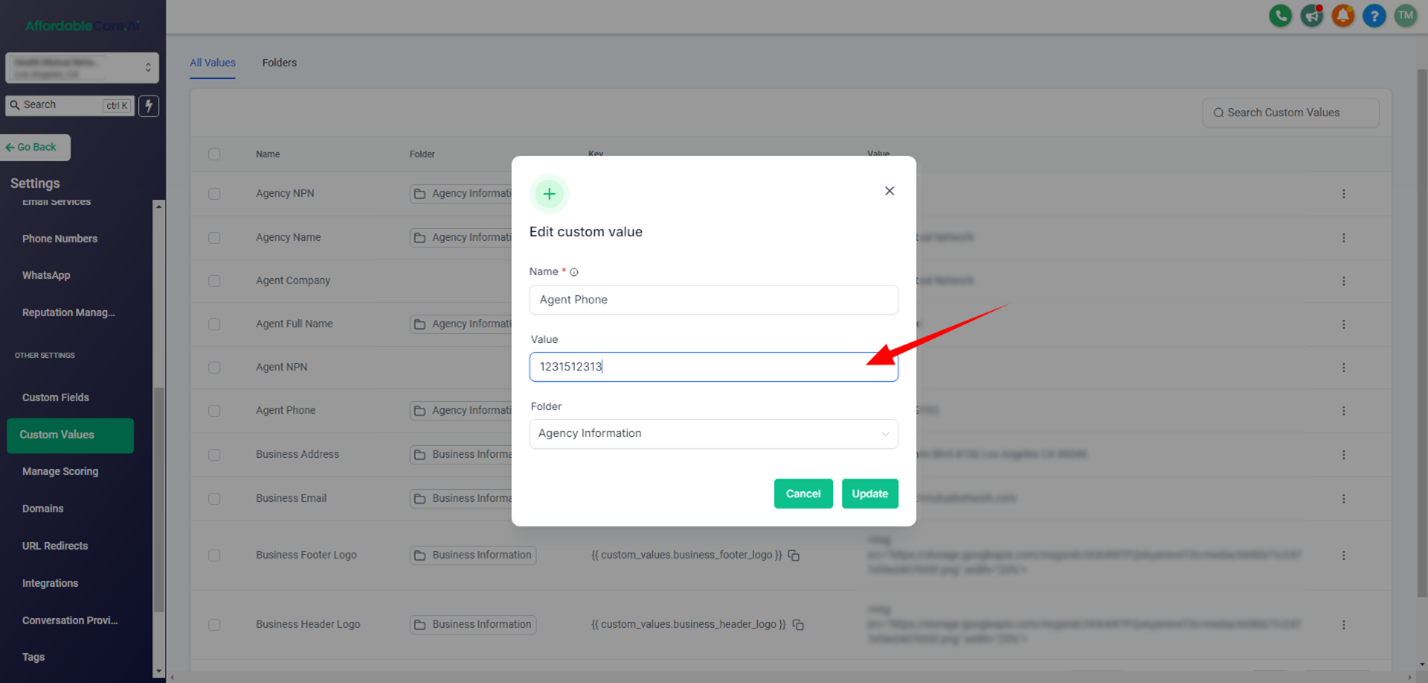
- Enter your updated information in the provided fields.
Step 4: Save Your Changes #
After entering the necessary details, be sure to save your changes by clicking the Update button. This will ensure that your custom values are accurately reflected in the snapshot.
How to Get a Phone Number for Your Sub-Account #
To acquire a phone number for a specific sub-account, follow these steps:
Step 1: Access Phone Number Settings #
- Log into Your Account: Start by logging into your account.
- Go to Settings: Navigate to your account settings.
- Click on Phone Numbers: In the settings menu, click on the Phone Numbers button.
Step 2: Add a New Phone Number #
- Click +Add Number: To add a new phone number, click the +Add Number button. A pop-up window will appear.
- Select Location or Country: Choose the location or country for which you want to purchase a phone number.
- Choose a Number: Browse through the list of available numbers and select the one you want.
- Proceed to Purchase: After selecting your desired number, click the Proceed to Buy button to complete the purchase.

Agent Portal Set-Up #
How To Add Custom Webhook in Your Agent Portal #
Click on the article below to see step-by-step how to add Weebhook agent portal👇
How to add custom webhook in your agent portal
Settings in the Agent Portal #
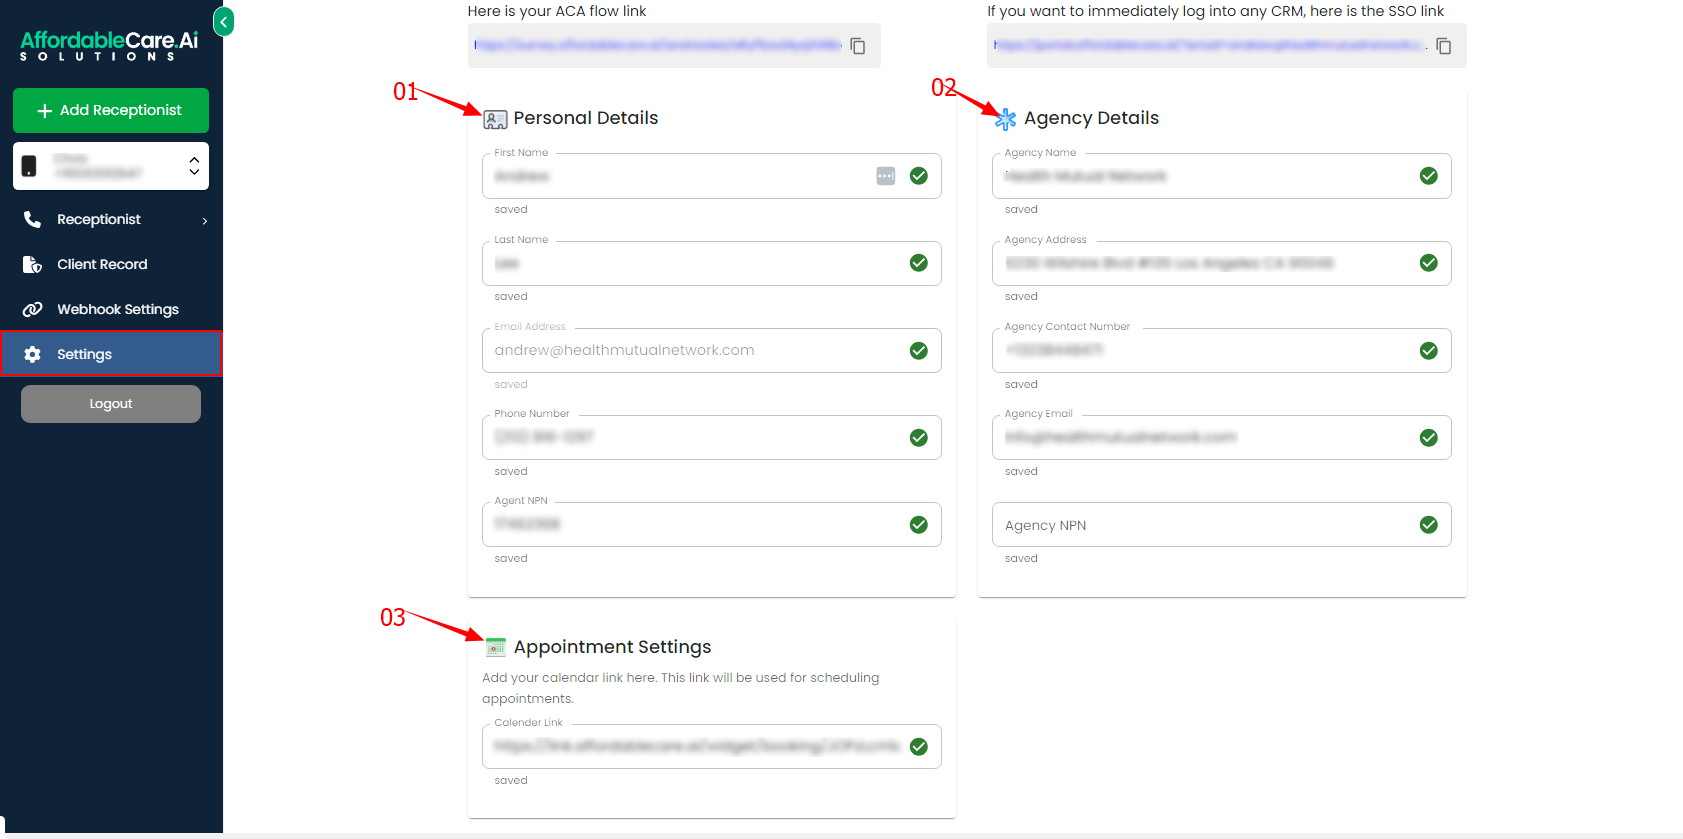
The Agent Portal allows you to manage your personal and agency details with ease. Here’s how to do it:
Step 1: Access the Settings #
- Click on the Settings Button: Begin by clicking the Settings button in the Agent Portal.
Step 2: Managing Your Details #
Once in the Settings section, you can update the following:
- Personal Details:
- First and Last Name
- Email Address
- Phone Number
- Agent NPN Number
- Agency Details:
- Agency Name
- Address
- Contact Number
- Calendar URL:
- At the bottom of the Settings section, you can add a calendar URL link for scheduling appointments.
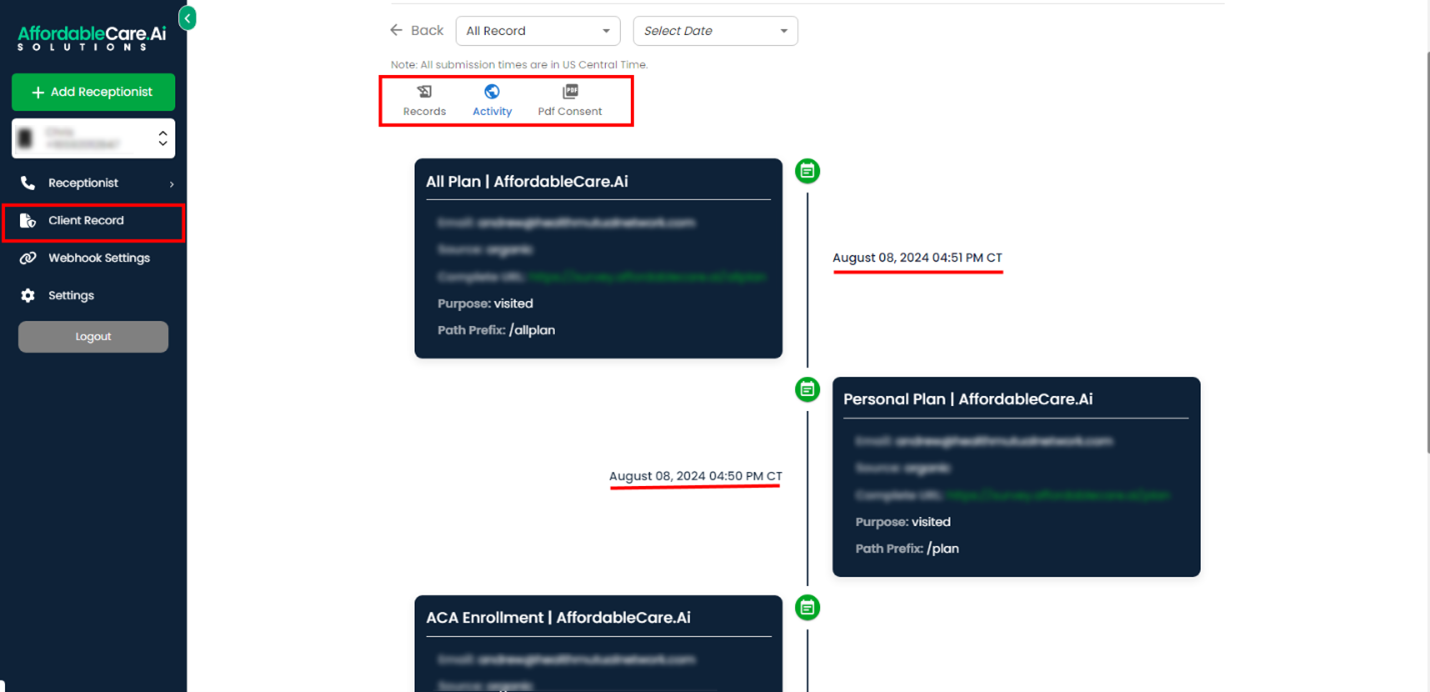
Client Records #
The Client Records section provides a comprehensive view of your client’s history and consent forms:
- View Client History:
- Click on the Client Record button to view your client’s history, including their activity, such as which pages they visited and the dates and times of those visits.
- Download Contents:
- You can download client consents individually for each client or in bulk by clicking the DOWNLOAD EXCEL button.
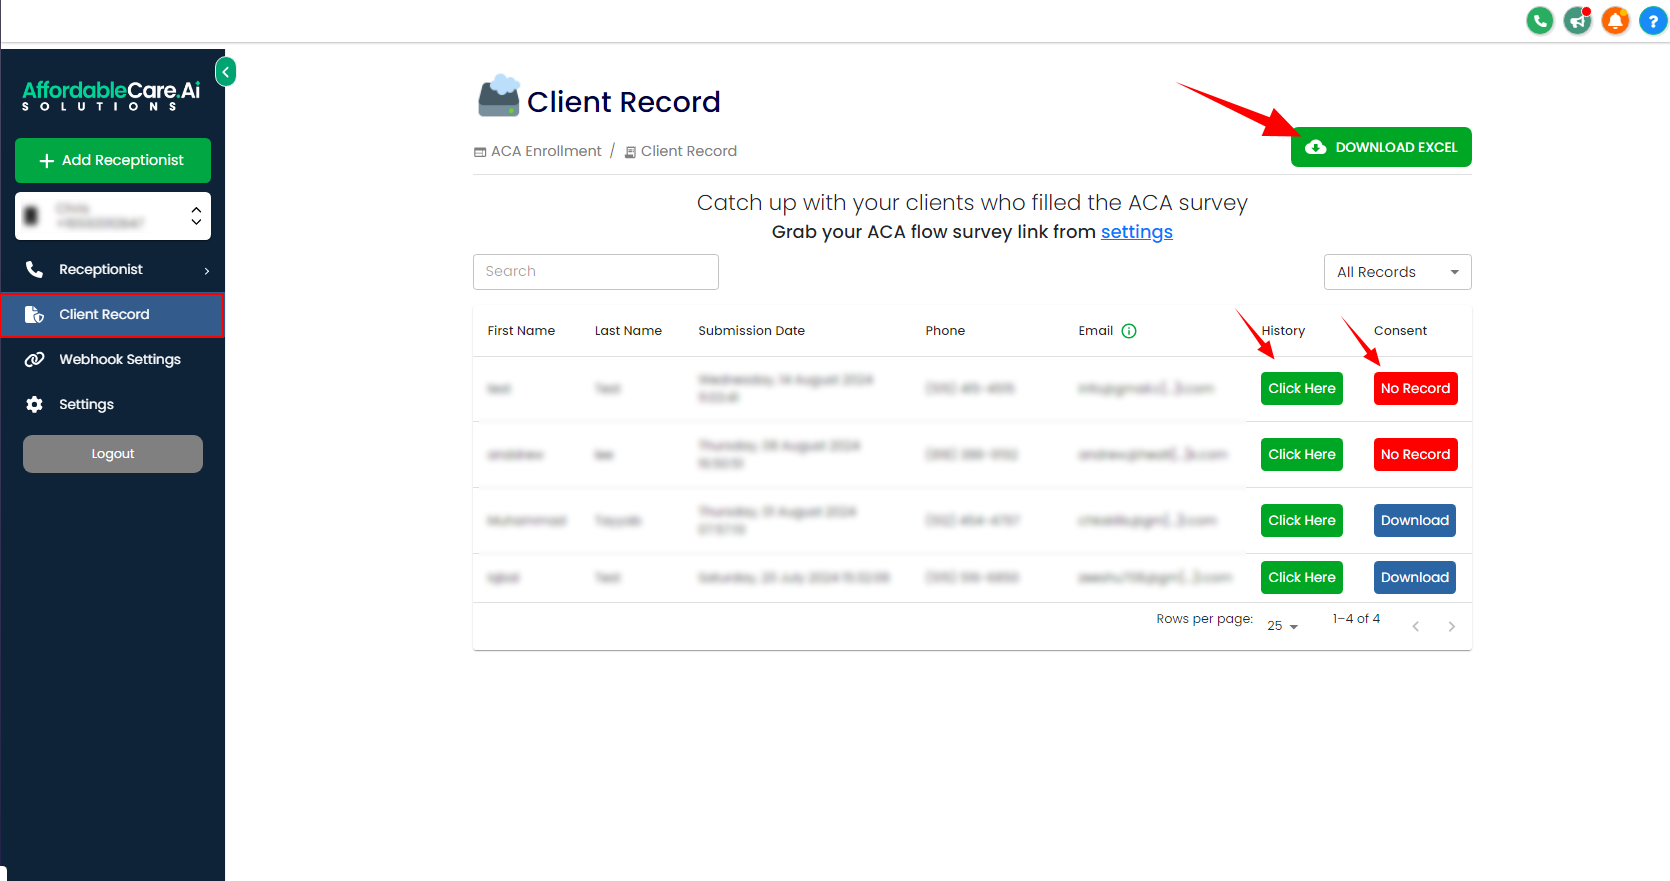
- Check Activity History:
- By clicking on the History button, you can see all the activities and consents your client has completed.