
Table of Contents
In this guide, we’ll look at how to structure an AI Caller workflow to make outbound calling more effective, compliant, and result-oriented. The steps below show how to add DND checks, manage tags, handle call outcomes, and automate retries until an appointment is booked.
Step 1: Add a DND (Do Not Disturb) Check #
- Before any call is placed, the workflow checks whether the contact is on DND for calls.

- If the contact is marked DND, the system will skip dialing.
Step 2: Clean Up Tags Before Dialing #
- Remove all AI tags.
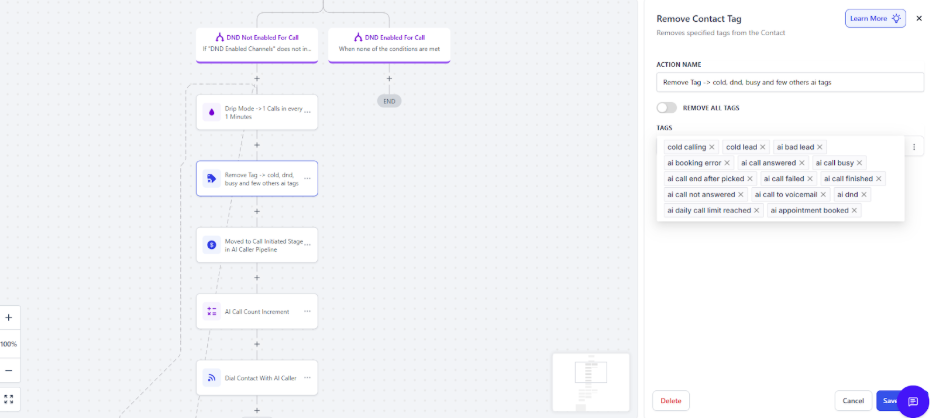
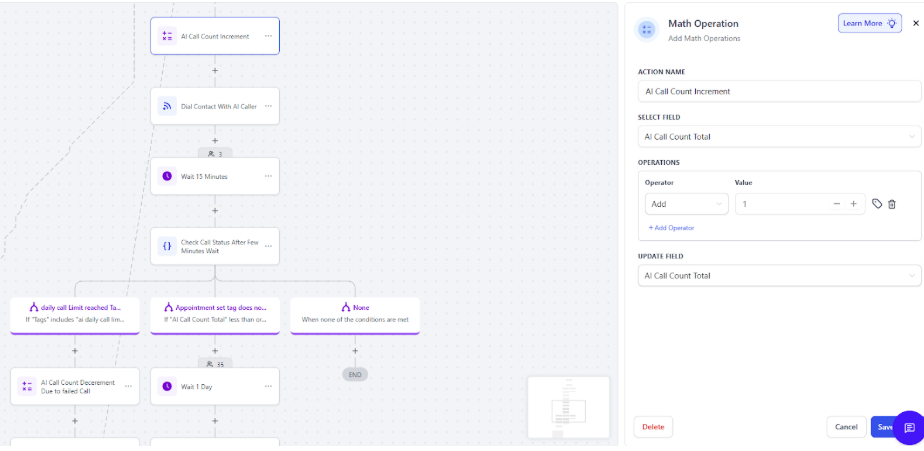
- Add an increment in call count.
- Place the call.
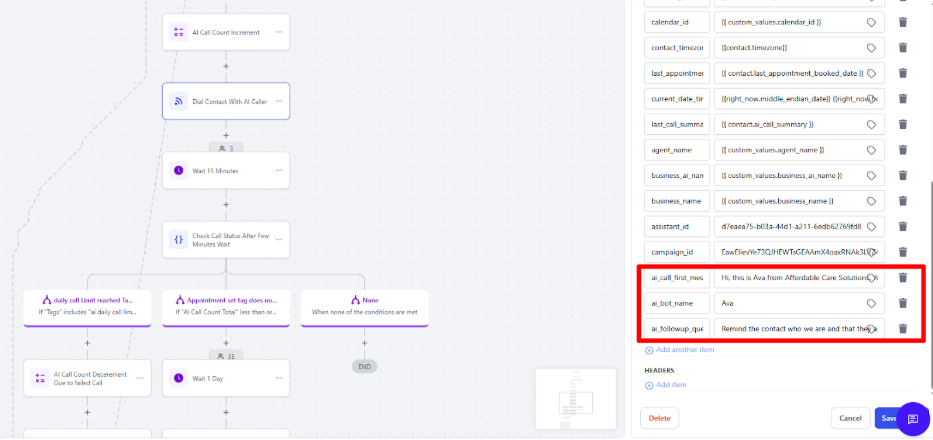
- Set the first message and any follow-up message here.
Step 3: Add a 15-Minute Wait #
- After a call attempt, insert a 15-minute wait.
- Once the wait is over, the workflow checks if the daily call limit has been reached.
- Or Appointment set tag does not included and AI call count is less than or equal to 15
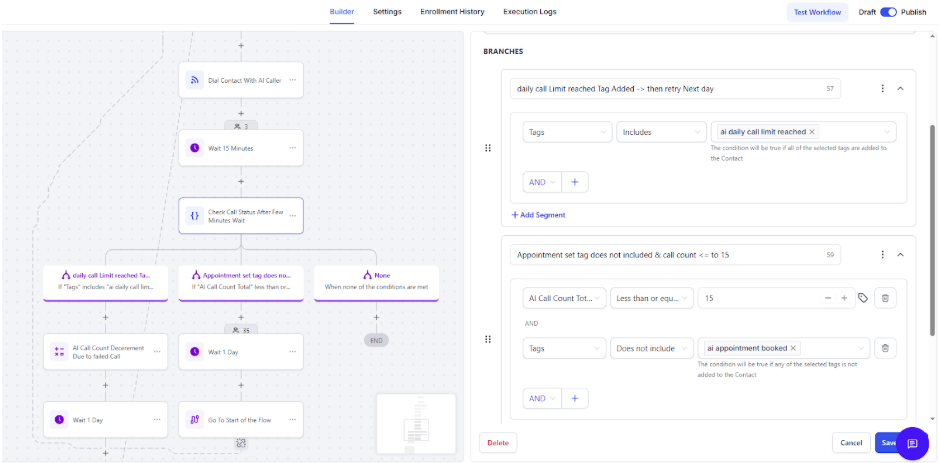
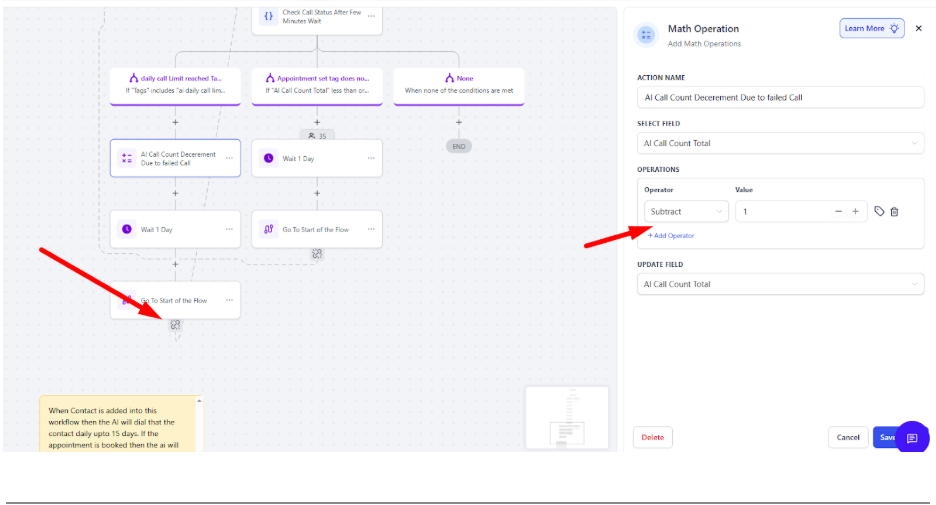
Step 4: Add a Daily Limit & Retry #
- If the call failed due to daily call limit, apply a 1-day wait.
- Subtract 1 in call count.
- After 1 day, loop the contact back to the first action (to retry the call sequence).
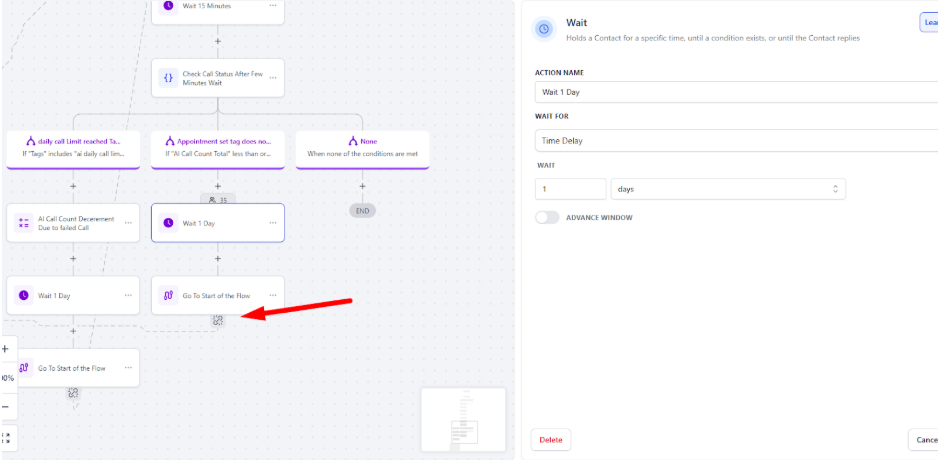
Step 5: Add Call Count & Appointment Logic #
- Add a condition: If call count < 15 AND no appointment is set, then:
- Wait 1 day.
- Loop back to the first stage (to retry calling).
- This ensures a maximum of 6 call attempts per contact until an appointment is set.
Step 6: Handle Specific Tags (Advanced Logic) #
- If a contact has tags like Did Not Pick or Customer Did Not Answer, you can use those to trigger additional retries.
- These conditions allow you to treat unanswered calls differently from other failed outcomes.
- These Logics are optional you can customize it according to your need.


