
In this article, we’ll walk you through the steps to fix DMI (Data Matching Issues) in your CRM system. There are two methods to resolve this issue: by importing an Excel file or using our database software. Both methods will trigger automation in your CRM (like HighLevel) to help you manage important tasks, such as verifying citizenship, income, and other requirements.
We can resolve this issue using two methods
- Manually upload the Excel file in HighLevel.
- Use our database software to automatically sync data with HighLevel after applying various filters.
Let’s get started!
Method 1: Fixing DMI by Importing an Excel File #
One way to address DMI is by importing an Excel file and adding the appropriate DMI tags. Follow these steps:
1. Import the Excel File #
- Open your CRM and go to Contacts.
- Click on Import Contacts.
- Upload your Excel file.
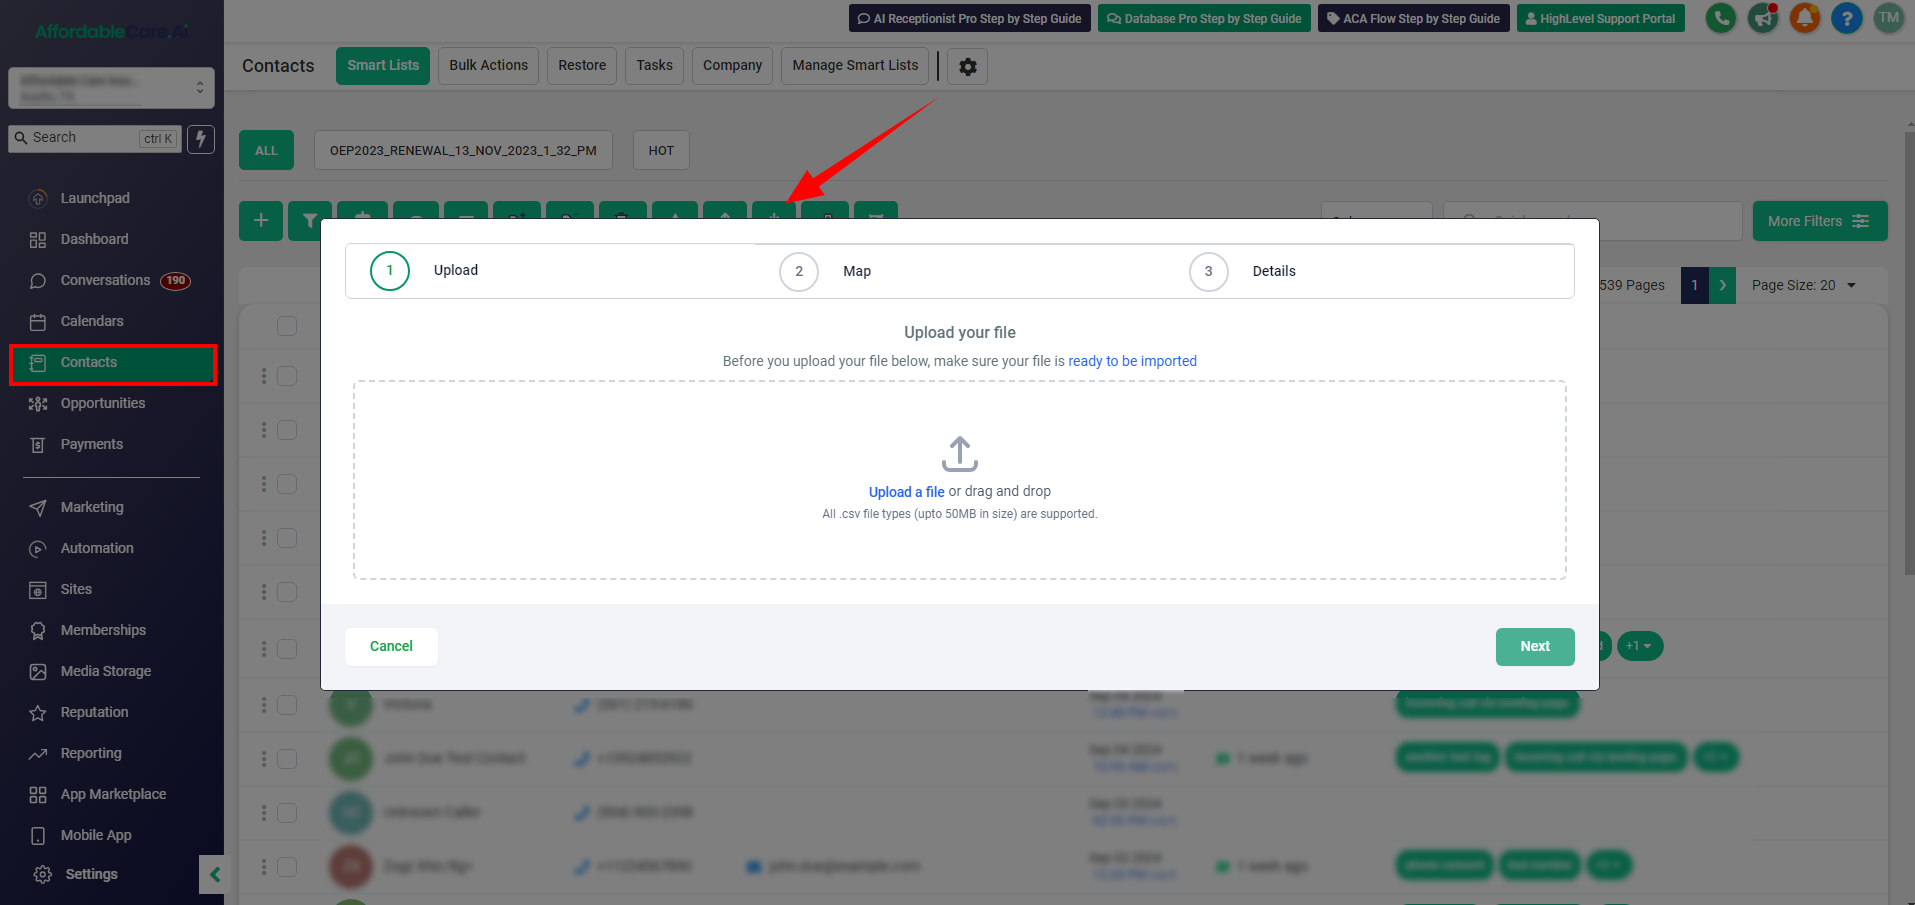
2. Run the DMI Check #
- After uploading the file, proceed to the next step.
- In the Excel file, make sure the relevant columns match your DMI needs. For example:
- Income for payment due.
- Citizenship for citizenship verification.

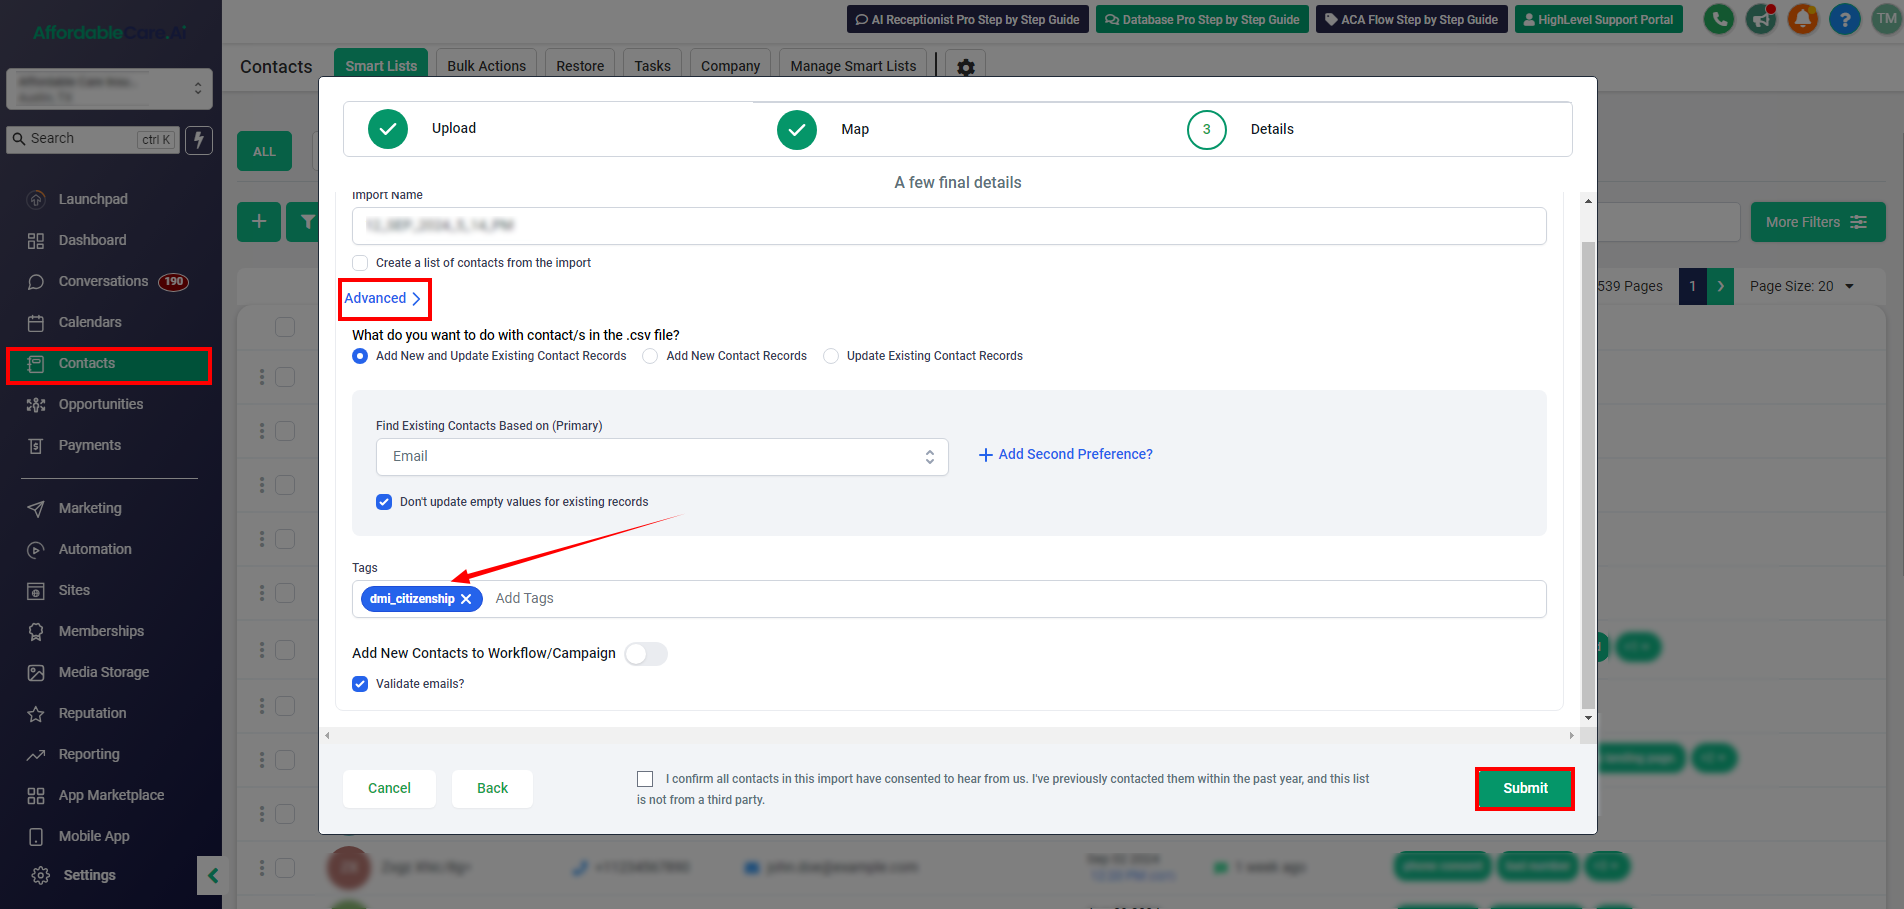
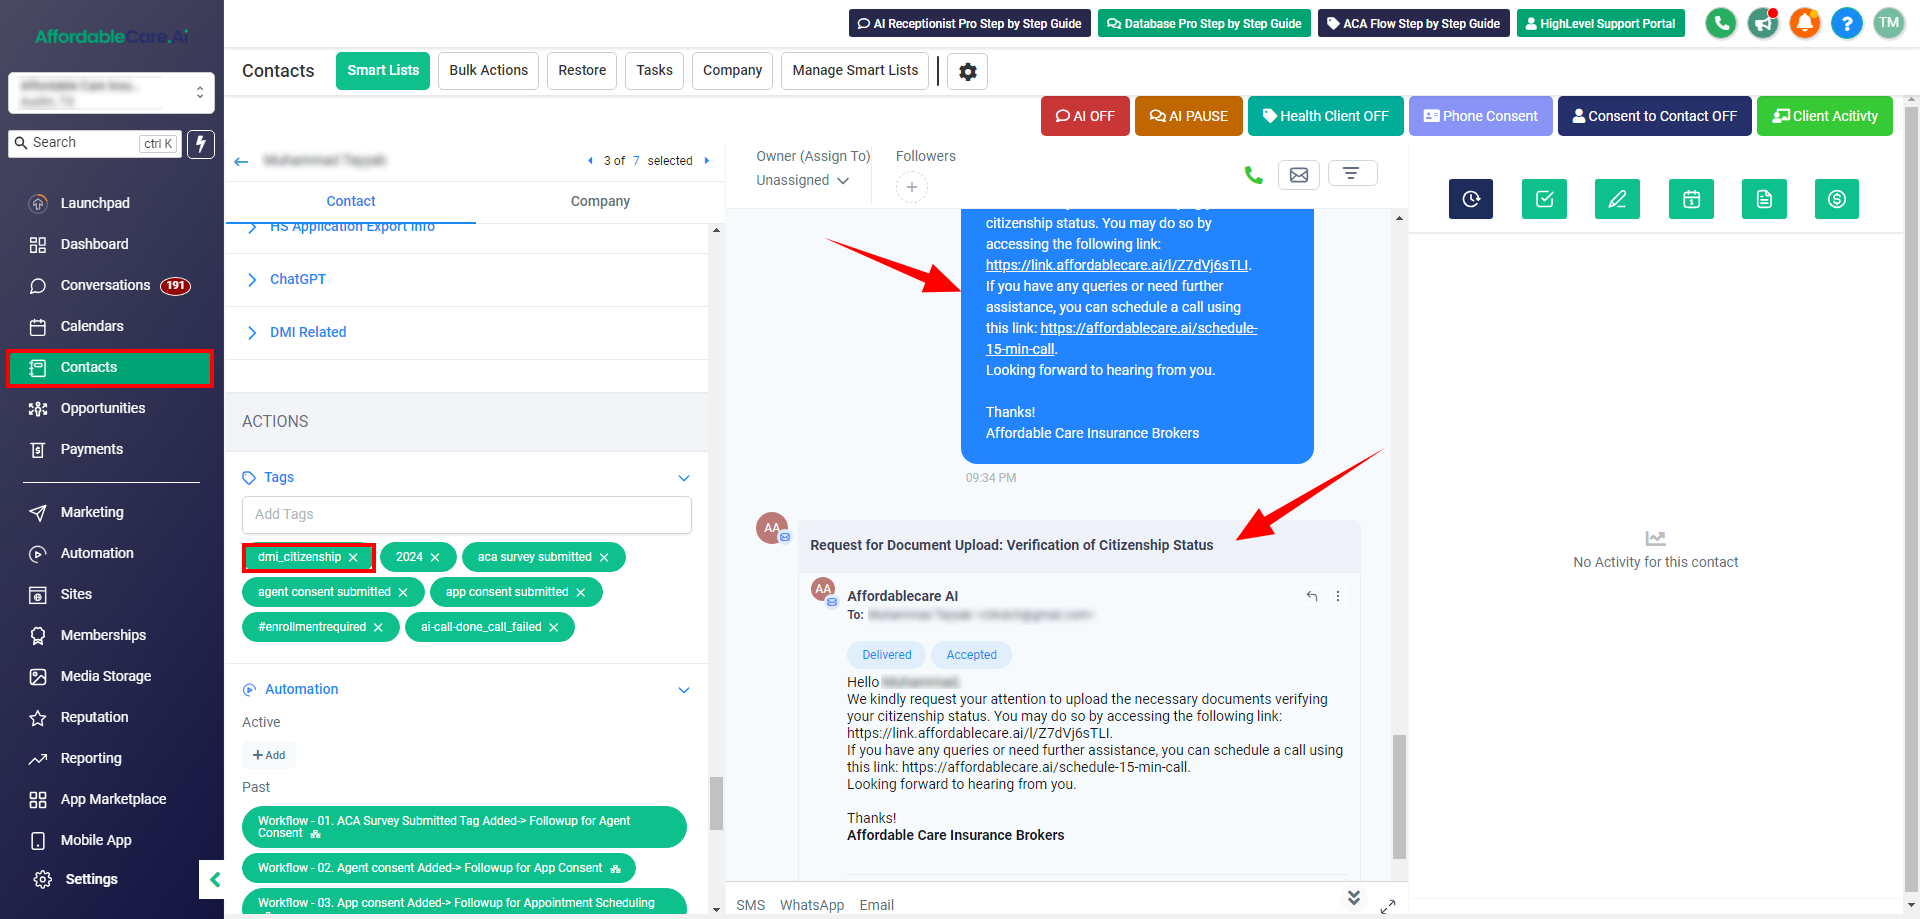
3. Add DMI Tags #
- Once the file is uploaded, go to Advanced Settings.
- Select the DMI tag that matches your file:
- For citizenship verification, select the Citizenship tag.
- For payment due, select the Income tag.
- For Medicare coverage or SSN (Social Security Number), choose the appropriate tags.
- After selecting the correct tags, click Submit.
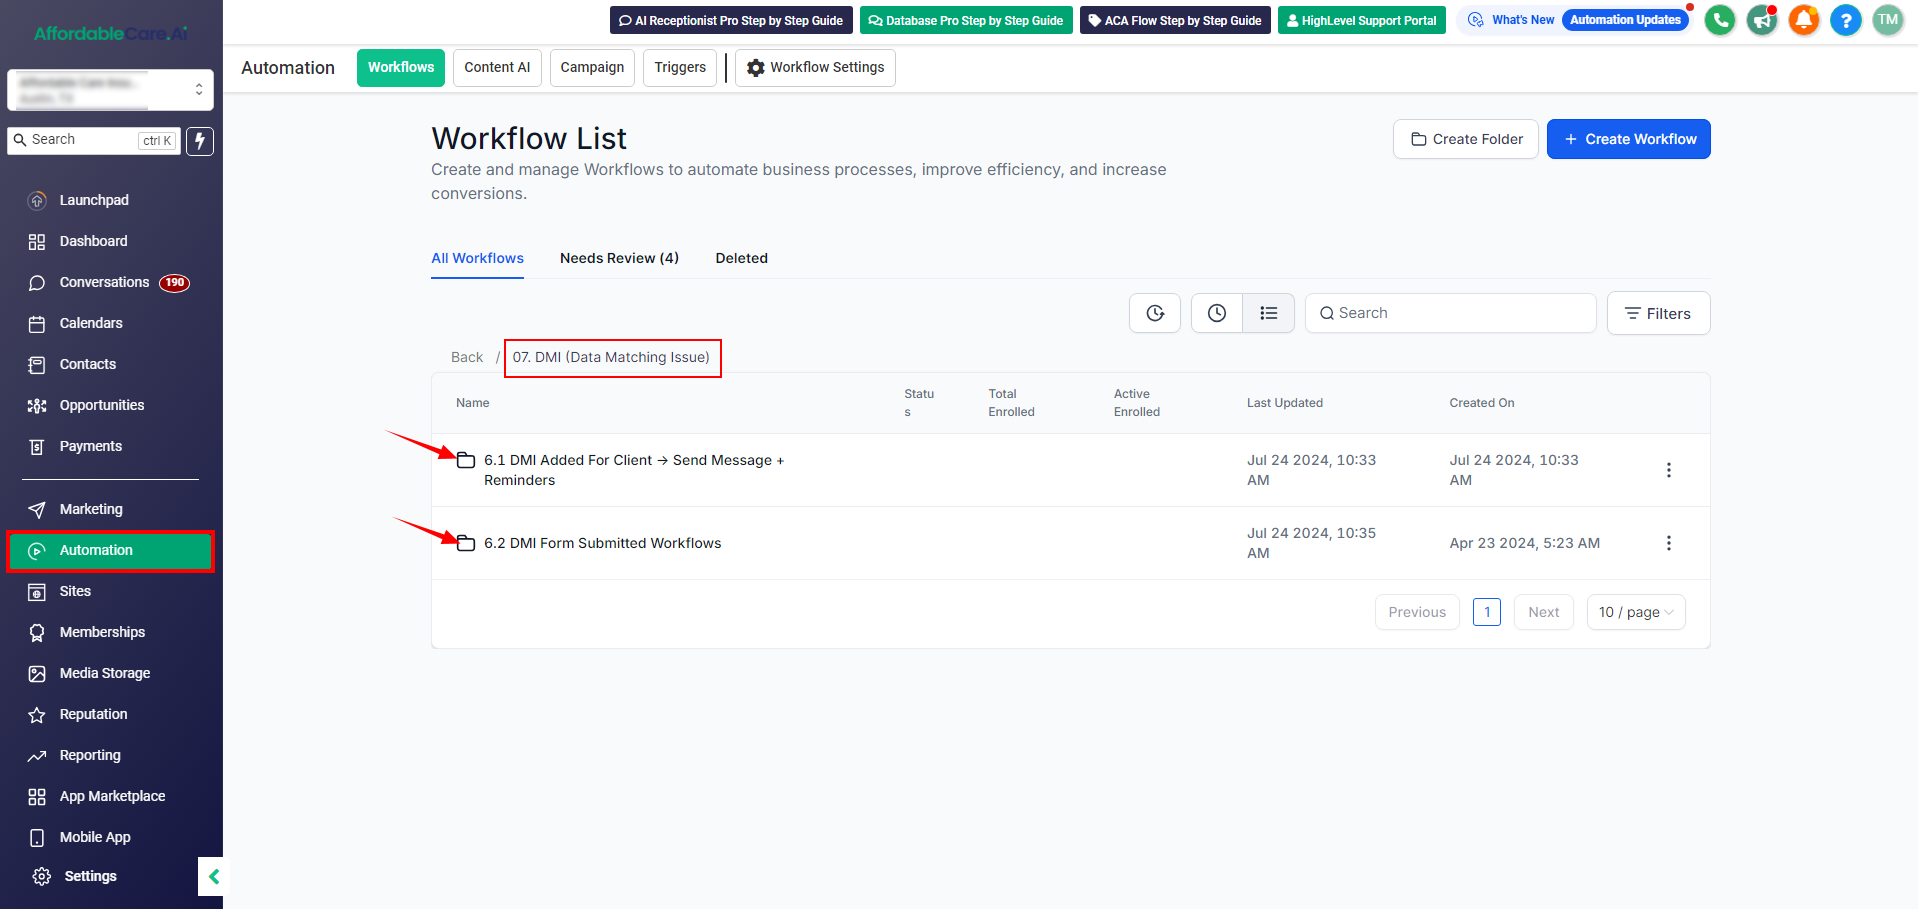
4. Automations Will Trigger #
- Automations will start automatically after the tag is added.
- To check these automations:
- Go to the Automations section in your CRM.
- You will see a folder named DMI Data Matching Issue. This contains different pre-built automations that trigger when a tag is added.
- If the tag is related to citizenship, the citizenship workflow will trigger.
- You can customize the email or SMS reminders here if needed.
Example: Automations for Citizenship Verification #
- The system will send 3 reminders to the client, prompting them to submit the required documents.
- These reminders are sent automatically on Day 1, Day 2, and Day 3.
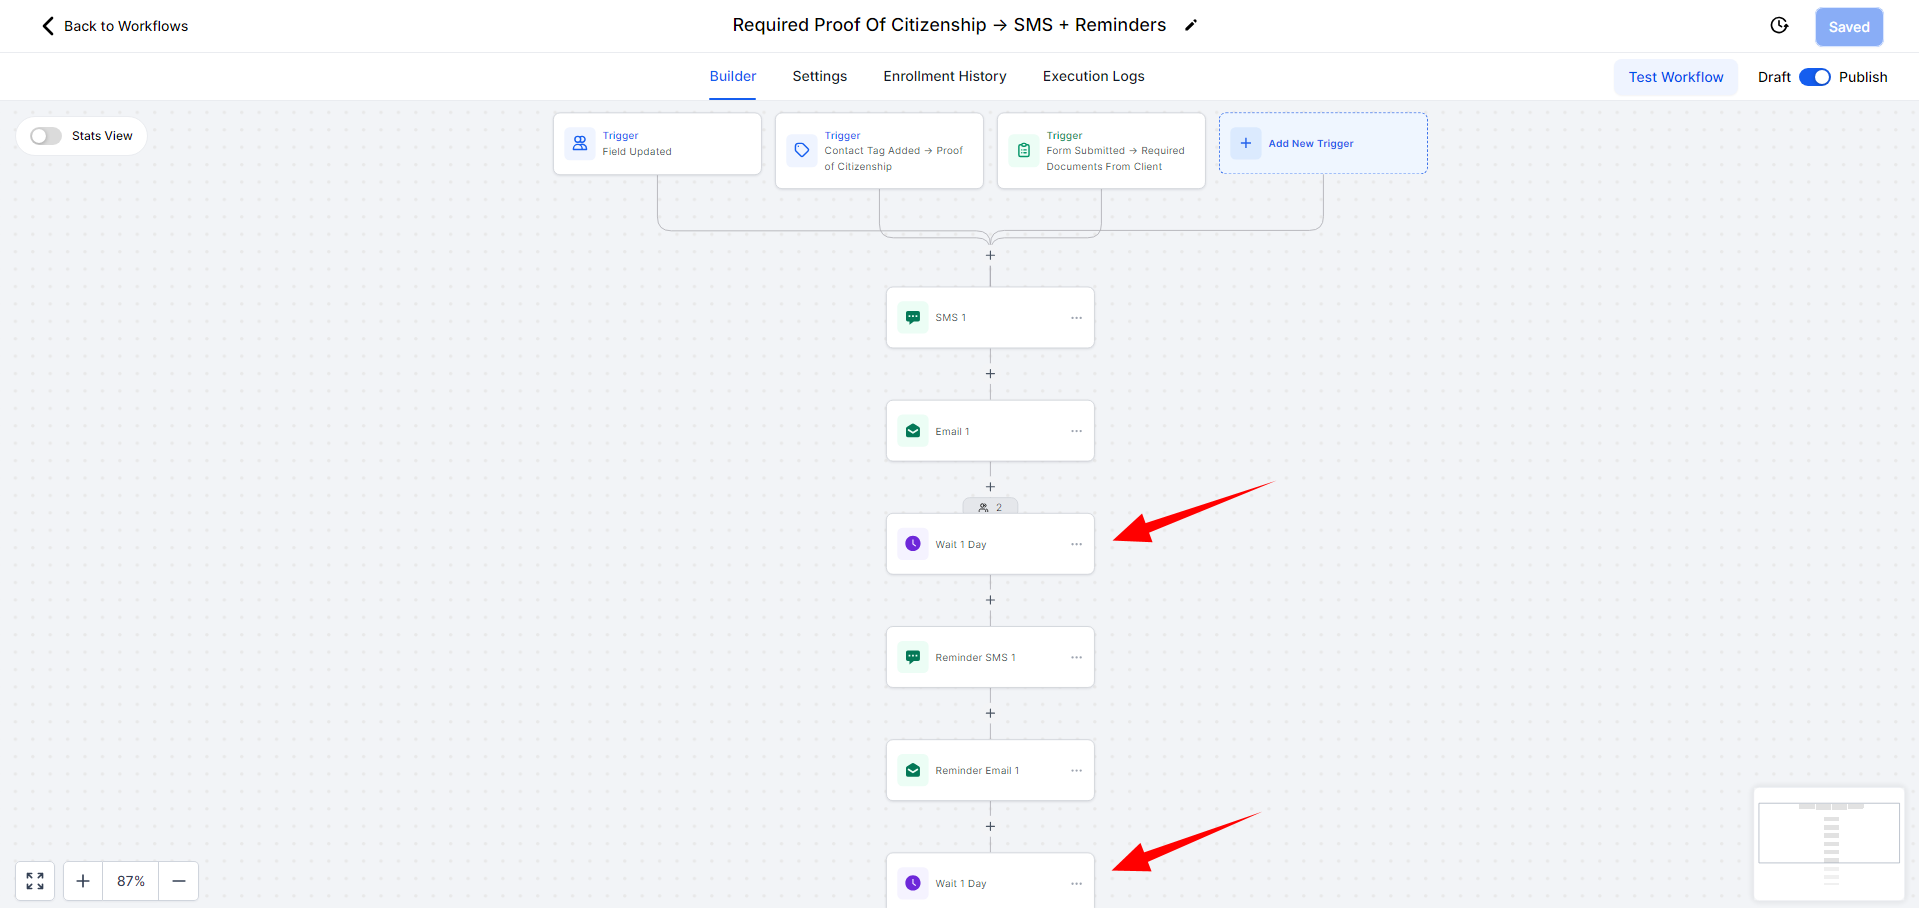
- Clients will receive a link to a form where they can upload their documents. This form can be customized if needed.
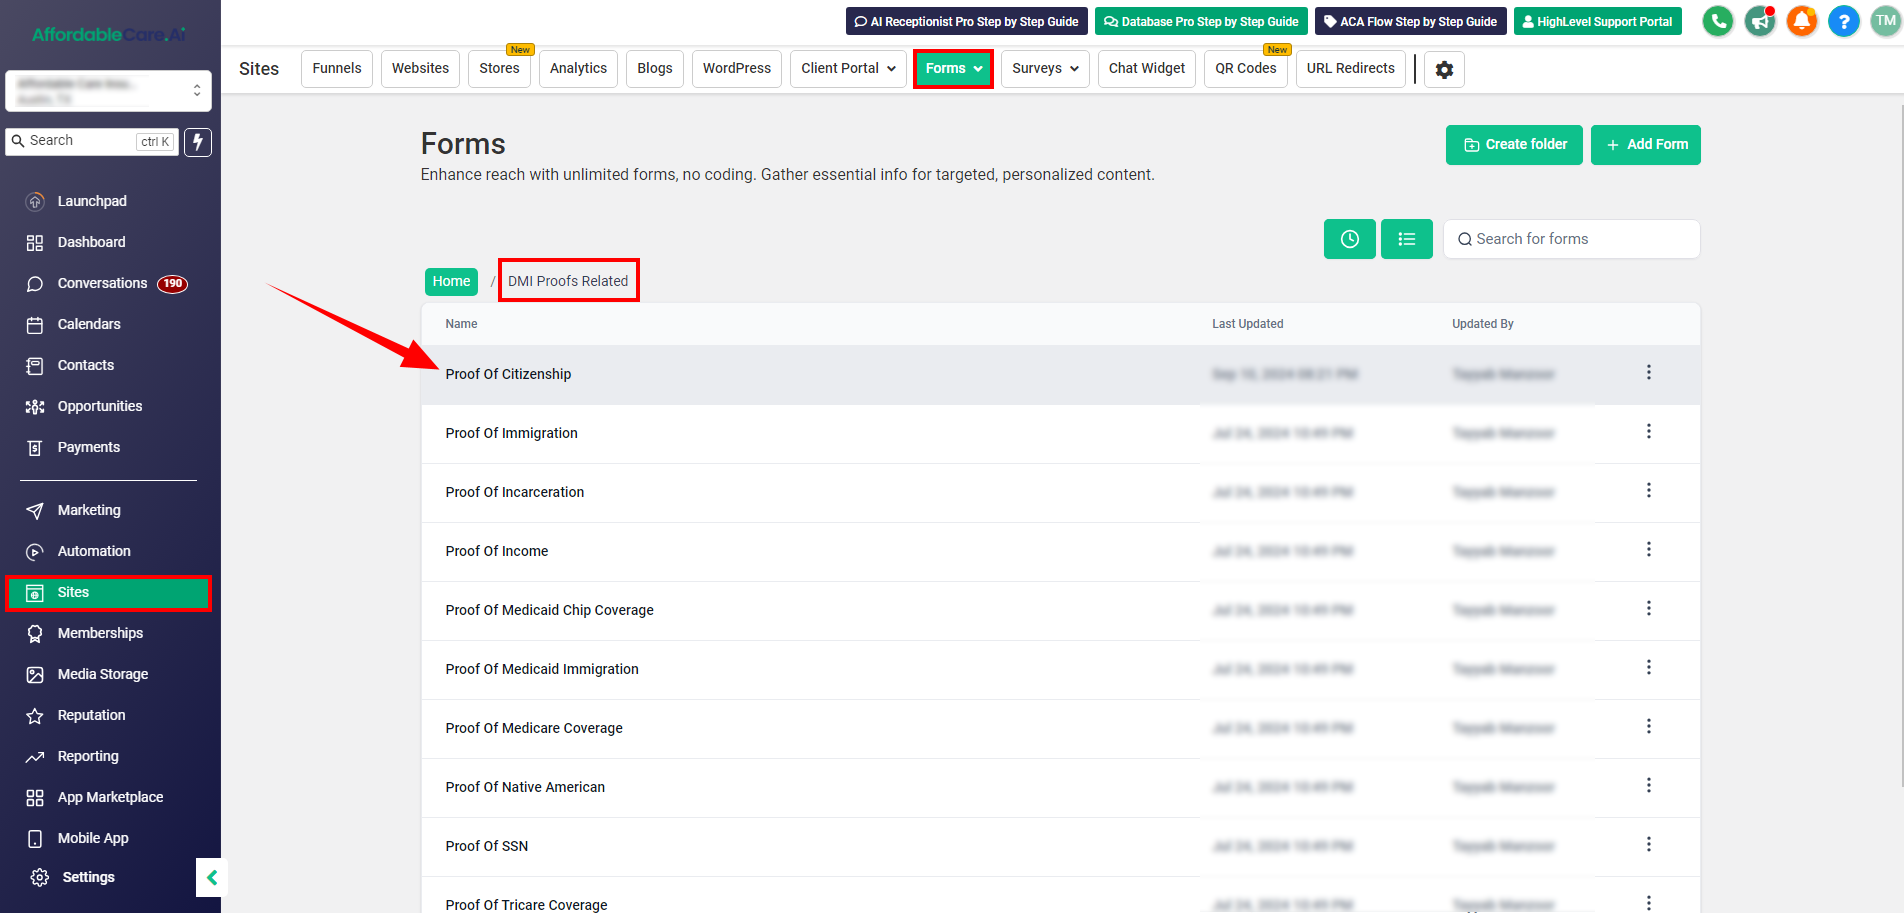
How to View the Form #
- In the CRM, go to Forms.
- Select the DMI form.
- You’ll see a form called Proof of Citizenship that is sent to clients for document submission.
- Once the client submits the document, the agent is notified to approve or reject it.
Managing the DMI Pipeline: #
- Go to Opportunities and select the DMI Journey pipeline.
- When a tag is added, the contact will appear here.
- Agents can review submitted documents and:
- Move the contact to Approved if the document is correct.
- Move the contact to Rejected if the document is incorrect, and the system will automatically notify the client to resubmit.

Method 2: Fixing DMI Using the Database Software #
You can also resolve DMI issues using our database software. Here’s how:
1. Load the DMI File #
- Log into the database software and open the DMIS section.
- Click on Load DMIS File and import the relevant file.

2. Filter the DMI Data #
- Once the file is imported, go to DMIS Search.
- Apply filters based on the DMI type. For example, you can filter for:
- Income.
- Citizenship.
- Plan Type or DMA Status.
- Ensure the checkboxes for DMA Type and DMA Status are selected to filter correctly.
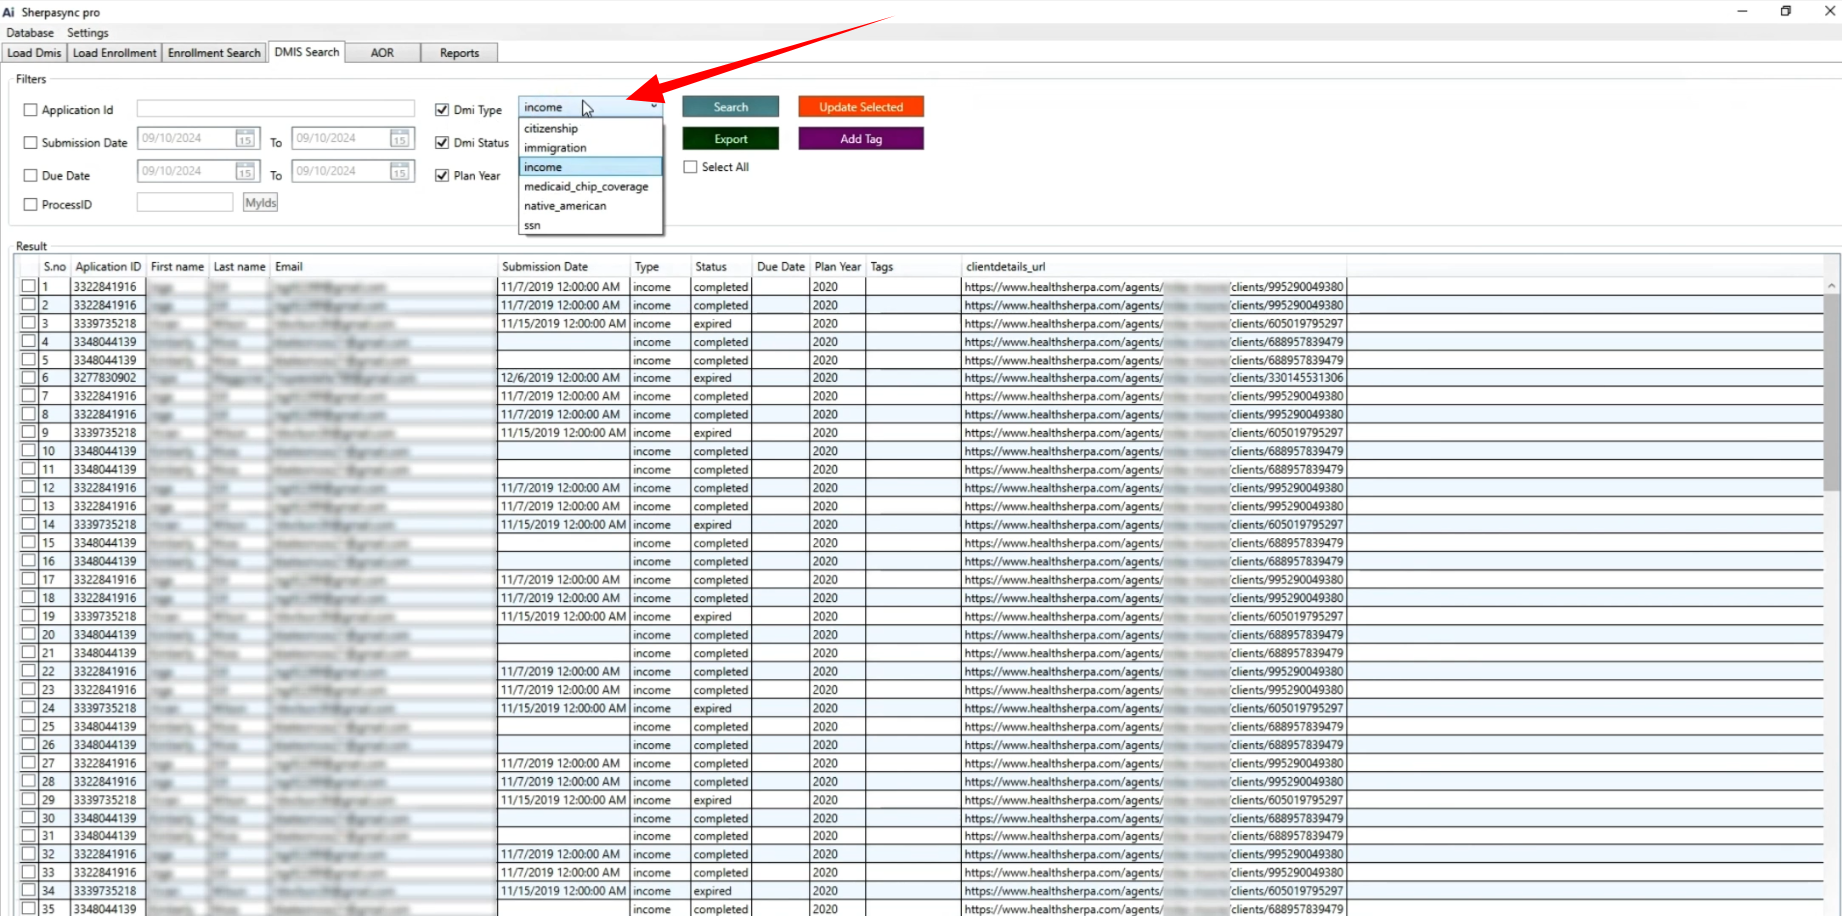
3. Add DMI Tags #
- After filtering, select the contacts you want and add the appropriate DMI tag (e.g., Proof of Income).
- Ensure you use accurate tags, as they trigger automations in your HighLevel account.
- Click Update Selected. If the contact already exists in HighLevel, the tag will be added. If not, a new contact will be created.

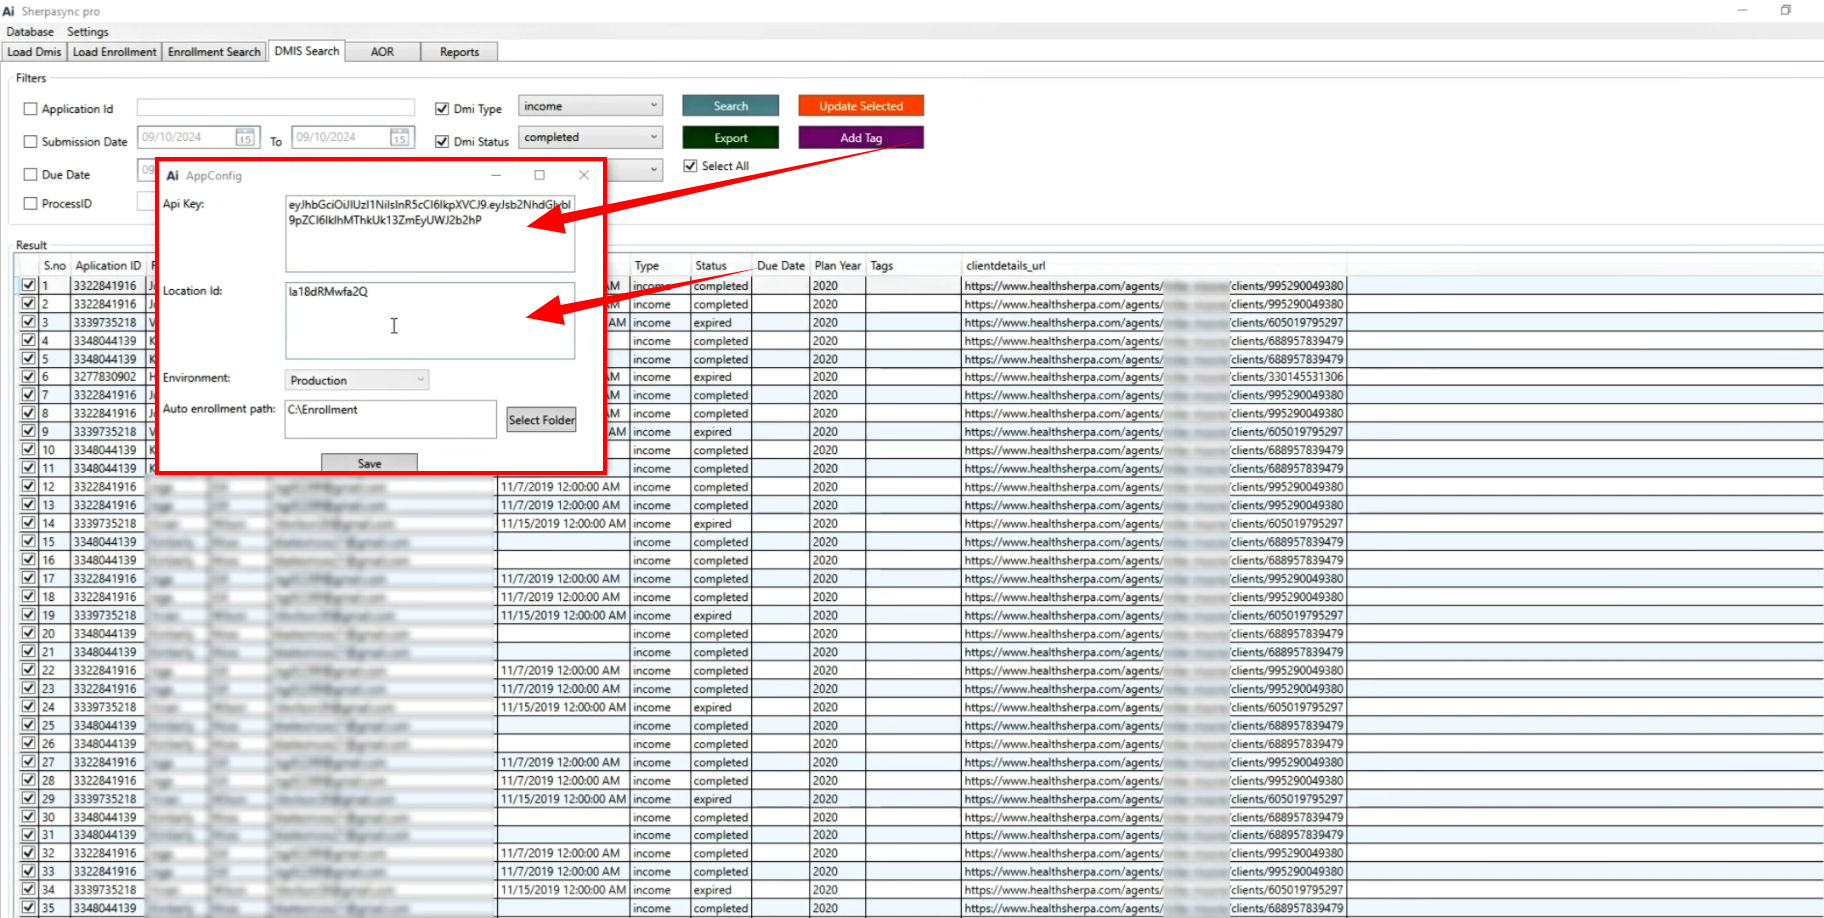
4. Sync with HighLevel #
- Make sure your HighLevel account is connected to the database software.
- To do this:
- Go to Settings and then App Settings in your database software.
- Add your HighLevel API Key and Location ID. You can find these in HighLevel by navigating to Business Profile under Settings.
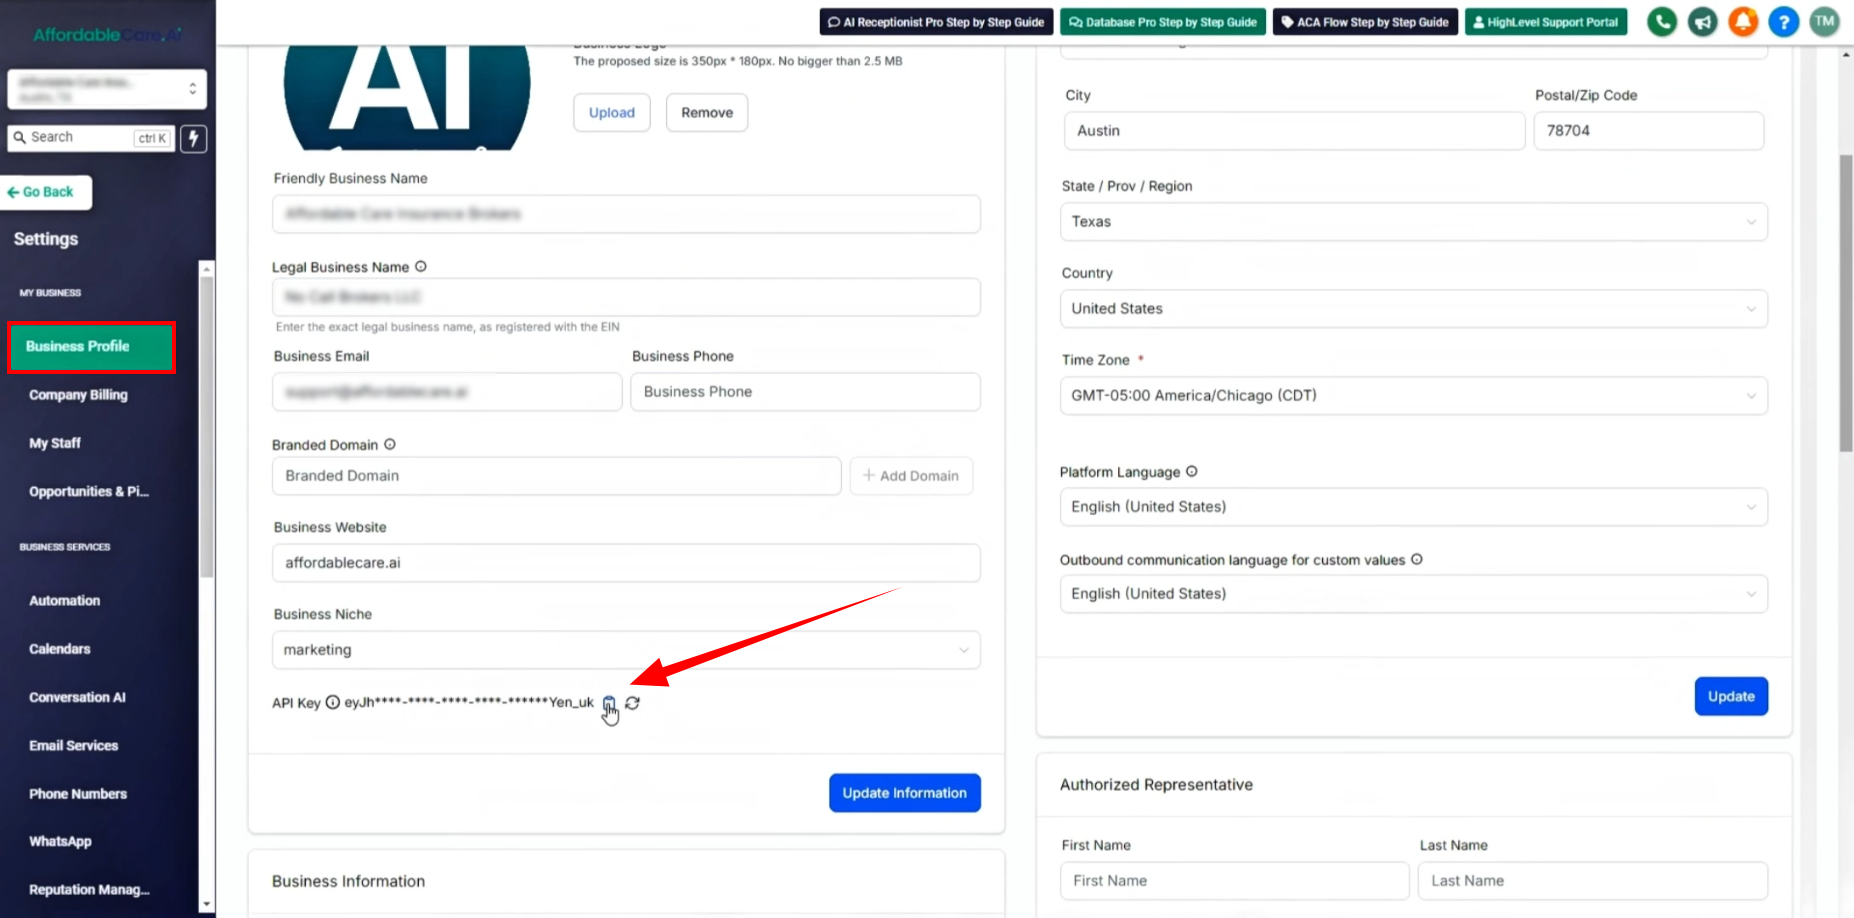
- Paste the API key and Location ID into the software and click Save.
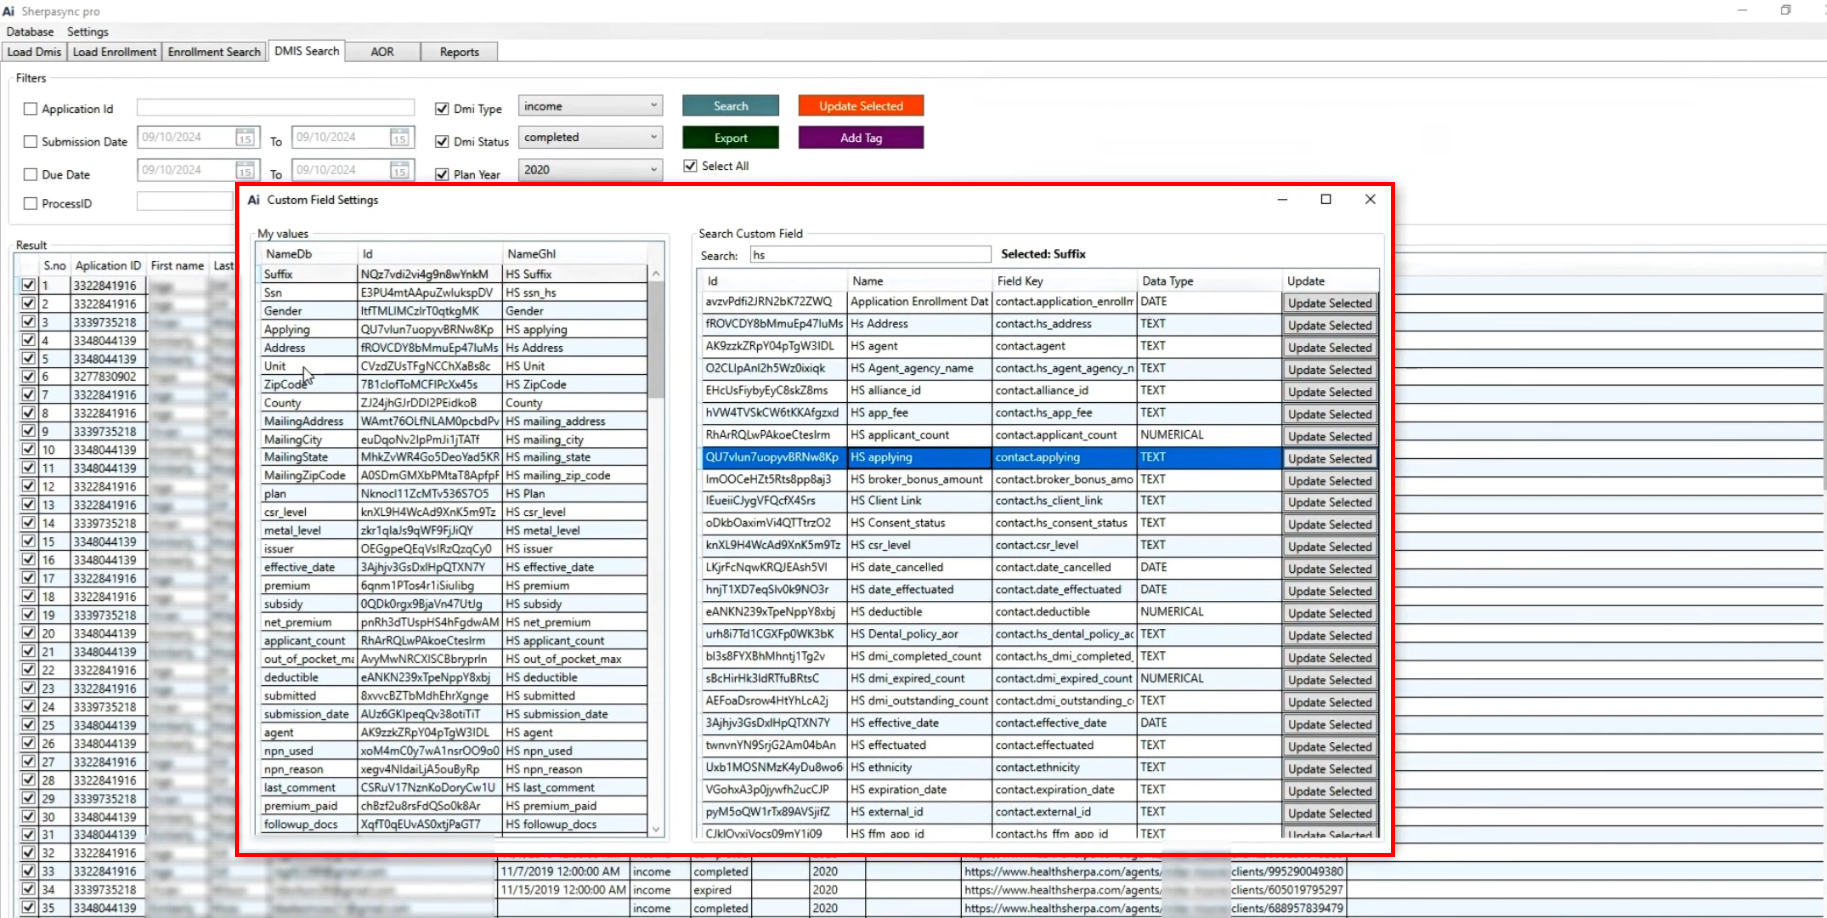
5. Perform Field Mapping #
- In the database software, go to Custom Field Settings.
- Map the fields between the database and HighLevel (e.g., first name, last name, email).
- This ensures that data from the database syncs correctly with HighLevel without overwriting important information, such as application data.
Final Steps for Both Methods #
- After completing the steps in either method, the system will trigger automations in HighLevel to remind clients and collect the necessary documentation.
- Make sure to review and approve or reject client submissions in the Opportunities section to keep the process moving efficiently.
Conclusion #
By following either of the methods described, you can easily manage DMI issues in your CRM. Whether you import an Excel file or use the database software, automations will handle much of the work for you, sending reminders and collecting necessary documentation.
If you need further assistance, please check out our documentation or contact support. Happy troubleshooting!
Frequently Asked Questions (FAQs) #
- What is DMI (Data Matching Issue)?
DMI refers to discrepancies in data, such as missing or incorrect information for citizenship, income, or Social Security Number (SSN). These issues need to be resolved to ensure proper documentation for clients. - How can I fix a DMI in my CRM?
You can fix DMIs by either importing an Excel file into your CRM or using database software. Both methods allow you to tag the relevant data and trigger automations to remind clients to submit necessary documents. - What kind of automations are triggered after adding DMI tags?
Automations will send email or SMS reminders to clients to submit documents. For example, citizenship verification reminders may be sent on Day 1, Day 2, and Day 3, with a link to upload documents. - Can I customize the reminders sent to clients?
Yes, you can customize the email or SMS templates in the Automations section of your CRM. - How do I check if a client has submitted the required documents?
Go to the Forms section in your CRM and check the DMI form (e.g., Proof of Citizenship). Once a client submits a document, you’ll be notified to approve or reject it.


