
- Step 1: Eligibility Application Submission
- Step 2: Follow-Up for Agent Consent
- Step 3: Triggering the Agent Consent Workflow
- Step 4: Application Review Follow-Up
- Step 5: Appointment Scheduling Workflow
- Step 6: Client Follow-Up Automation
- Step 7: Updating Follow-Up Content
- Step 8: Adding Leads Manually or via CSV
- Step 9: Handling No-Show Appointments
- Step 10: Health Client Tag for Post-Sale Follow-Up
- Frequently Asked Questions (FAQs)
In this article, we will discuss the step-by-step process for managing lead workflows, from eligibility application submission to post-sale follow-up. Each step covers the actions taken when a lead interacts with your system, including automated tagging, follow-ups, and handling no-show appointments. Whether you’re manually adding leads or importing them via CSV, this guide will ensure that your workflows are effectively optimized for better lead management and client engagement. Let’s dive into the details of each step to streamline your process.
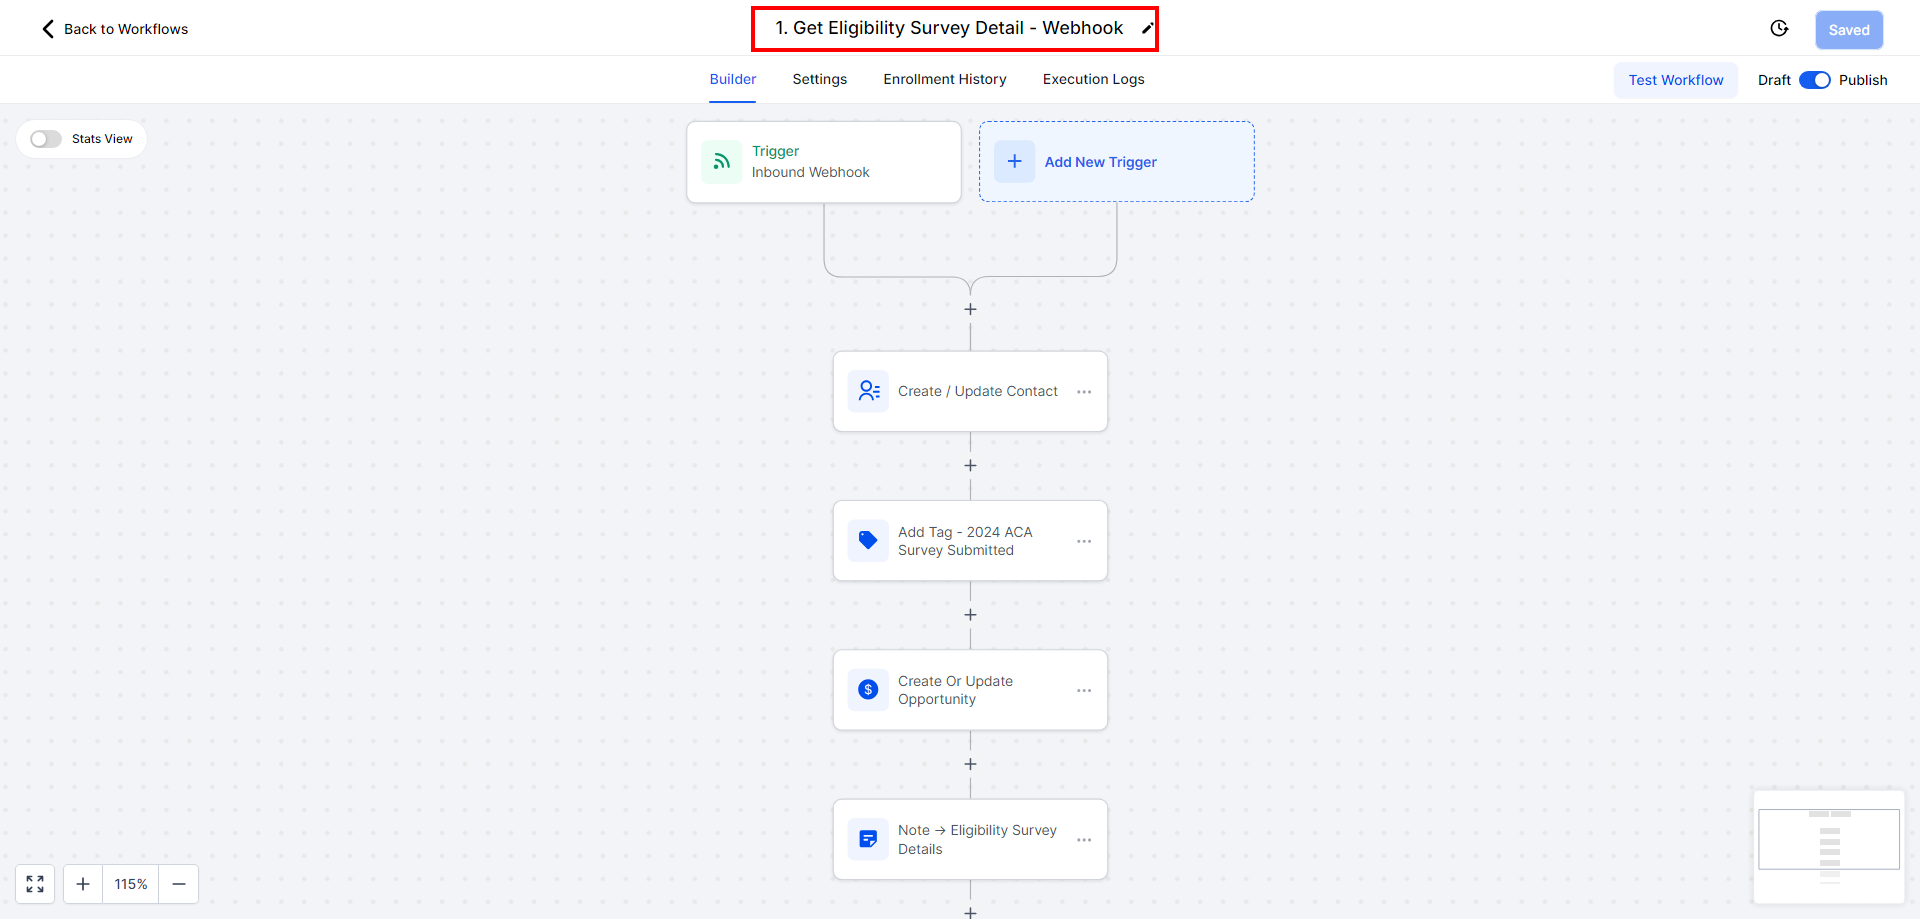
Step 1: Eligibility Application Submission #
When a user submits the eligibility application, a workflow is triggered to capture the survey details.
- The workflow stores the data from the eligibility survey.
- A tag such as “Survey Submitted 2024” is automatically added to the lead.
- The lead is enrolled in a series of workflows based on their actions.
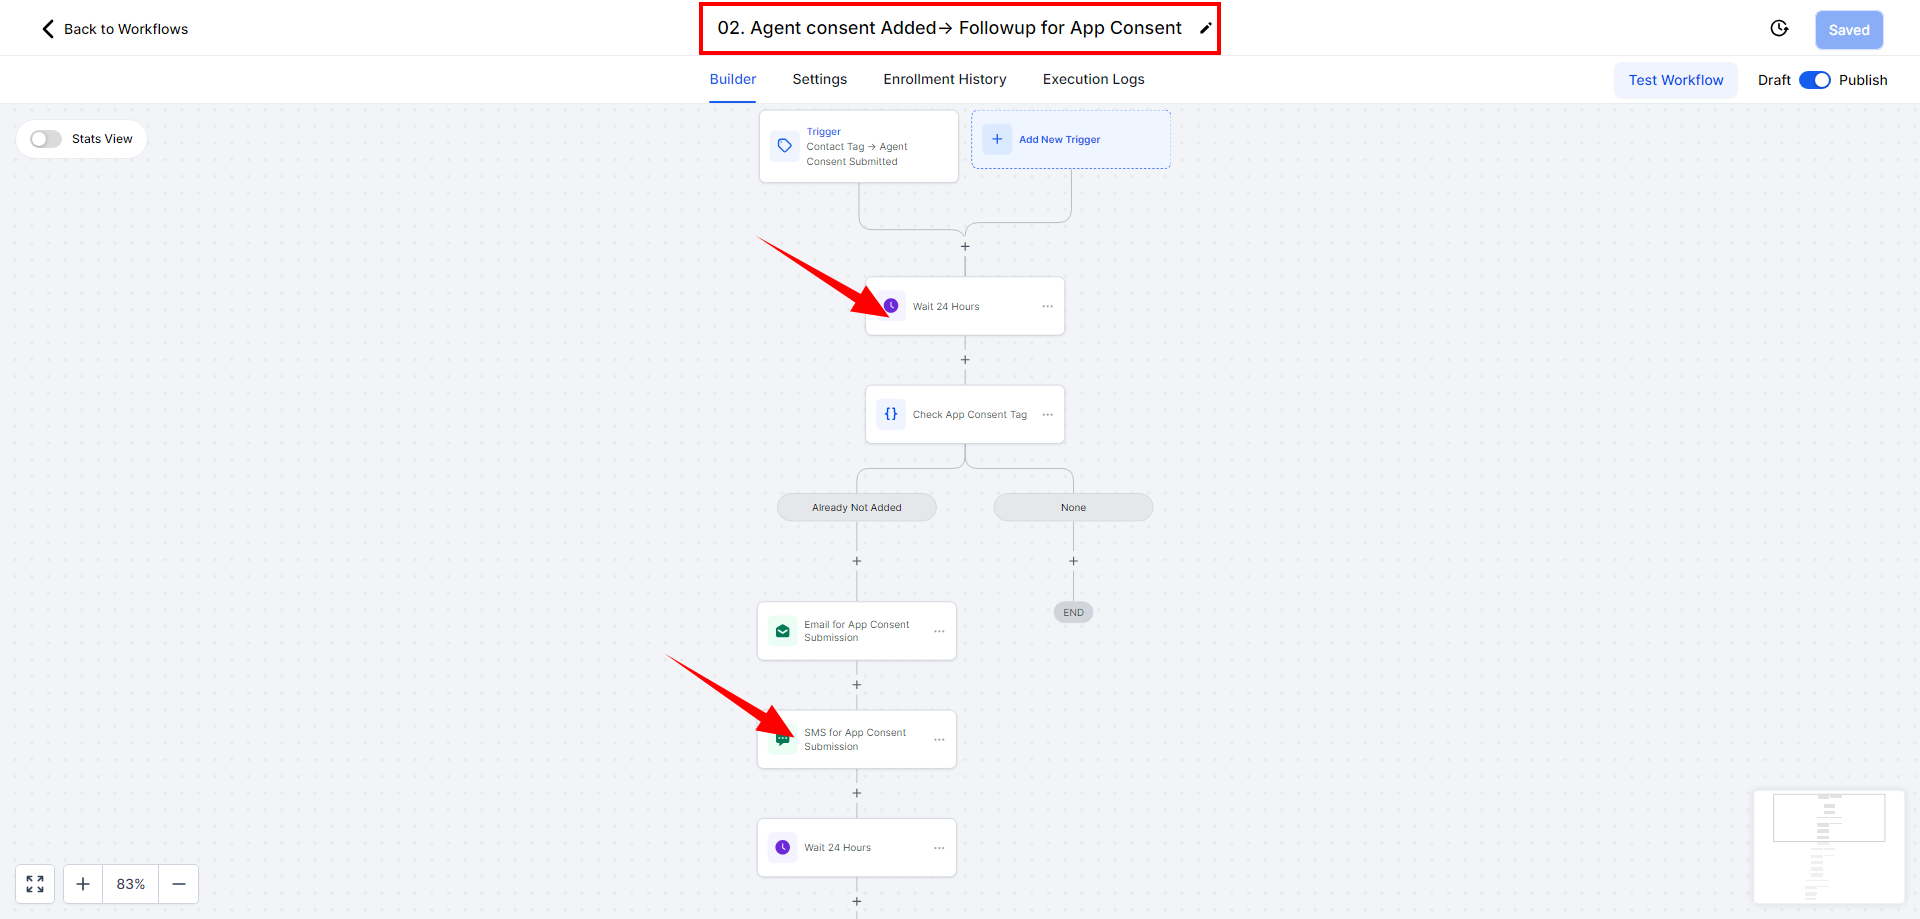
Step 2: Follow-Up for Agent Consent #
If the lead has not submitted the agent consent form:
- They will be enrolled in the “Lead Follow-Up” workflow.
- Reminders will be sent 24 hours after the eligibility survey submission, prompting the lead to submit their agent consent form.
- Reminders continue until the agent consent form is submitted.

Step 3: Triggering the Agent Consent Workflow #
Once the agent consent form is submitted:
- The lead is automatically removed from the “Follow-Up for Agent Consent” workflow.
- The system enrolls them into the “Application Review Consent” workflow.
- A tag like “Agent Consent Submitted” is added to confirm the submission of the agent consent.
Step 4: Application Review Follow-Up #
If the application review consent is pending:
- The lead is added to the “Follow-Up for Application Review Consent” workflow.
- Once the final application review is submitted, a tag such as “Application Consent Submitted” is added.
- The lead is enrolled in the workflow to schedule an appointment for further discussion on their plans.
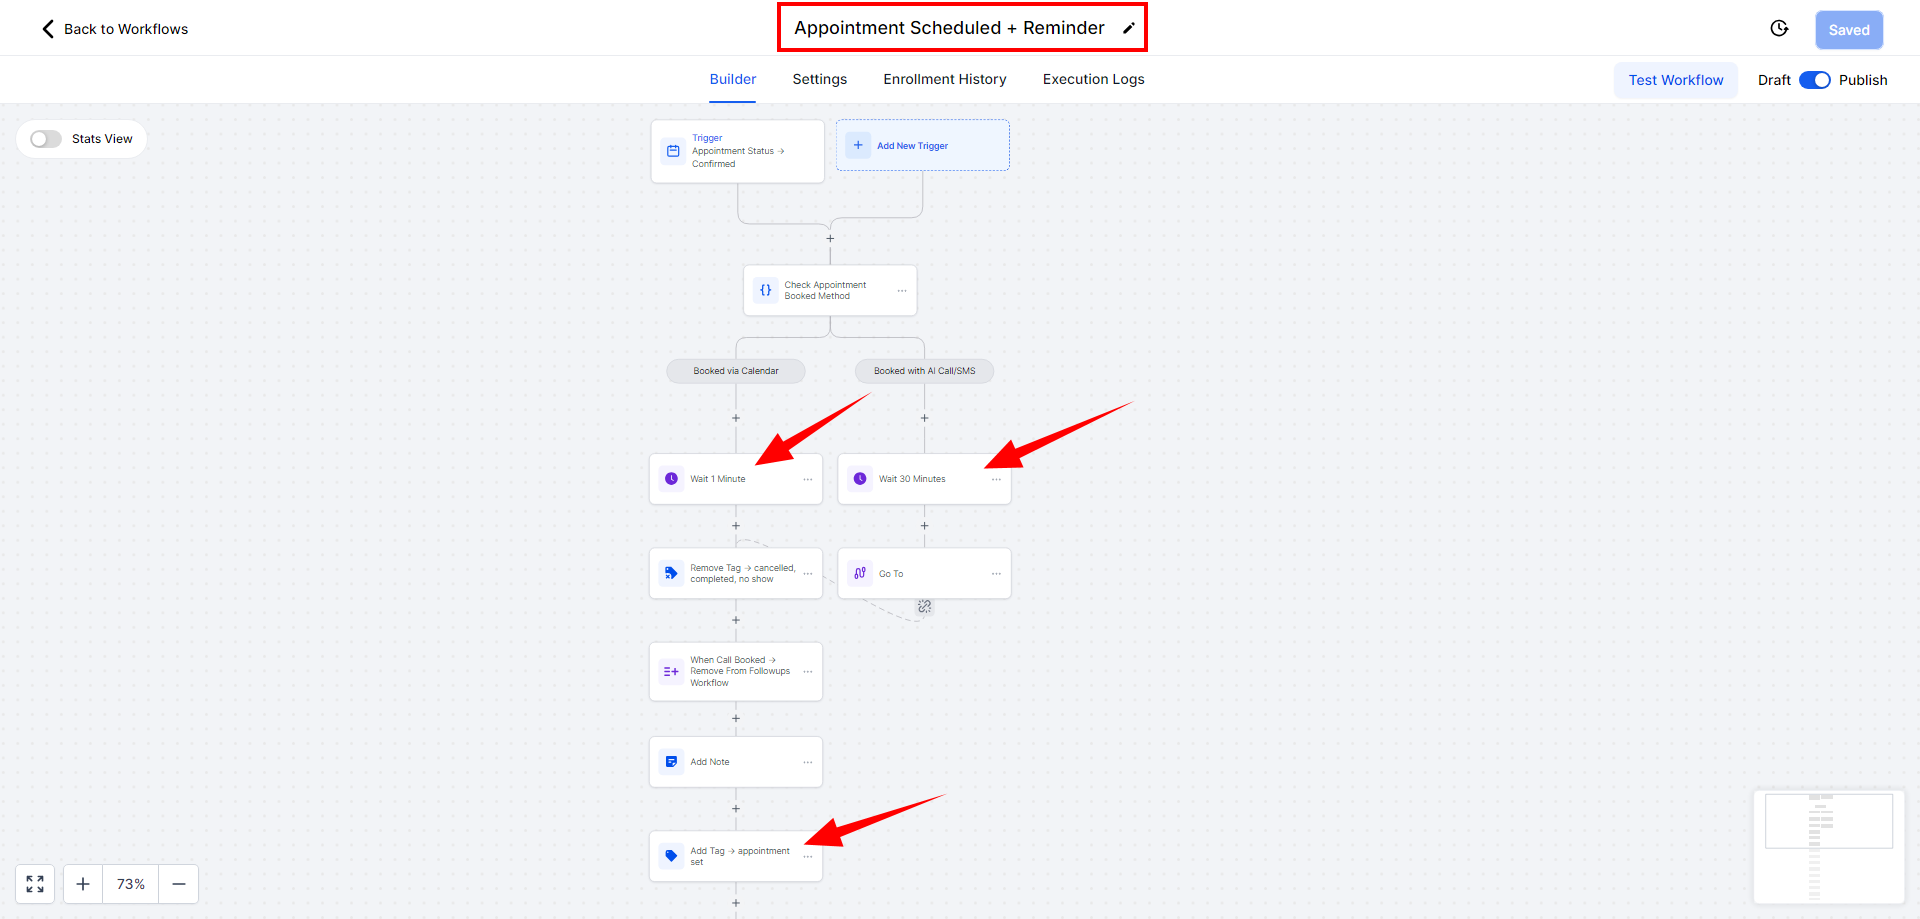
Step 5: Appointment Scheduling Workflow #
Once the final application review is complete:
- The lead is added to the “Follow-Up for Appointment Scheduling” workflow.
- Reminders are sent to schedule a meeting to discuss plans.
- After scheduling the call, a tag “Appointment Set” is added.
Step 6: Client Follow-Up Automation #
The client follow-up automation triggers specific reminders based on the lead’s actions:
- If the agent consent form isn’t submitted, follow-ups will continue until it’s received.
- After agent consent, follow-ups shift to focus on the application review consent.
- Once the application review consent is submitted, follow-ups will focus on scheduling an appointment.
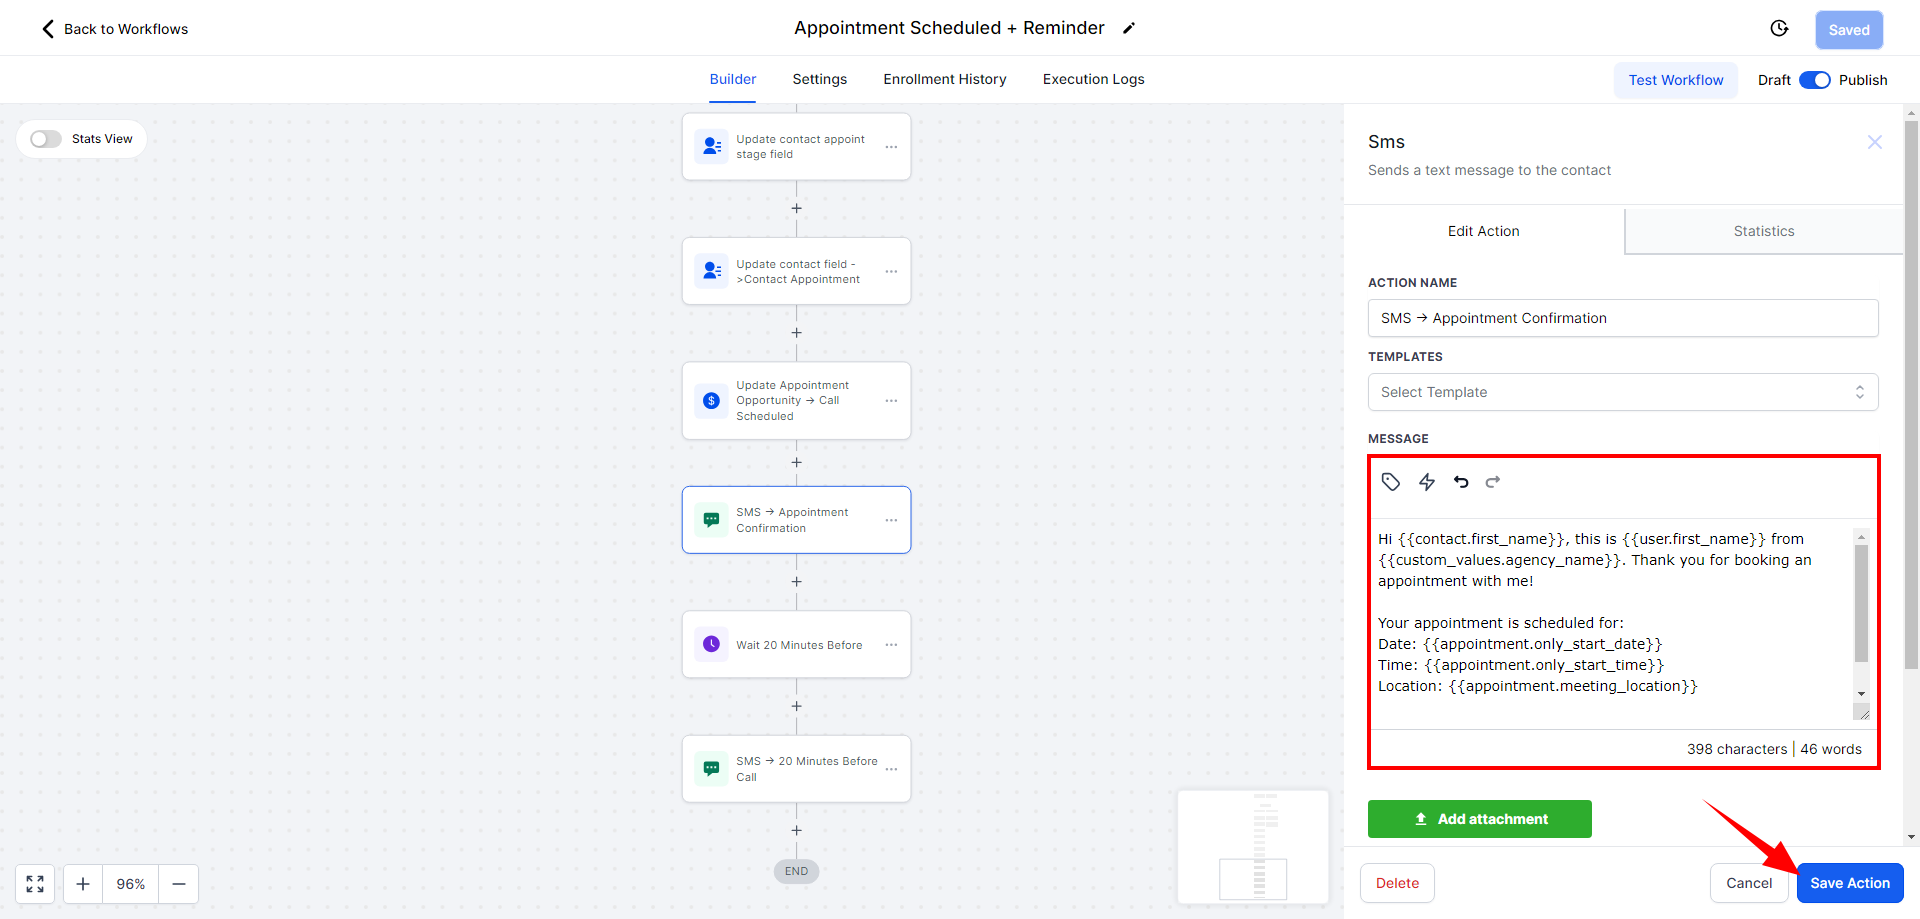
Step 7: Updating Follow-Up Content #
If you need to change the content in the follow-up emails or SMS:
- Access the workflow and update the text accordingly.
- Emails can be modified to reflect changes in agent consent or application review steps.

- SMS content, such as the enrollment link, can also be updated based on the workflow requirements.
Step 8: Adding Leads Manually or via CSV #
If you wish to add leads manually or import them via CSV:
- Select the lead(s) and add the necessary tag, such as “Consent to Contact” or “Hot Lead.”
- Once the tag is added, the leads will automatically enter the relevant campaigns.
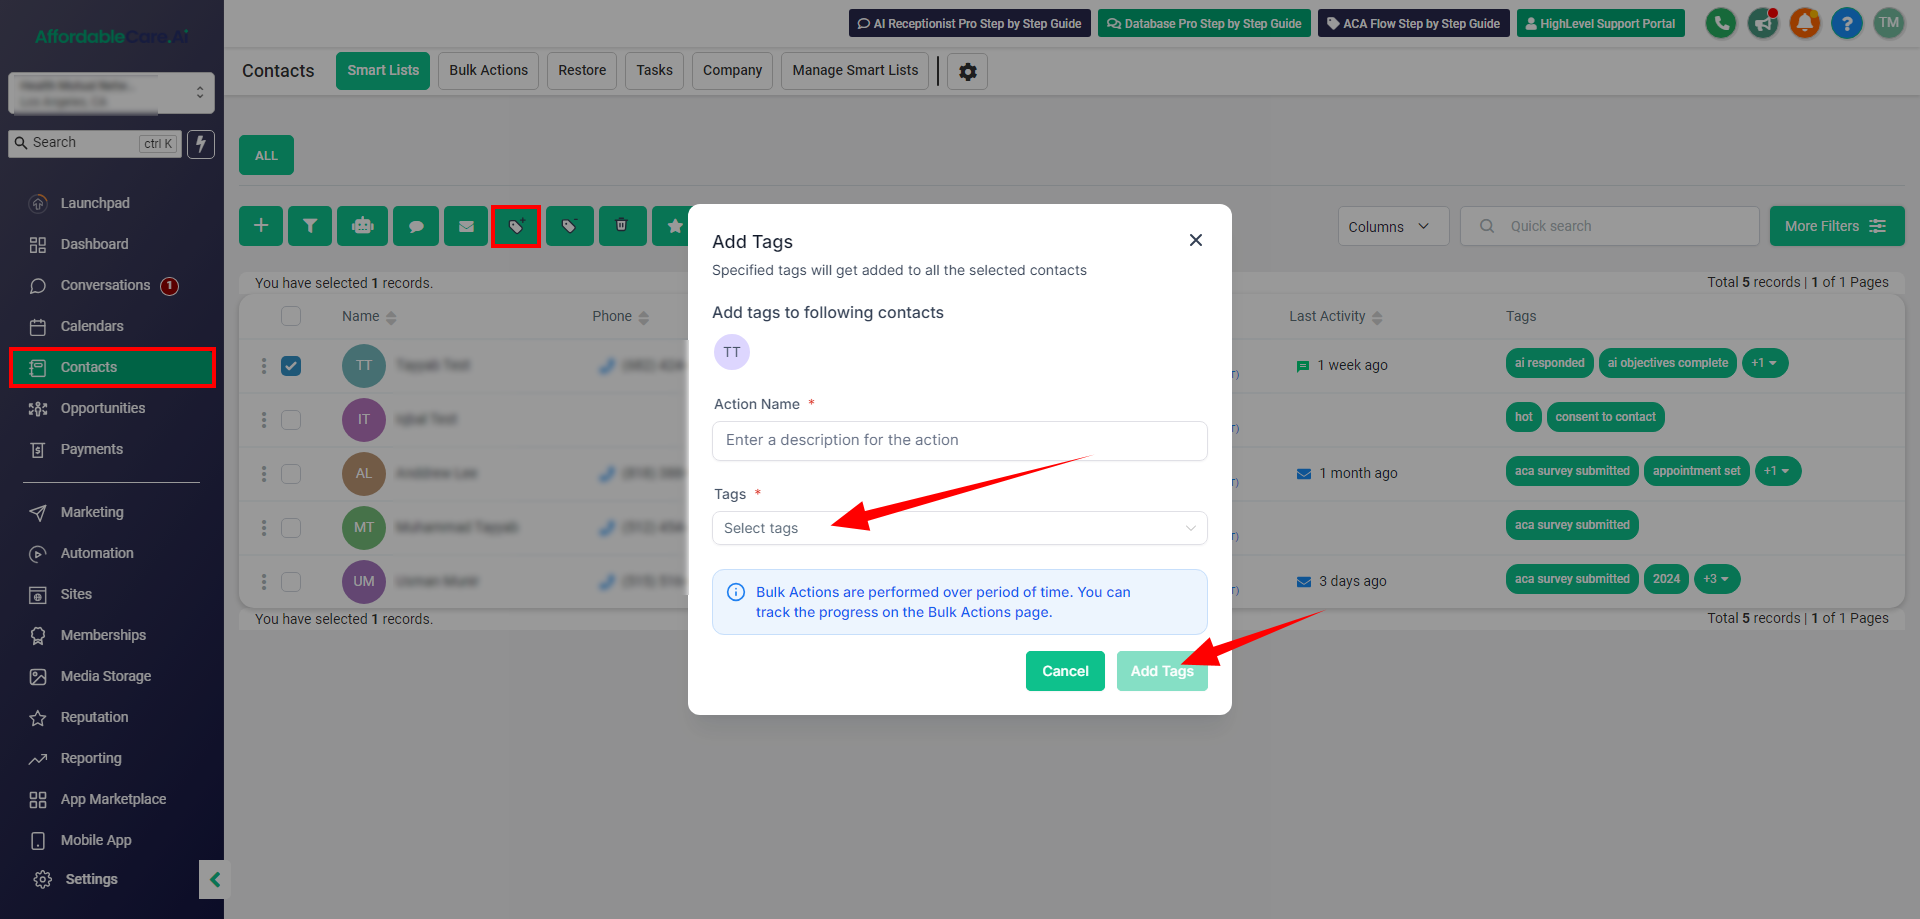
- If using the CRM, the system automatically assigns tags based on lead actions (e.g., submitting the eligibility survey or agent consent).
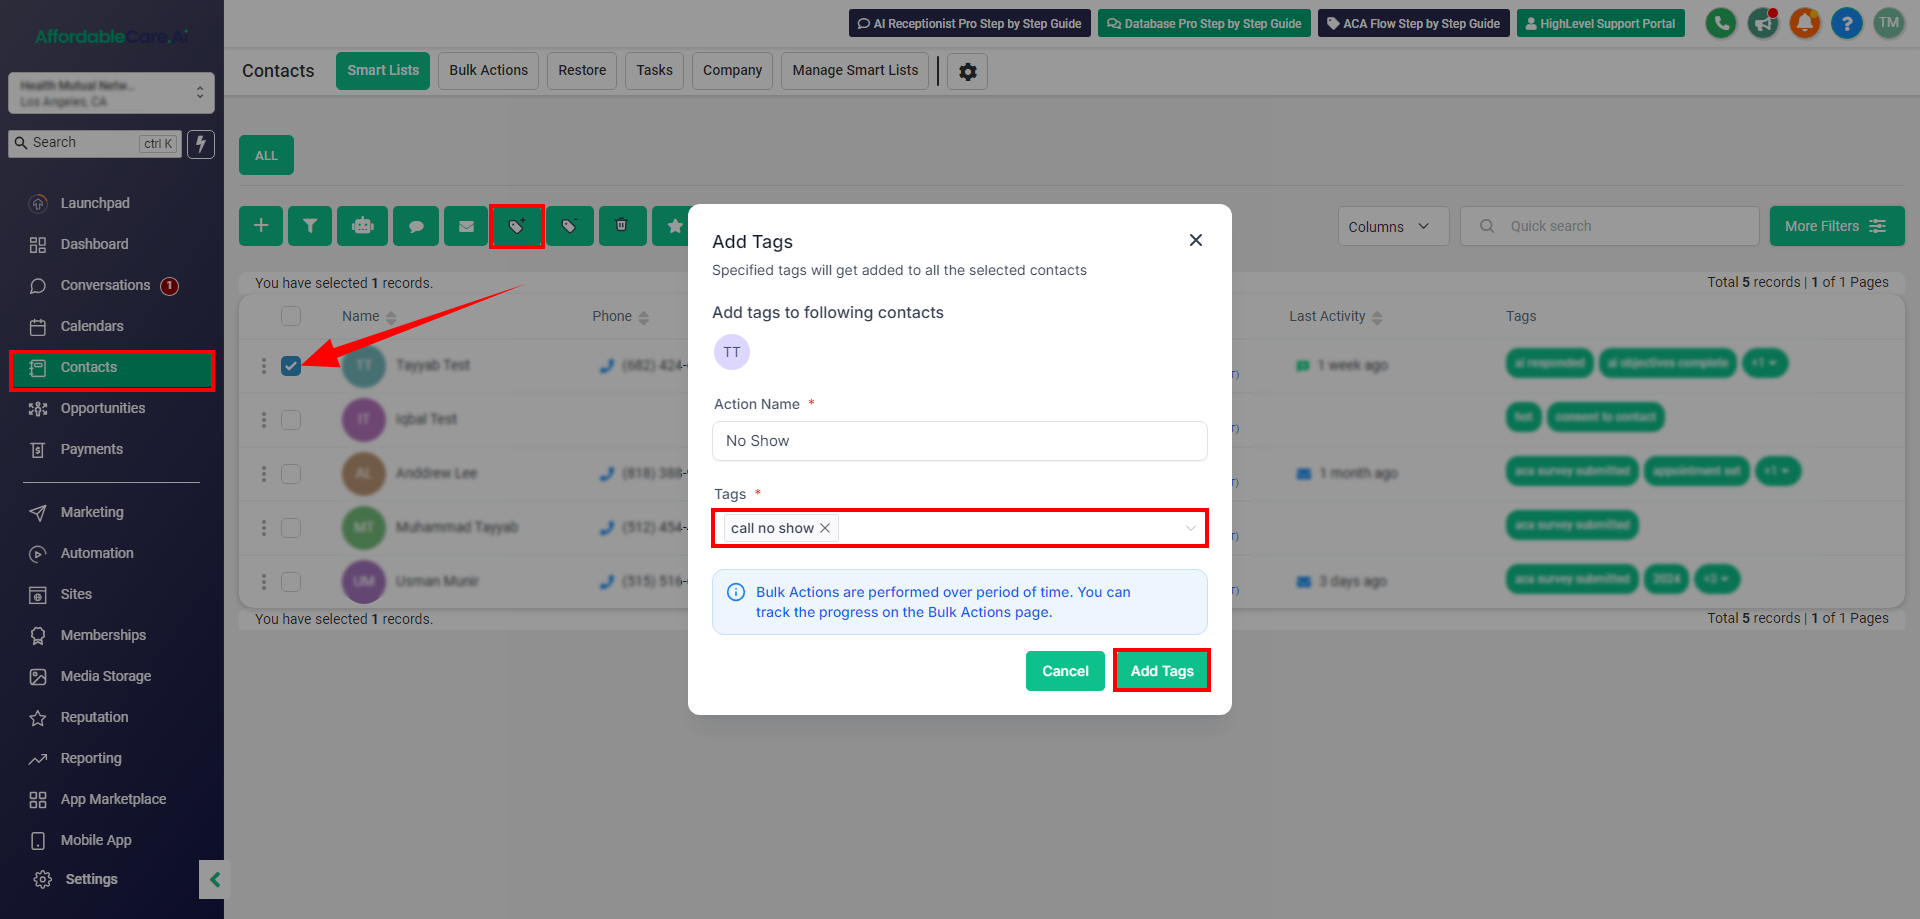
Step 9: Handling No-Show Appointments #
If a client schedules a call but does not attend the appointment:
- Add the “No Show” tag to the lead.
- The system will automatically send a rescheduled email or SMS.
- This helps manage clients who miss appointments by prompting them to reschedule.
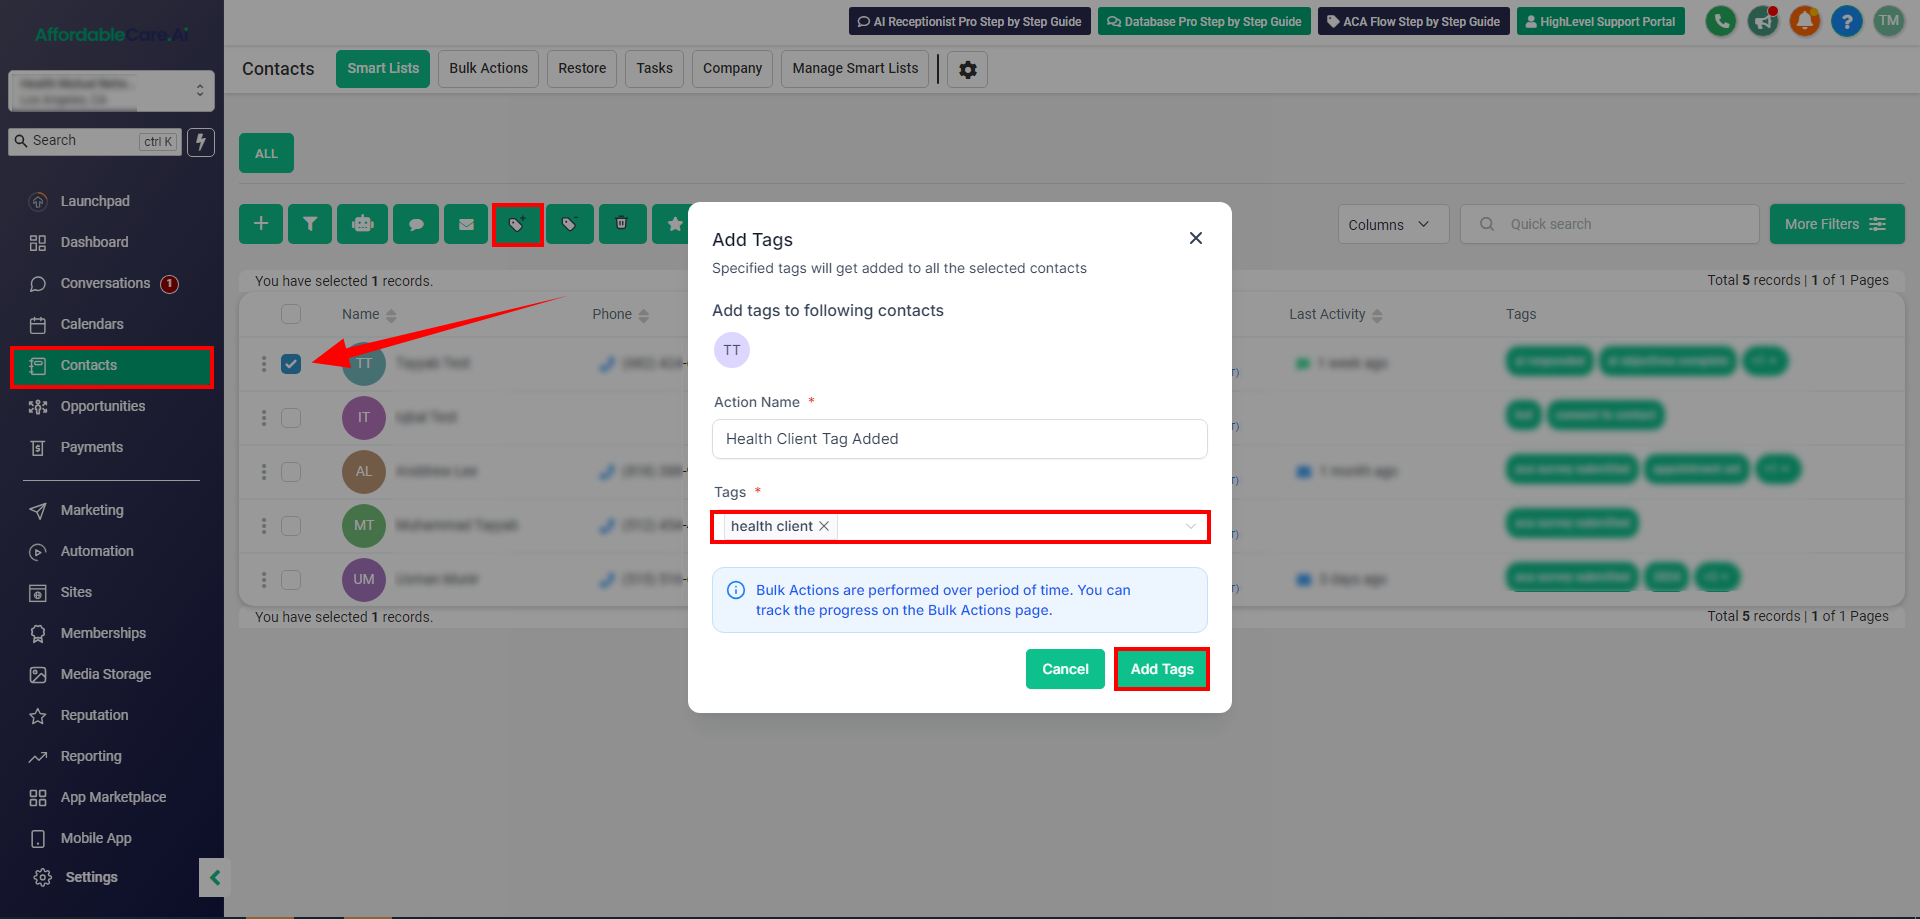
Step 10: Health Client Tag for Post-Sale Follow-Up #
For clients who need post-sale assistance:
- After submitting their application to HealthSherpa, add the “Health Client” tag.
- If using the CRM, this tag triggers post-sale workflows for reviews or additional assistance.
- If not using the CRM, manually add the “Health Client” tag to the lead to enroll them in the appropriate workflow.
Frequently Asked Questions (FAQs) #
- What happens after submitting the eligibility application?A workflow captures the survey details, adds a “Survey Submitted 2024” tag, and enrolls you in follow-up workflows.
- What if I don’t submit the agent consent form? You’ll enter the “Lead Follow-Up” workflow and receive reminders until the form is submitted.
- Does using the Sandbox for testing purposes consume tokens? You’re removed from the follow-up workflow, and a “Agent Consent Submitted” tag is added. You’ll then enter the “Application Review Consent” workflow.
- What if my application review consent is pending? You’ll receive reminders until it’s submitted, after which you’ll be prompted to schedule an appointment.
- How does the appointment scheduling process work?Reminders prompt you to schedule a meeting. After scheduling, an “Appointment Set” tag is added.


