
Automating Lead Management with Tags in Your CRM #
Managing your leads efficiently is key to ensuring that your business follows up with prospects at the right time. Using tags in your CRM helps automate this process. Below is a step-by-step guide on how to add tags, both manually and automatically, and how to trigger follow-up campaigns.
Steps to Add Tags Manually #
When you add leads manually or import them from a CSV file, follow these steps to ensure they are correctly tagged and enrolled in follow-up campaigns:
Step 1: Select the Leads #
Go to the Leads Section:
-
- Log in to your CRM and navigate to the leads section.
Select the Leads:
-
- Choose the leads you’ve added or imported.
Step 2: Click the “Add Tag” Button #
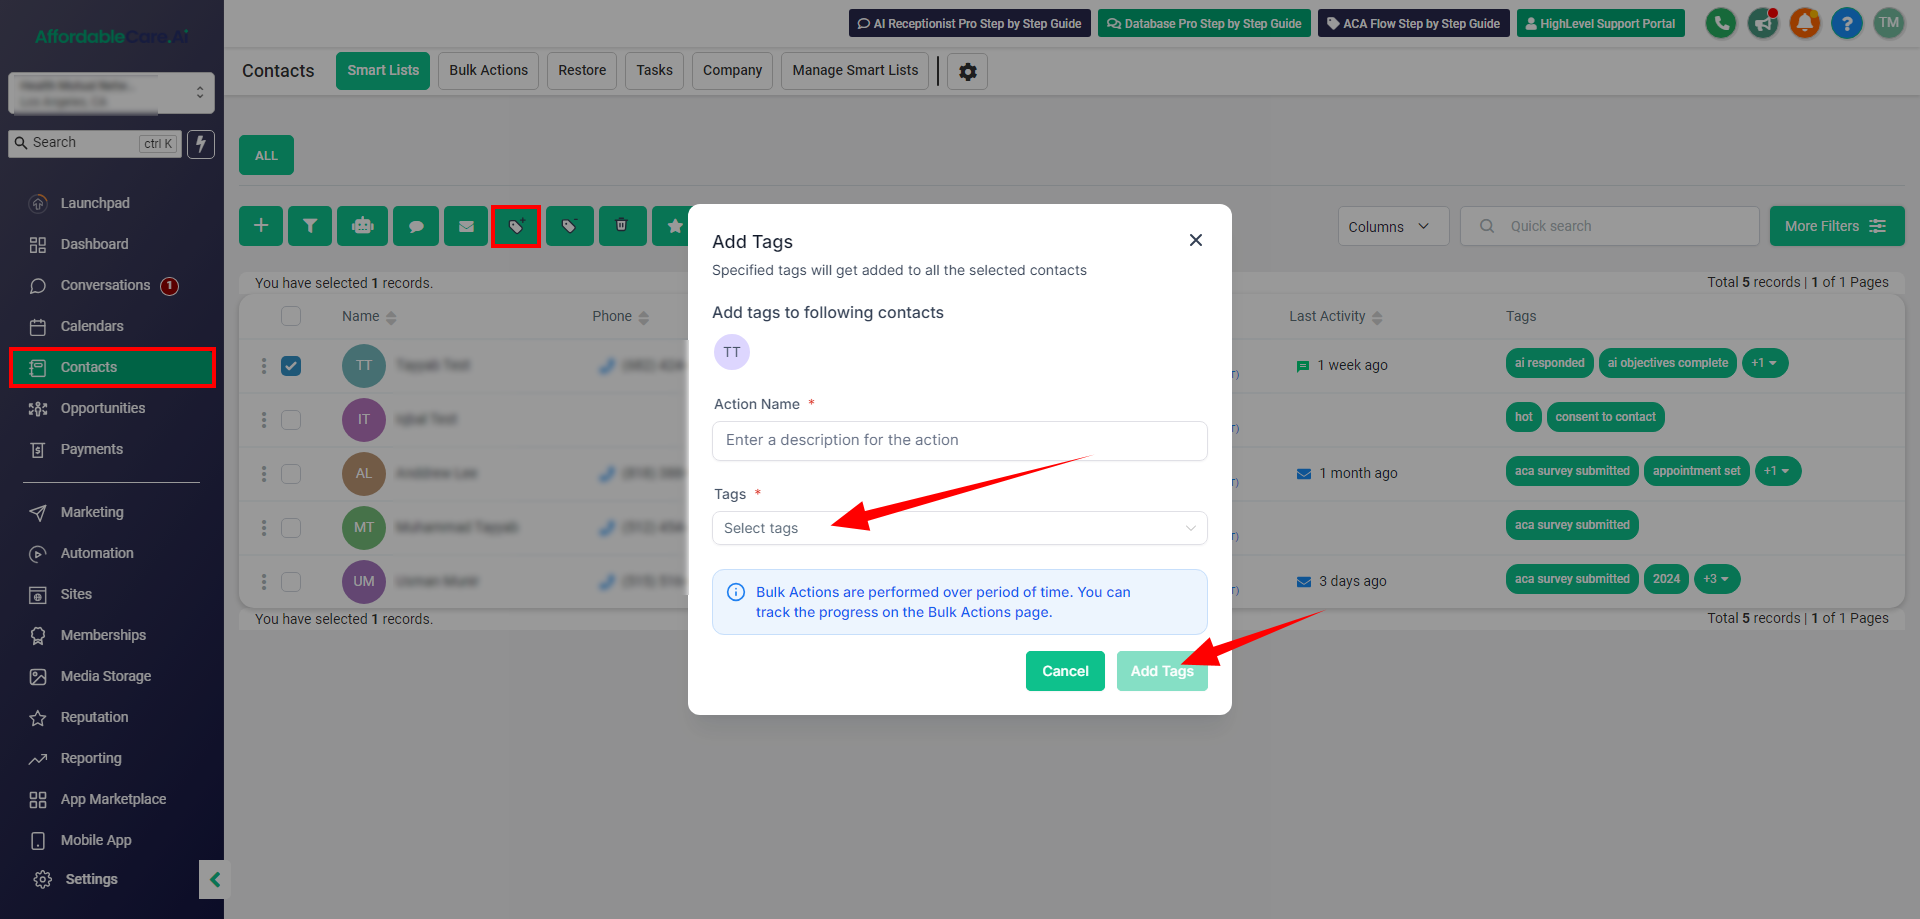
Find and Click the “Add Tag” Button:
-
- After selecting the leads, locate and click on the “Add Tag” button.
Step 3: Choose the Relevant Tag #
Select the Appropriate Tag:
-
- From the dropdown menu, choose the relevant tag, such as “consent to contact” or “hot lead.”
Step 4: Trigger Automation #
Automatic Enrollment:
-
- Once the tag is added, the lead is automatically enrolled in the associated follow-up campaign. This may include a sequence of emails and SMS messages over a set period.
Steps to Automate Tag Addition for Multiple Leads #
To save time when dealing with multiple leads, you can bulk add tags. Follow these steps:
Step 1: Select All Leads #
Navigate to the Leads Section:
-
- Go to the leads section in your CRM.
Select All Leads:
-
- Use the selection option to choose all the leads you want to tag.
Step 2: Bulk Add Tags #
Click on the “Add Tag” Button:
-
- After selecting the leads, click the “Add Tag” button.
Select the Relevant Tag:
-
- From the dropdown menu, select the appropriate tag.
Step 3: Automation Initiation #
Automatic Enrollment:
-
- The CRM will automatically enroll all tagged leads in the follow-up campaigns, ensuring all your leads receive timely and consistent communication.
Steps to Customize Follow-Up Content #
You can tailor the follow-up messages and timings to better suit your leads. Here’s how:
Step 1: Access Campaign Settings #
Go to Campaign Settings:
-
- Navigate to the campaign or automation settings in your CRM where the follow-up sequence is configured.
Step 2: Modify Content #
Edit Emails or SMS Messages:
-
- Select the specific emails or SMS messages within the campaign that you wish to edit.

Make Necessary Changes:
-
- Modify the text or media as needed to suit your lead’s needs.
Step 3: Adjust Timings #
Change Timing Between Messages:
-
- If required, adjust the wait times or schedule within the campaign settings to better align with your follow-up strategy.
Steps to Handle Specific Scenarios with Tags #
Different scenarios require different tags. Below are steps to handle some common situations:
For Health Clients #
When you submitted the application in Health Sherpa, you need to add the tag “Health Client” for which you need to follow the steps.
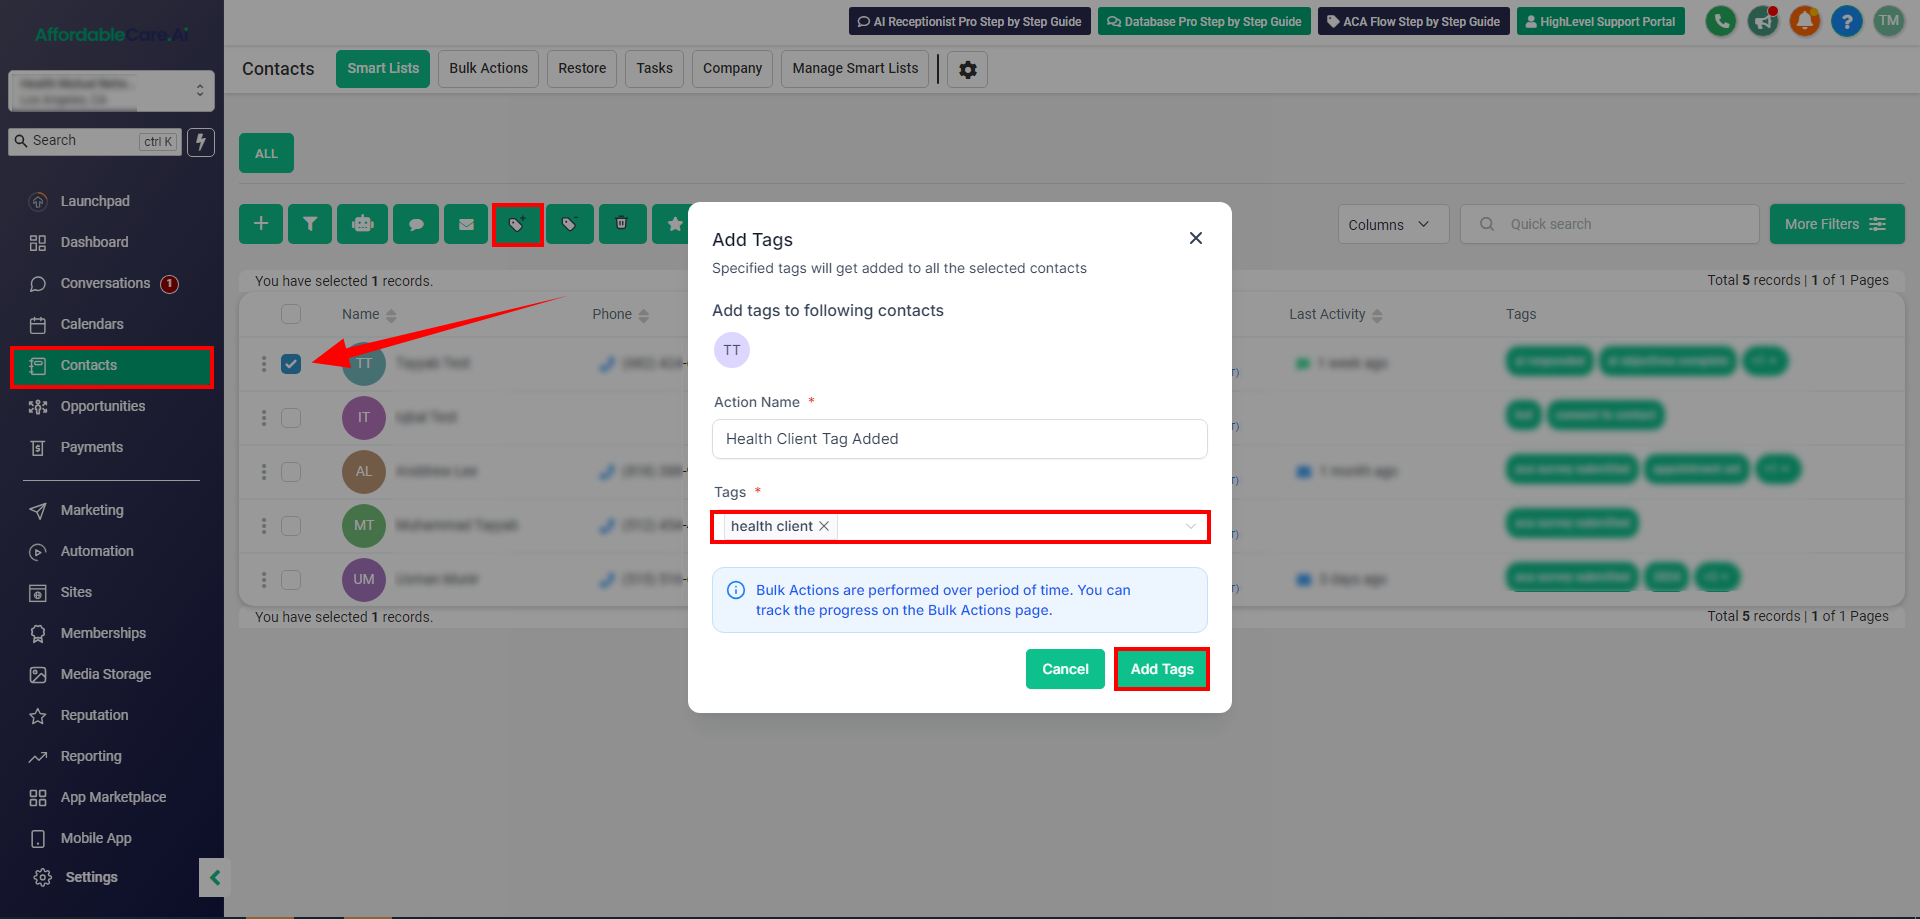
Step 1: Add the “Health Client” Tag #
Tagging Post-Application:
-
- After submitting an application to Health Sherpa or similar services, add the “health client” tag to the lead.
Step 2: Trigger Post-Sale Workflow #
Automatic Enrollment:
-
- The lead will automatically be enrolled in a post-sale workflow where they will receive follow-ups, such as review requests or additional assistance offers.
For No-Show Appointments: #
If the client does not attend the call or join the appointment. Then by following the steps you will add the tag “Call No Show”
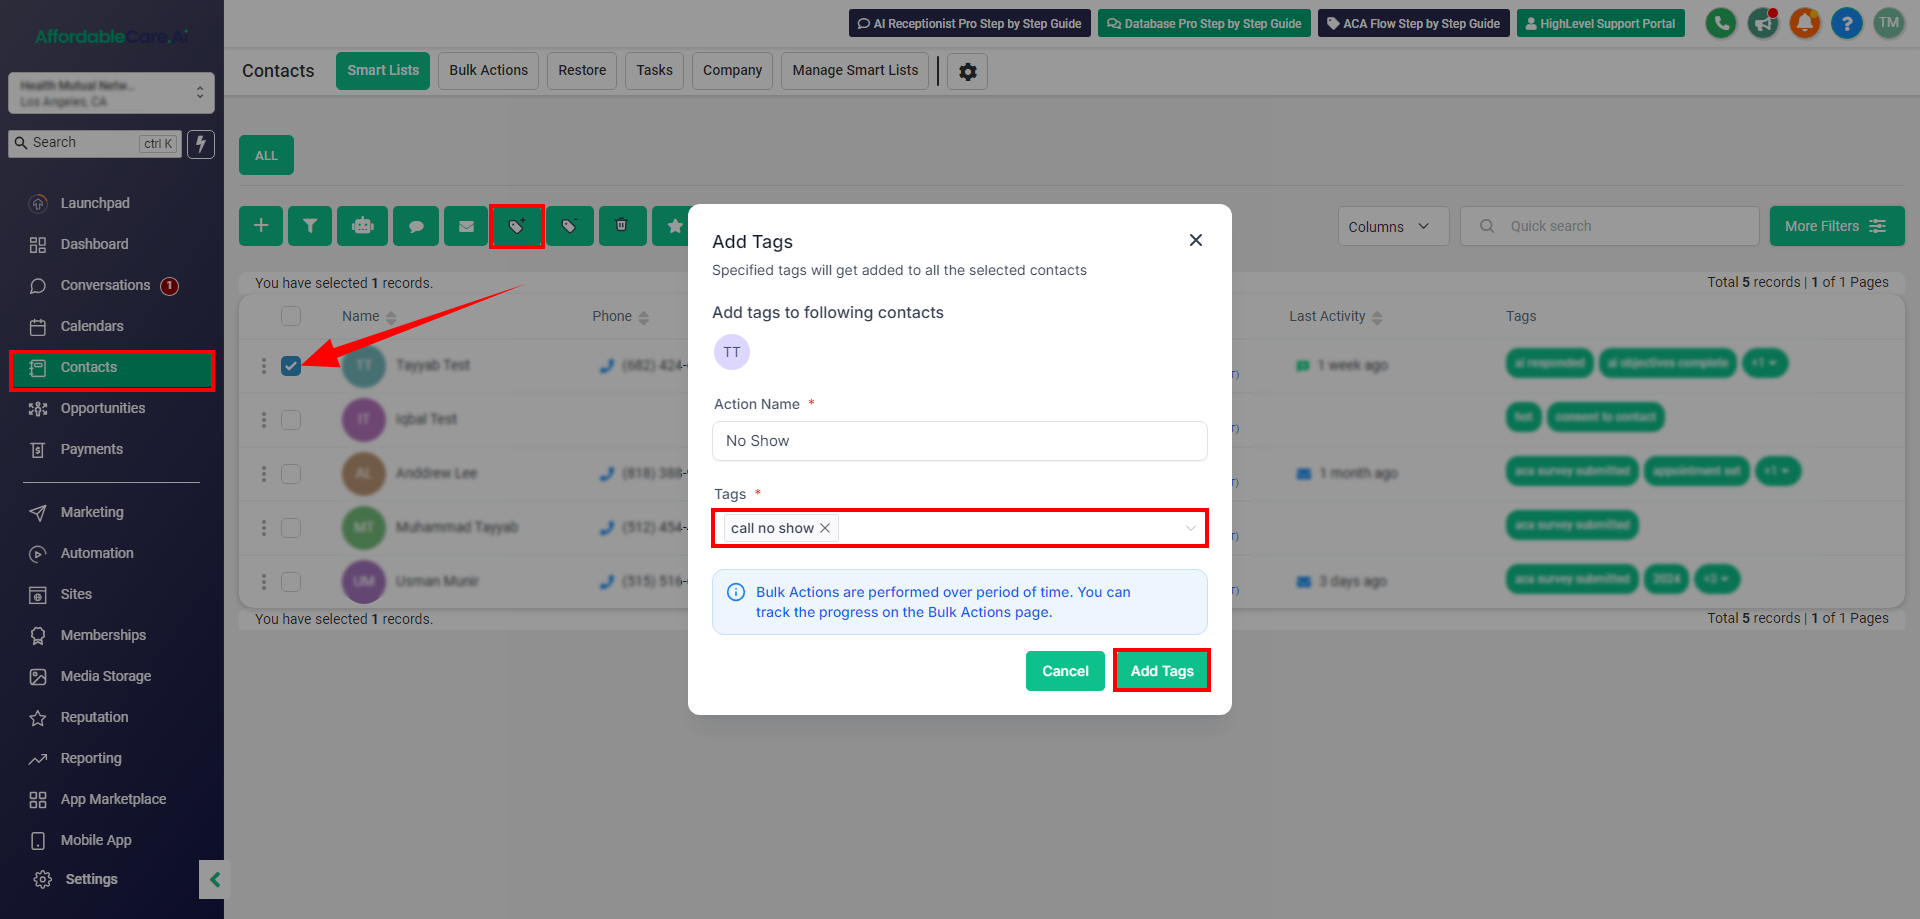
Step 1: Add the “Call No Show” Tag #
Tagging After a Missed Appointment:
-
- If a client misses a scheduled call or appointment, add the “call no show” tag to their profile.
Step 2: Trigger Reschedule Communication #
Automatic Reschedule Messages:
- The CRM automatically sends a rescheduled email and SMS, prompting the client to book a new appointment.
Summary #
Frequently Asked Questions (FAQs) #
- What is the purpose of adding tags to leads in a CRM? Tags are used to categorize leads and trigger specific automations, such as follow-up campaigns, based on their status or actions.
- How do I add tags to leads manually? To add tags manually, select the leads in your CRM, click on the “Add Tag” button, and choose the relevant tag like “consent to contact” or “hot lead.
- Can I add tags to multiple leads at once? Yes, you can select multiple leads and apply a tag to all of them simultaneously using the bulk add feature in your CRM.
- What happens after I add a tag like “consent to contact”? Once the tag is added, the lead is automatically enrolled in a pre-configured follow-up campaign, which typically includes emails and SMS messages over a set period.
- How can I customize the follow-up messages sent to my leads? You can customize the content and timing of follow-up messages by accessing the campaign settings within your CRM.
- What should I do if a client misses a scheduled call? If a client misses a call, you can add the “call no show” tag, which will automatically send a reschedule message via email and SMS.


