
Introduction #
This guide provides a step-by-step walkthrough to help you effectively set up and integrate the ACA Flow Snapshot into your GoHighLevel CRM, customize business-specific values, and manage agent portals for your ACA insurance operations. Whether you are using your own CRM or the ACA Solution CRM, this documentation outlines all necessary procedures to ensure a smooth setup. From importing snapshots and updating custom values to setting up agent portals and configuring webhooks, these instructions are designed to streamline your workflows, enhance data management, and improve client interaction. By following this guide, you can maximize the efficiency and effectiveness of your ACA-related processes.
Step 1: Import a ACA Flow Snapshot in GoHighLevel (GHL) #
This step is optional. If you are using your own high-level CRM then you need to import the snapshot. If you are using ACA Solution CRM then you don’t need to perform this step.
Log into Your HighLevel Agency Account
Start by logging into your HighLevel account through your web browser.
Copy the URL from the Email
Open the email you received and copy the snapshot link provided.
Open a New Tab
In the same browser, open a new tab.
Paste the Snapshot Link
Paste the copied snapshot link into the address bar of the new tab and press Enter.
Import the Snapshot
When prompted, click Yes! Import Now to begin the import process.
Where to Find Imported Snapshots
After the import is complete, you can find all imported snapshots under the Imported Snapshots tab in Settings (Agency View) -> Account Snapshot.
To read the full article, click here. How to Import a Snapshot in GoHighLevel (GHL)
Step 2: How to Change the Custom Values in GoHighLevel (GHL) #
After importing a snapshot into GoHighLevel, you’ll need to update the custom values to reflect your specific business details. Here’s how to do it:
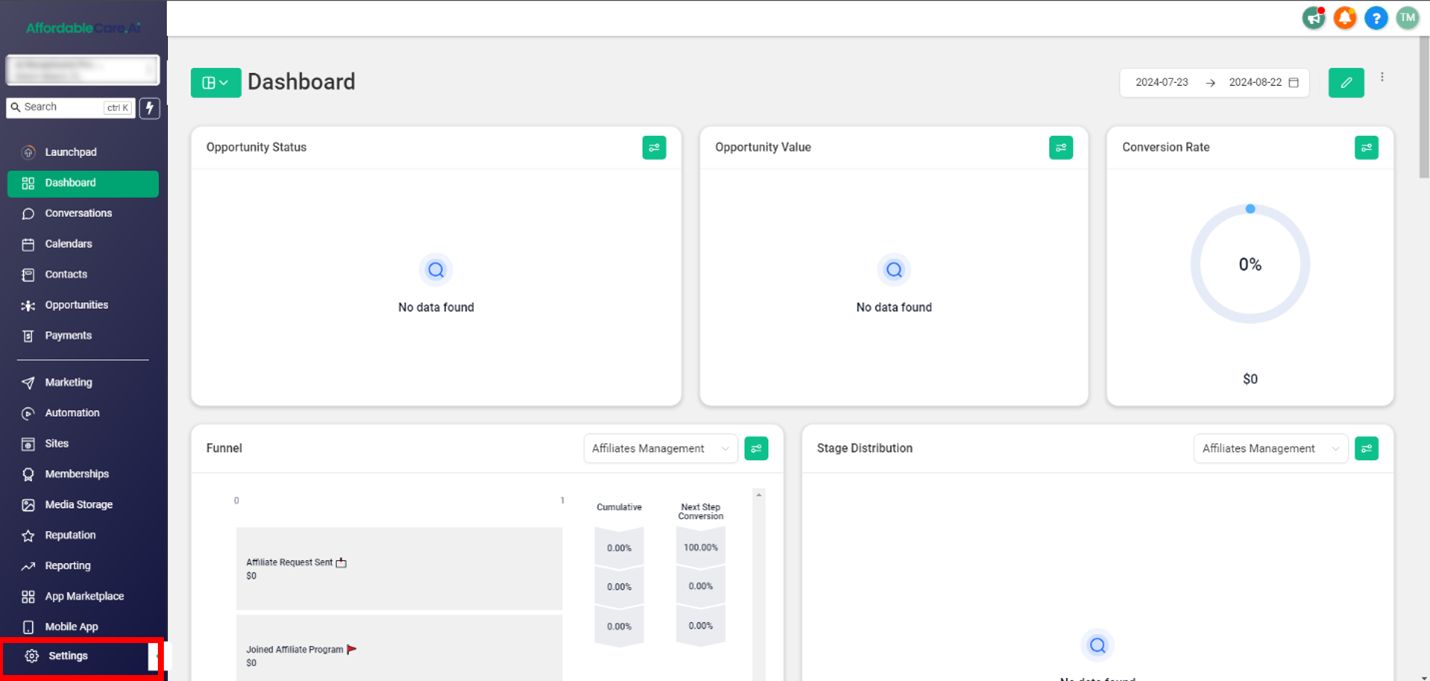
Access the Custom Values
Start by clicking on the Settings button in your GoHighLevel account. A new window will open where you’ll find an option labeled Custom Values.
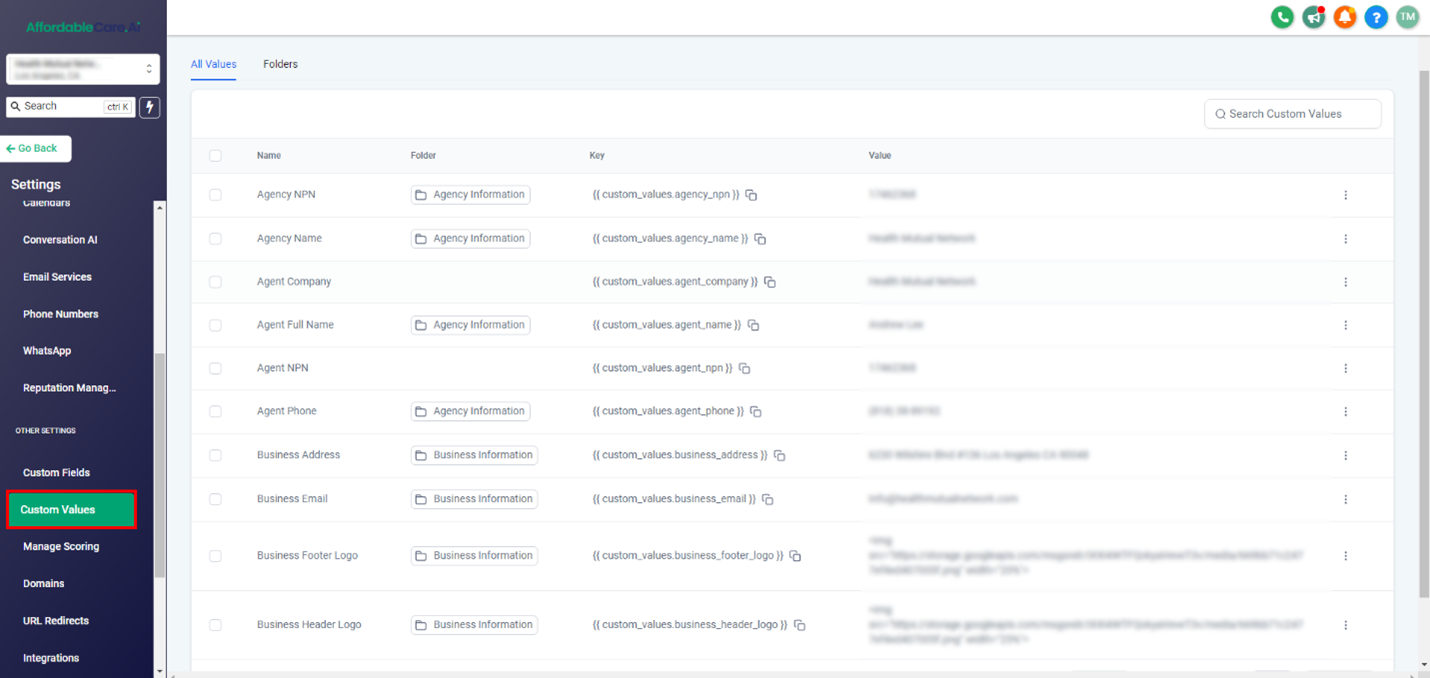
Update the Custom Values
Click on the Custom Values button, and a window will appear displaying all the existing custom values. To update these values:
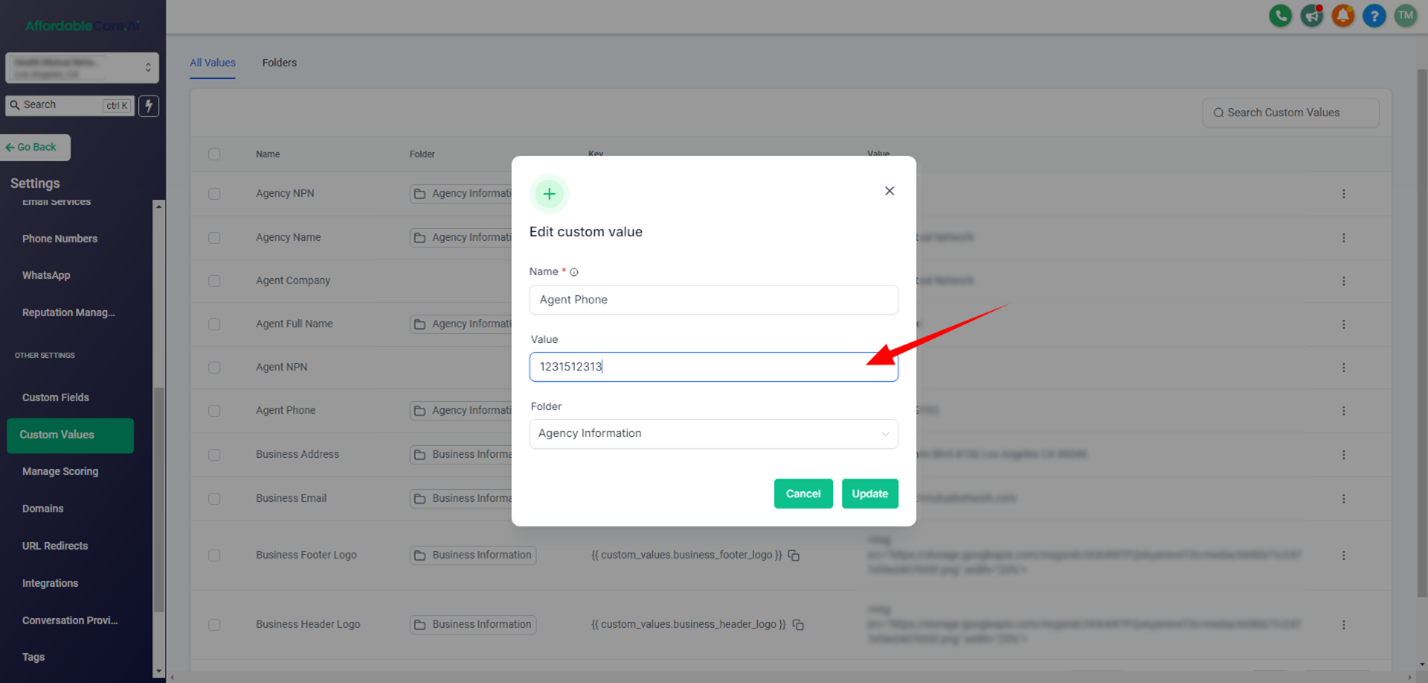
- Edit Custom Values: Click the three dots next to the custom value you want to change.
- Add Your Data: Select Edit the Custom Value from the dropdown menu, enter the relevant details such as your agency information, NPN number, name, and other business details.
3. Save the Changes: After entering the necessary information, update the custom value by saving the changes.
Step 3: How to Add the Agent Portal in a Custom Menu Link #
Log into the Agent Portal
- Access the Portal: Open your preferred web browser and go to ACA Solution Agent Portal.
- Enter Credentials: Input your username and password in the designated fields.
- Login: Click the “Login” button to access your account.
Add the Agent Portal to a Custom Menu Link
- Open Your Agency Account: Log into your agency account and click on the Settings button.
- Access Custom Menu Link: Scroll down and click on the Custom Menu Link option.
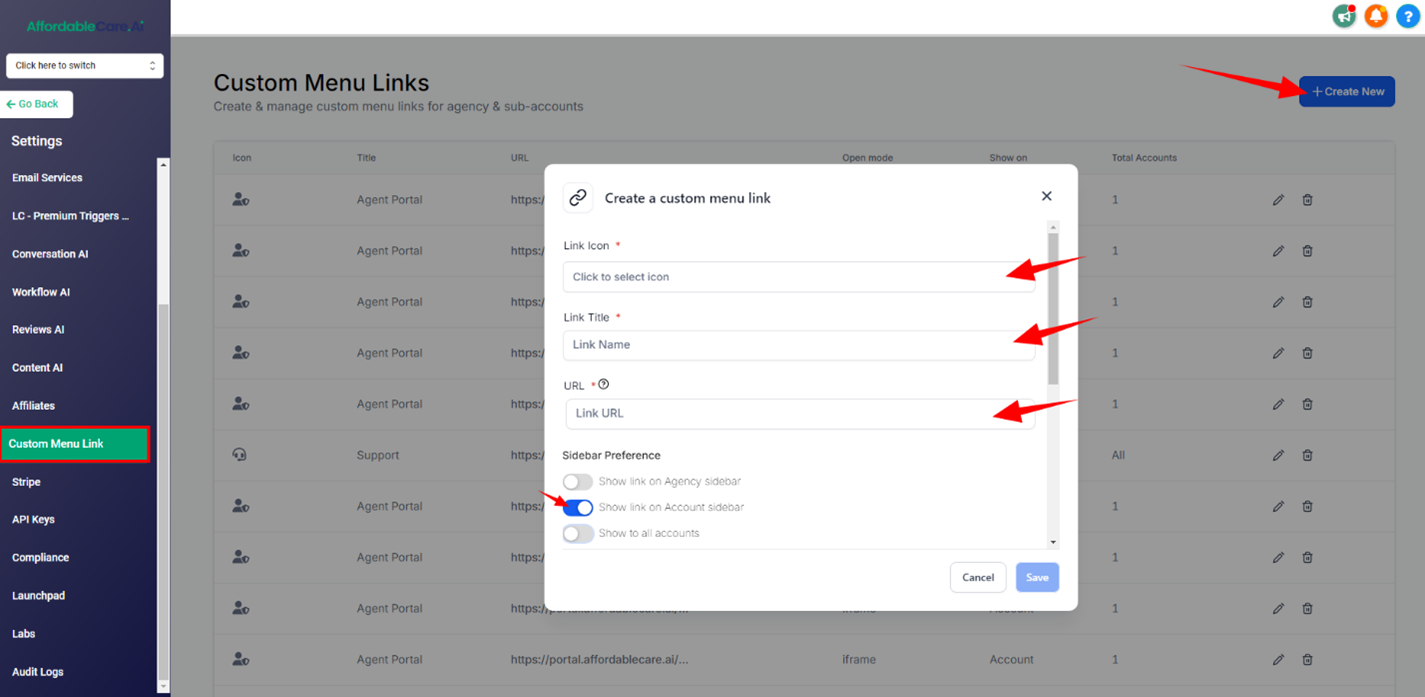
Create a New Link:
- Click the Create New button, and a pop-up window will appear.
- Select an icon and add a title for the link.
- Paste your agent portal URL link into the third input field.
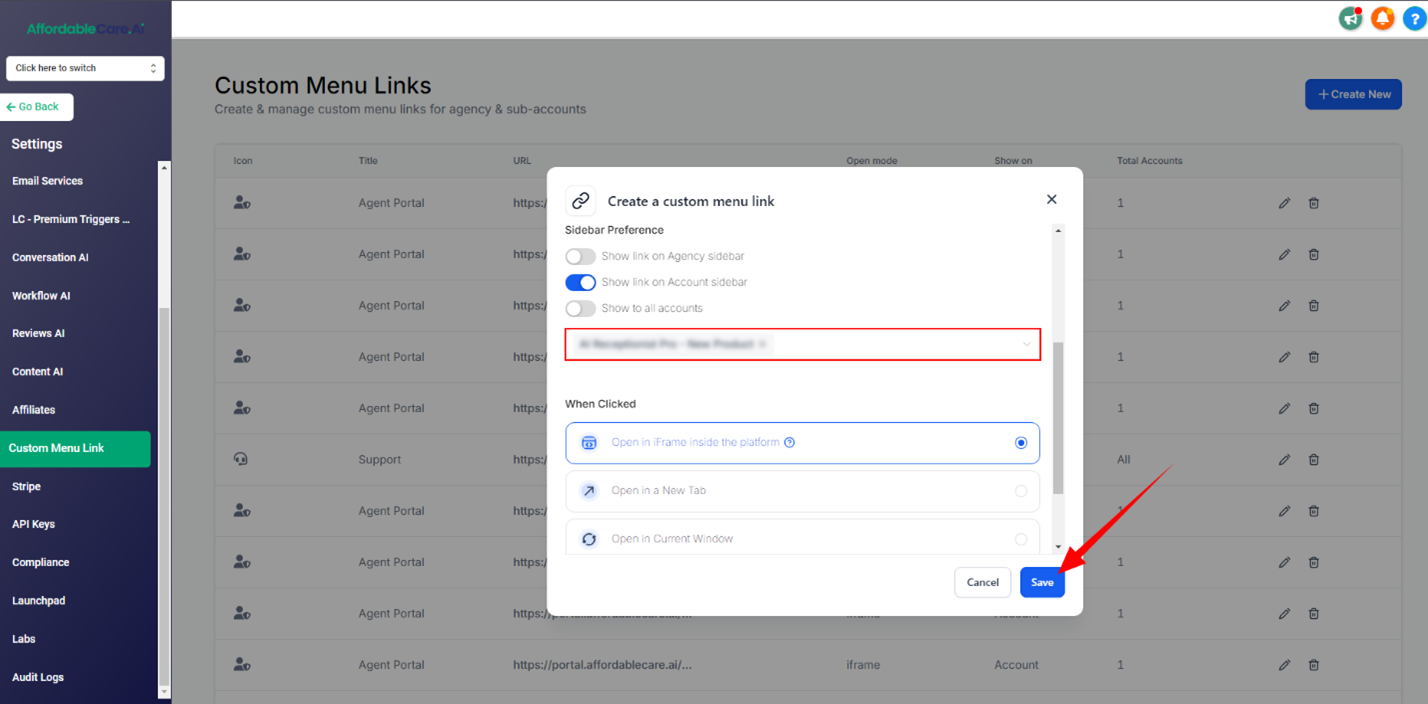
- Enable the Sidebar Link: In the Sidebar Preference section, enable the option to show the link on the account sidebar.
- Select Sub-Account: Choose the sub-account where you want to enable the agent portal button, then save the changes.
To read the full article, click here. How to Add the Agent Portal in a Custom Menu Link
Step 4: Agent Portal Set-Up: #
How to Add a Custom Webhook #
Setting Up the Custom Webhook in Your Agent Portal
- Access the Automation Section:
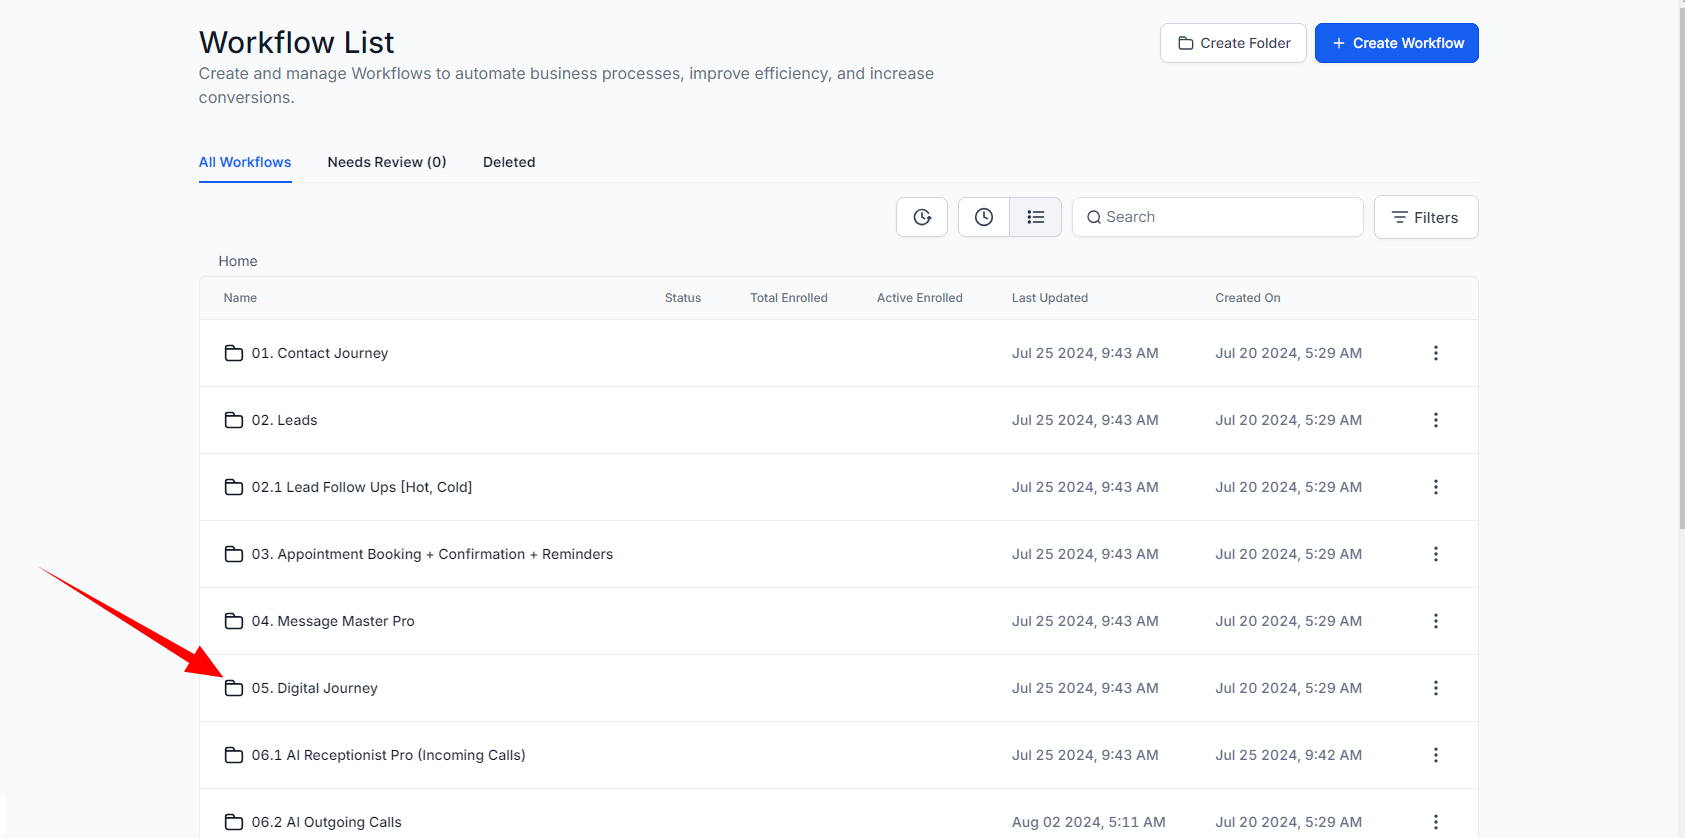
- Go to the Automation section in your agent portal.
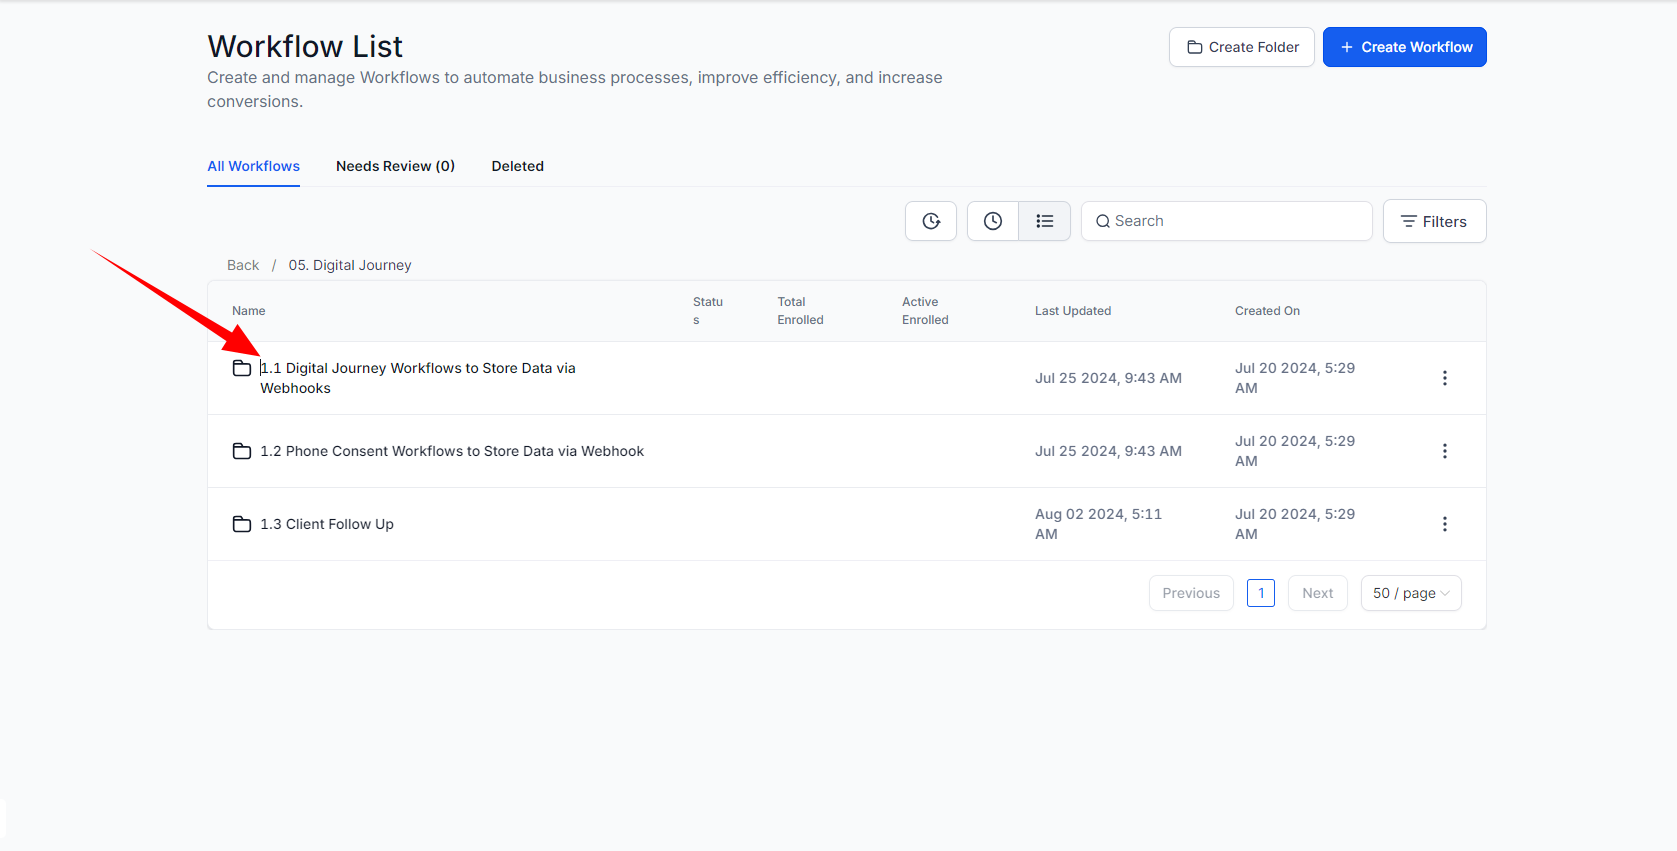
- Open the first folder labeled 05. Digital Journey.
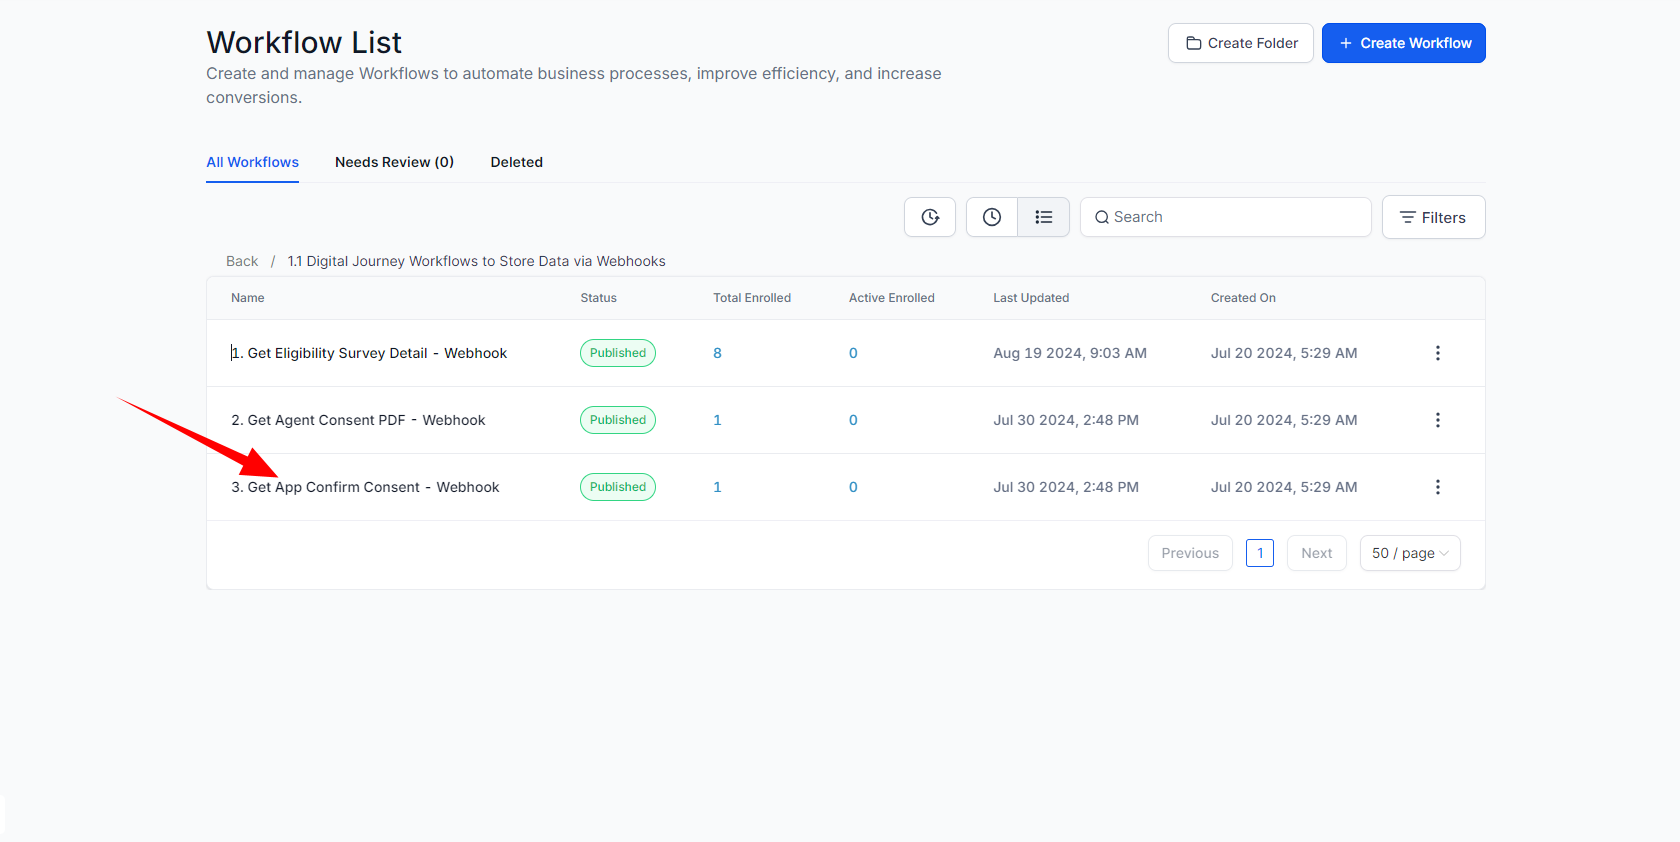
Configure the Digital Journey Workflow:
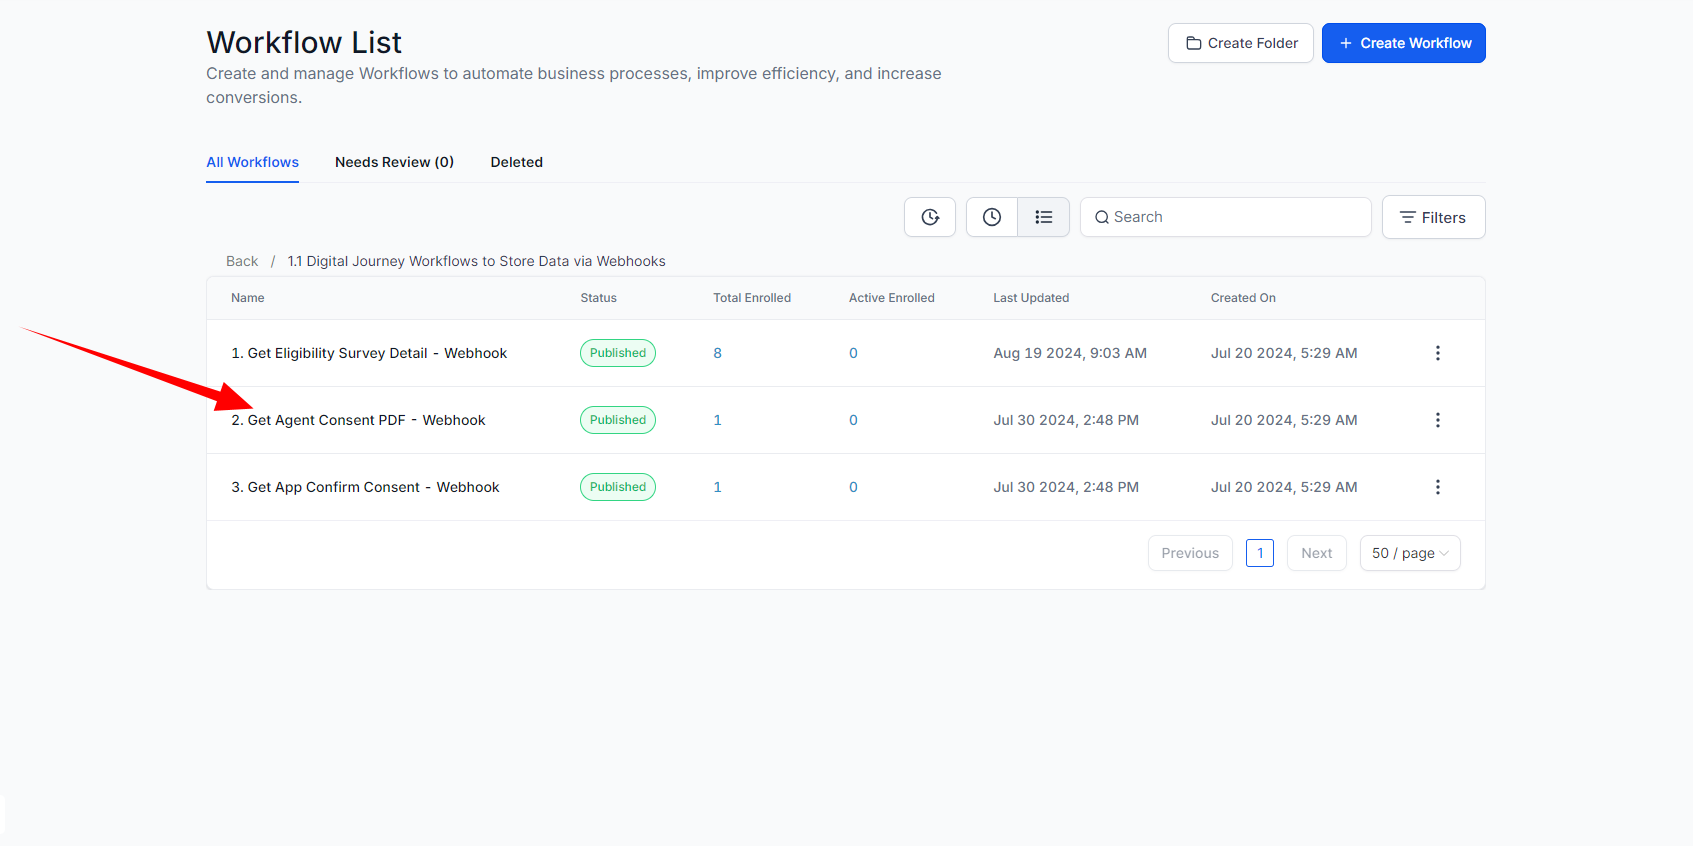
- Navigate to the folder 1.1 Digital Journey Workflow to Store Data Via Webhook.
Setup Complete Application Detail Webhook #
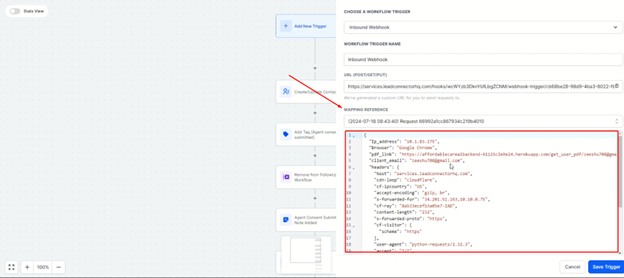
- Open the workflow titled Get Complete Application Detail – Webhook.
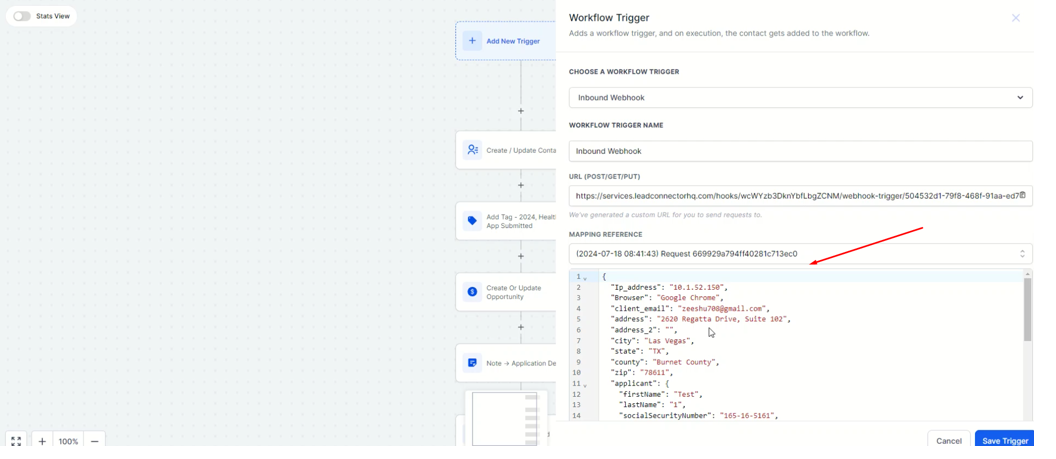
- Within the workflow, add a trigger called Inbound Webhook
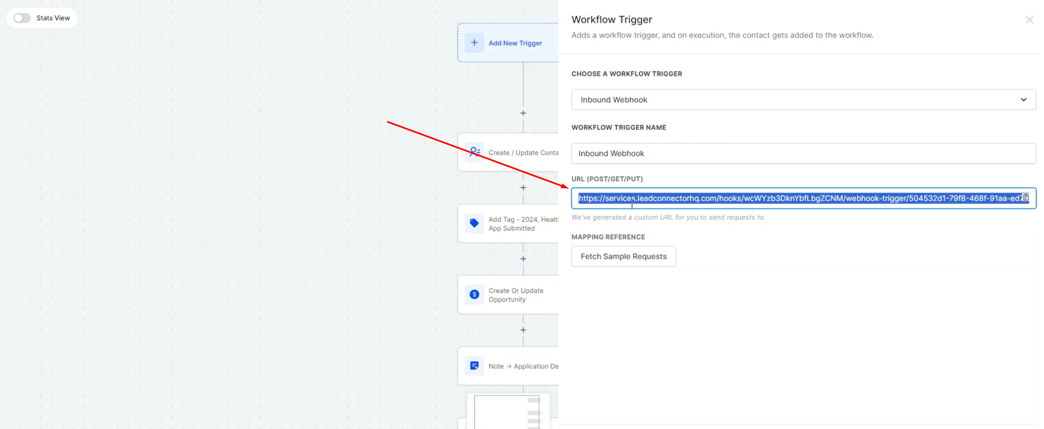
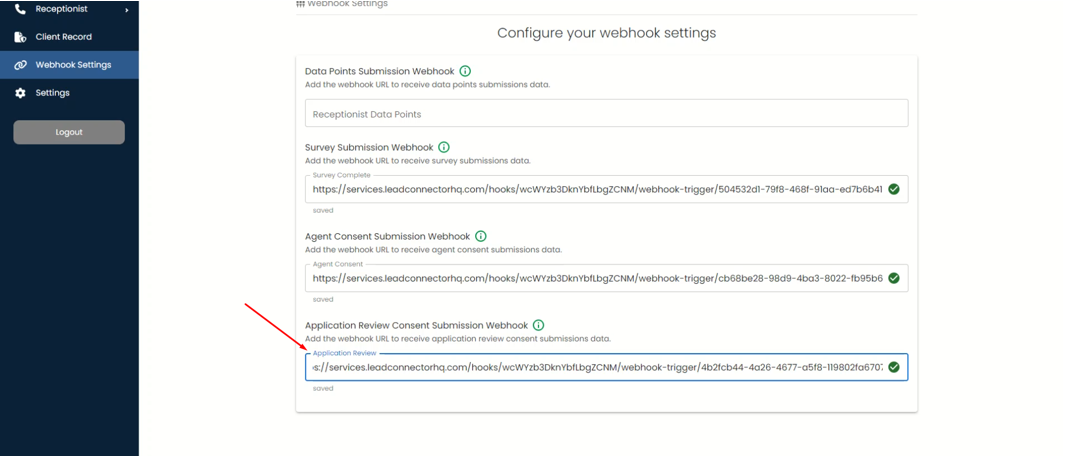
Copy and Paste the Webhook URL:
- Copy the URL provided in the workflow.
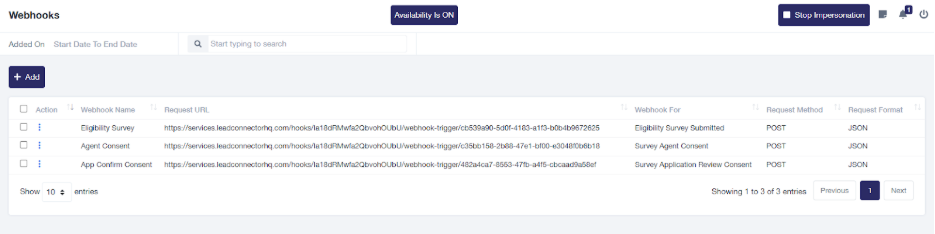
- Paste this URL into the designated area within your agent portal. The URL will be saved automatically.
Complete the ACA Flow:
- Go to the settings in your agent portal and copy the ACA Flow link.
- Paste this link into the next tab to access the survey.
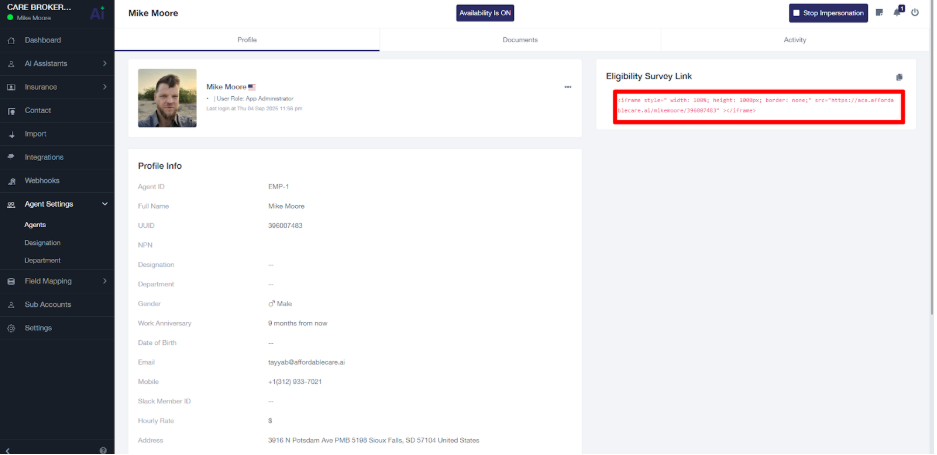
- Fill out the survey with the necessary information, such as your first name, type of insurance you’re looking for, income, phone number, and other relevant details.
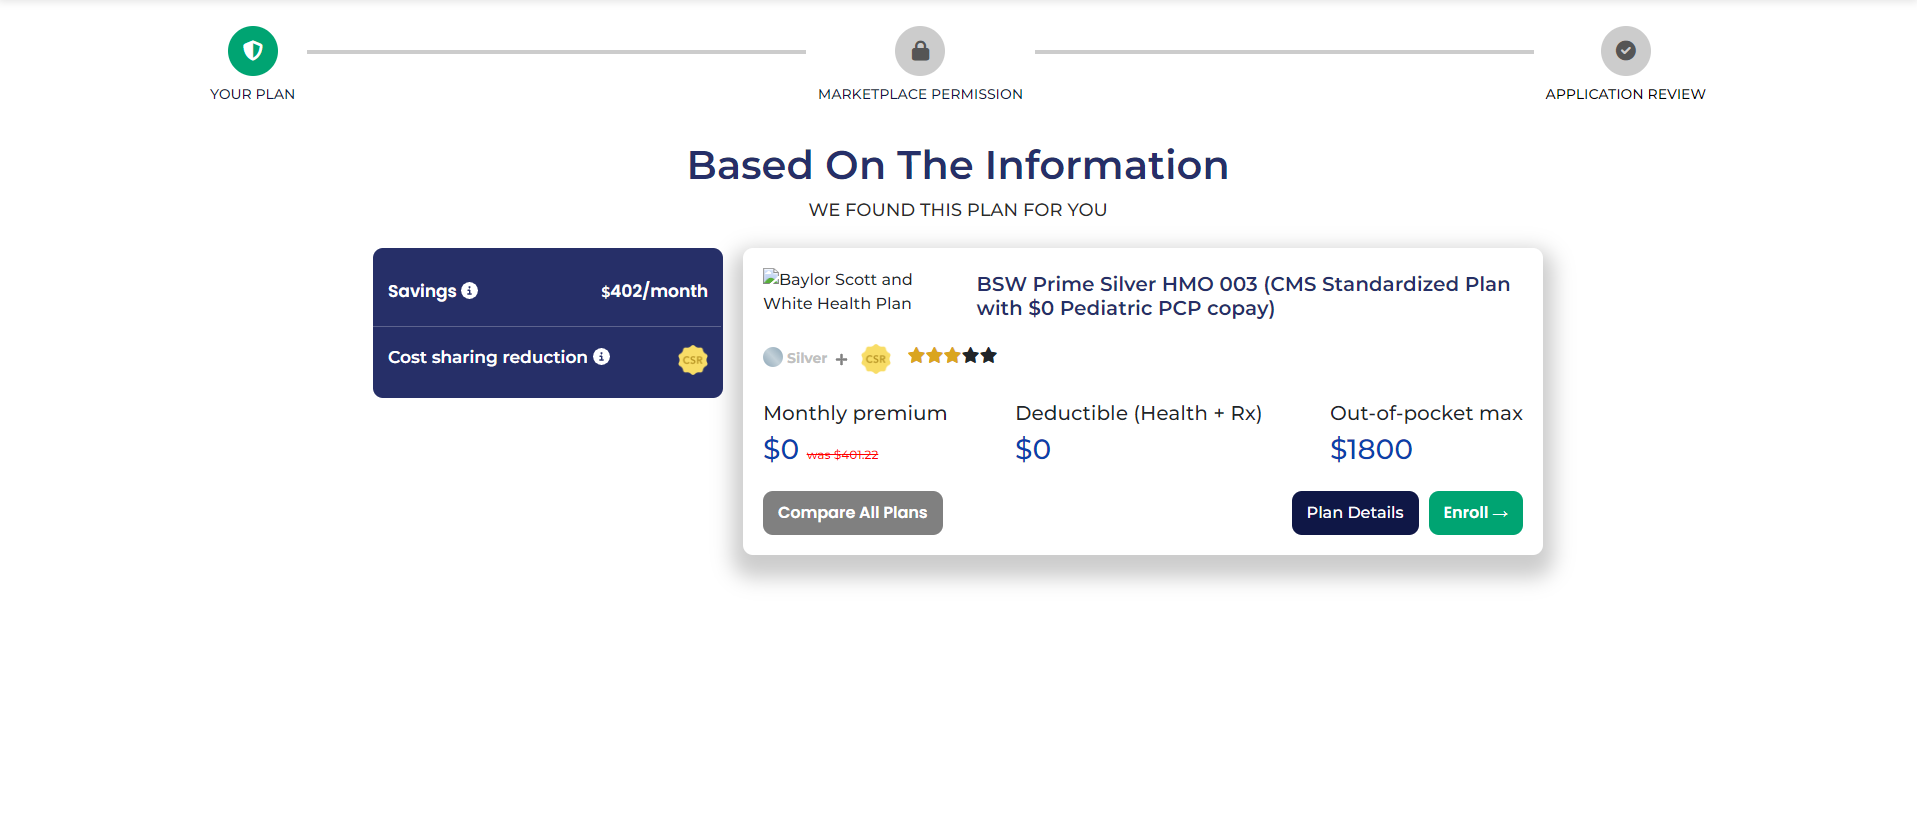
Review the Fetched Data:
- After submitting the survey, you will receive a plan based on your information.
- Return to the workflow to check if the information has been fetched by the webhook. Click here for more details on the inbound webhook.
- Save the trigger and the workflow.
- Important Note: After saving the trigger, it will automatically create a new Action ” Create Contact”. You need to delete it because we already added that action.
Setup Agent Consent Confirmation Webhook #
-
- Open the second workflow titled 02. Get Agent Consent PDF – Webhook.
- Repeat the same steps as before:
- Add an Inbound Webhook Trigger.
- Copy the provided URL (POST/GET/PUT).
- Paste it into the Agent Consent Submission Webhook within your agent portal.
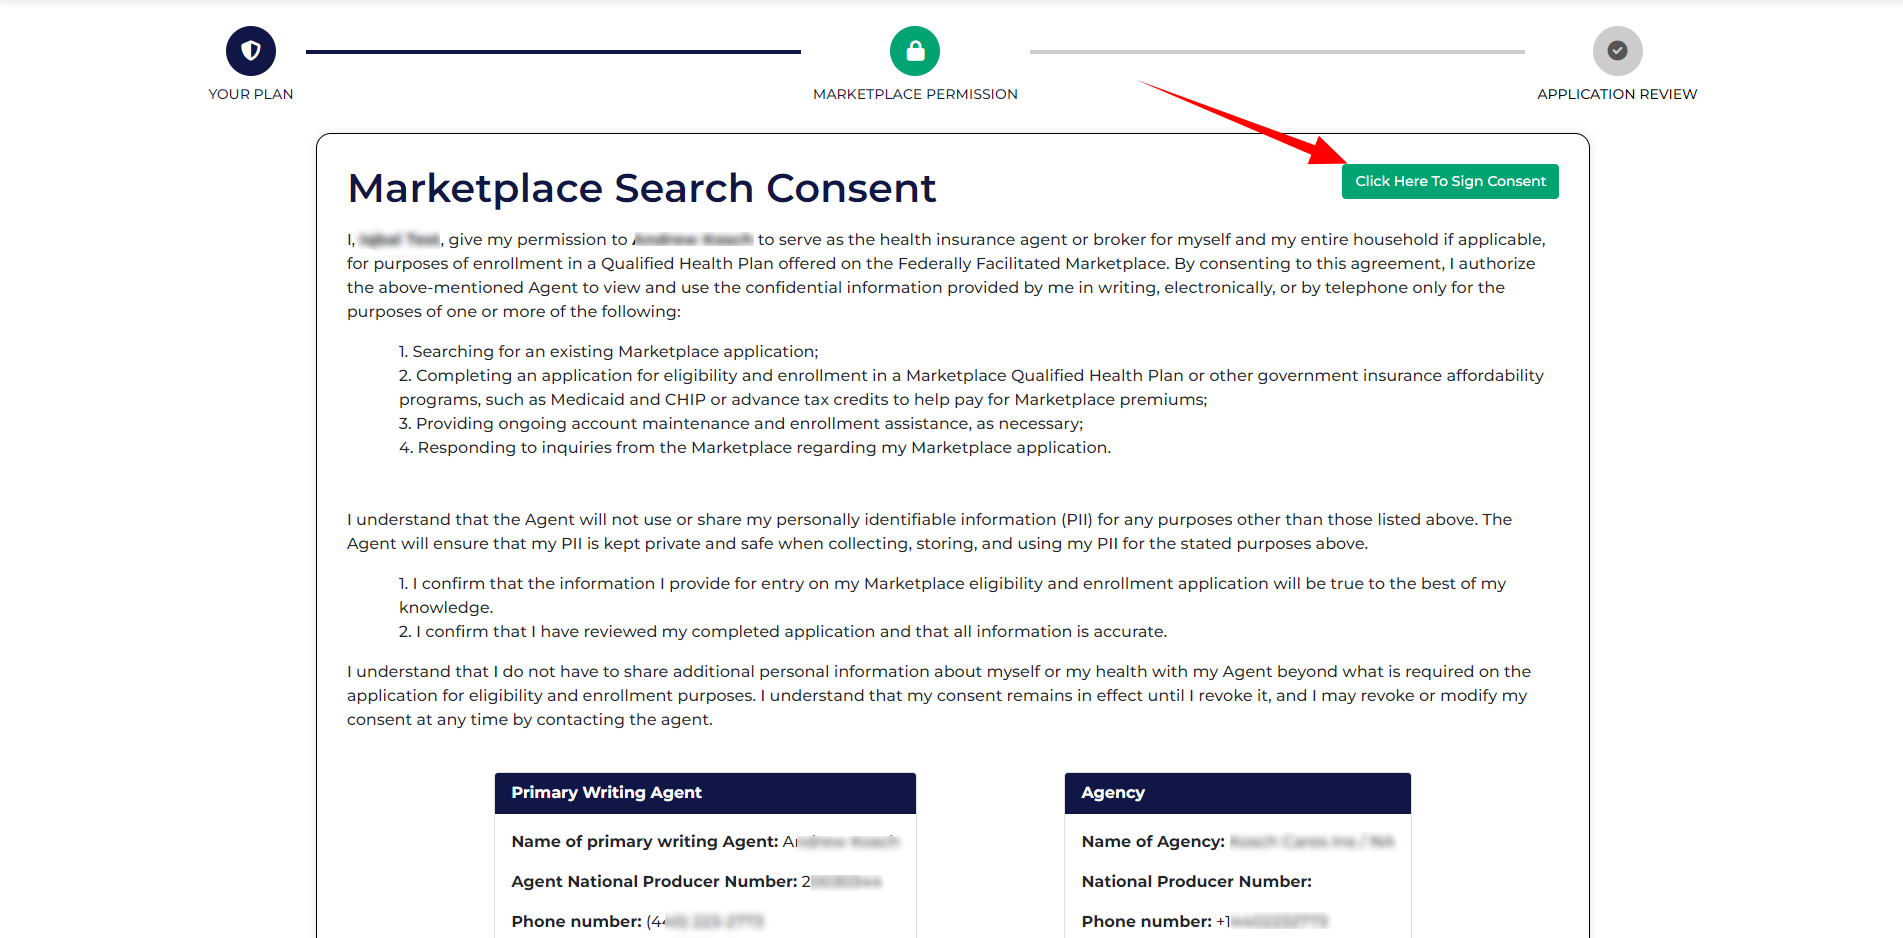
Complete the Agent Consent:
- Fill out the agent consent form, including signing it in the signature pad.
- Check the data fetched by the webhook by clicking on the record.
- Save the trigger and the workflow.
- Important Note: After saving the trigger, it will automatically create a new Action ” Create Contact”. You need to delete it because we already added that action.
Setup Application Review Consent Webhook #
-
- Open the workflow.
- Repeat the same steps as before:
- Add an Inbound Webhook Trigger.
- Copy the provided URL (POST/GET/PUT).
- Paste it into the Agent Consent Submission Webhook within your agent portal.
- Copy the URL from the workflow and paste it into your agent portal.
Complete the Application Review Consent:
- Sign and submit the application consent.
- Verify that the data has been fetched by the webhook in the workflow.
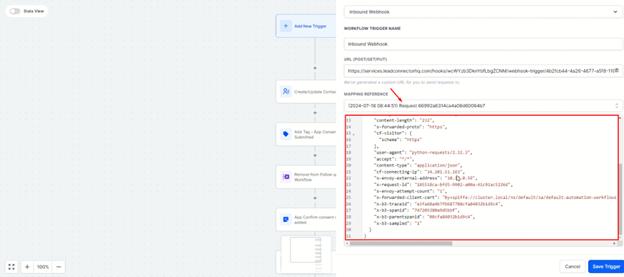
- Save the trigger and the workflow.
- Important Note: After saving the trigger, it will automatically create a new Action ” Create Contact”. You need to delete it because we already added that action.
By following these steps, you can successfully add and configure webhooks in your agent portal.
To read the full article, click here. How To Add Custom Webhook in Your Agent Portal
Step 5: Do Agent and Agency Settings in the Agent Portal #
Click on the settings button in the agent portal. Here you can easily change all your personal and agency details.
01- In Personal Details: Like First and last name, Email address, Phone number and Agent NPN number.
02- Agency Details: Agency name, Address, Contact number, Email.
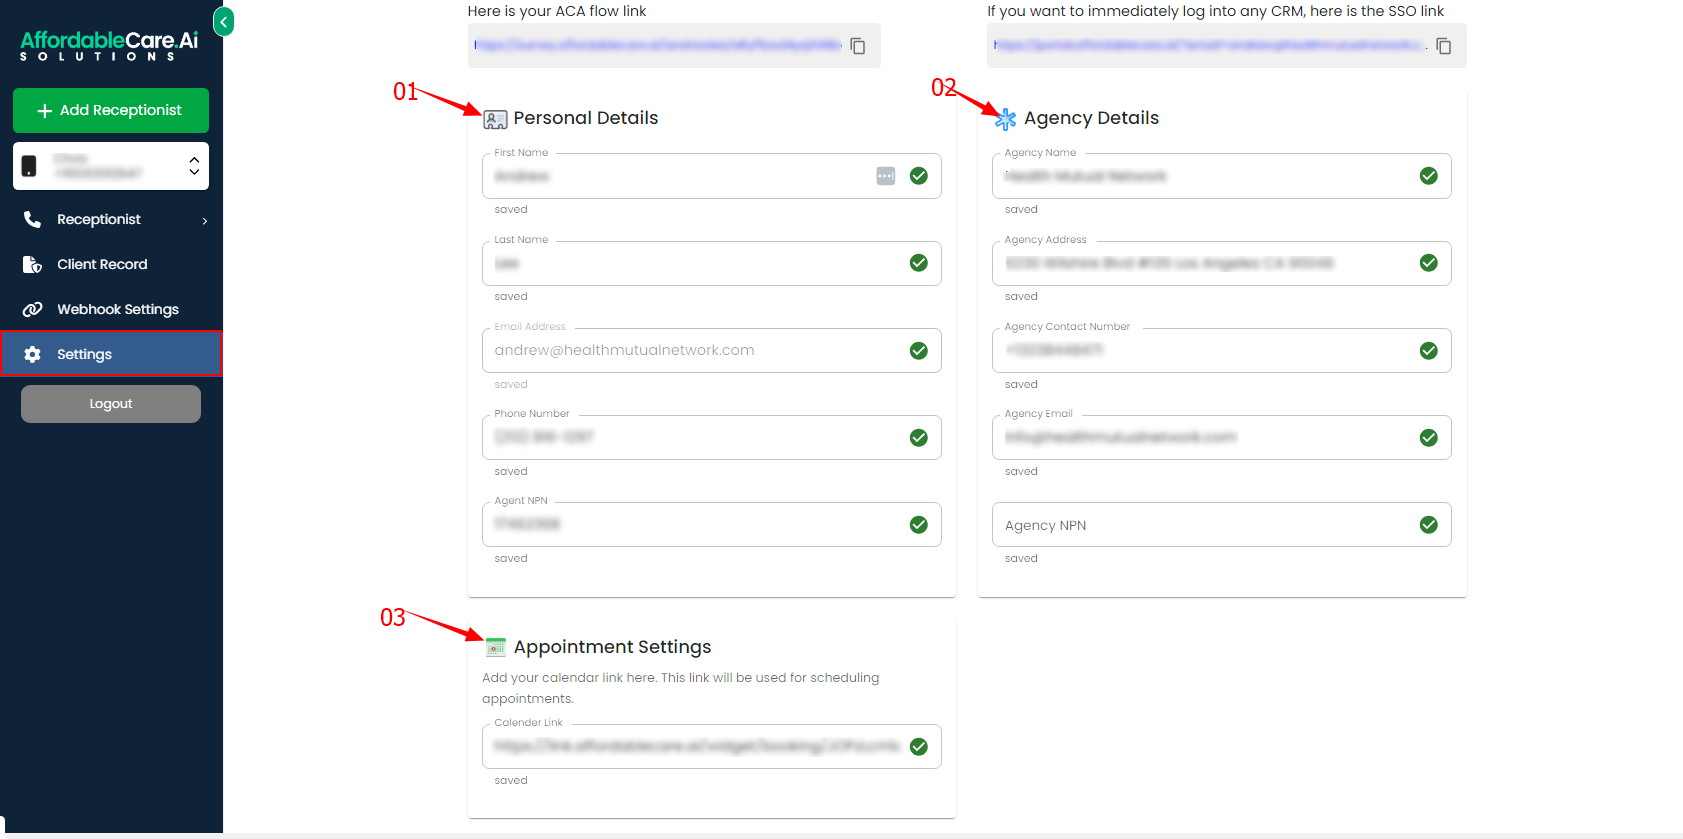
Calendar URL for Appointments #
At the end of the settings section, you have the option to add your calendar URL link for scheduling appointments.
Client Records #
- In the Client record button you are able to check your client’s history, also you download the consents separately for every single client or also for all the clients in bulk by clicking
- You can download consents either for individual clients or in bulk for all clients by clicking the DOWNLOAD EXCEL button.
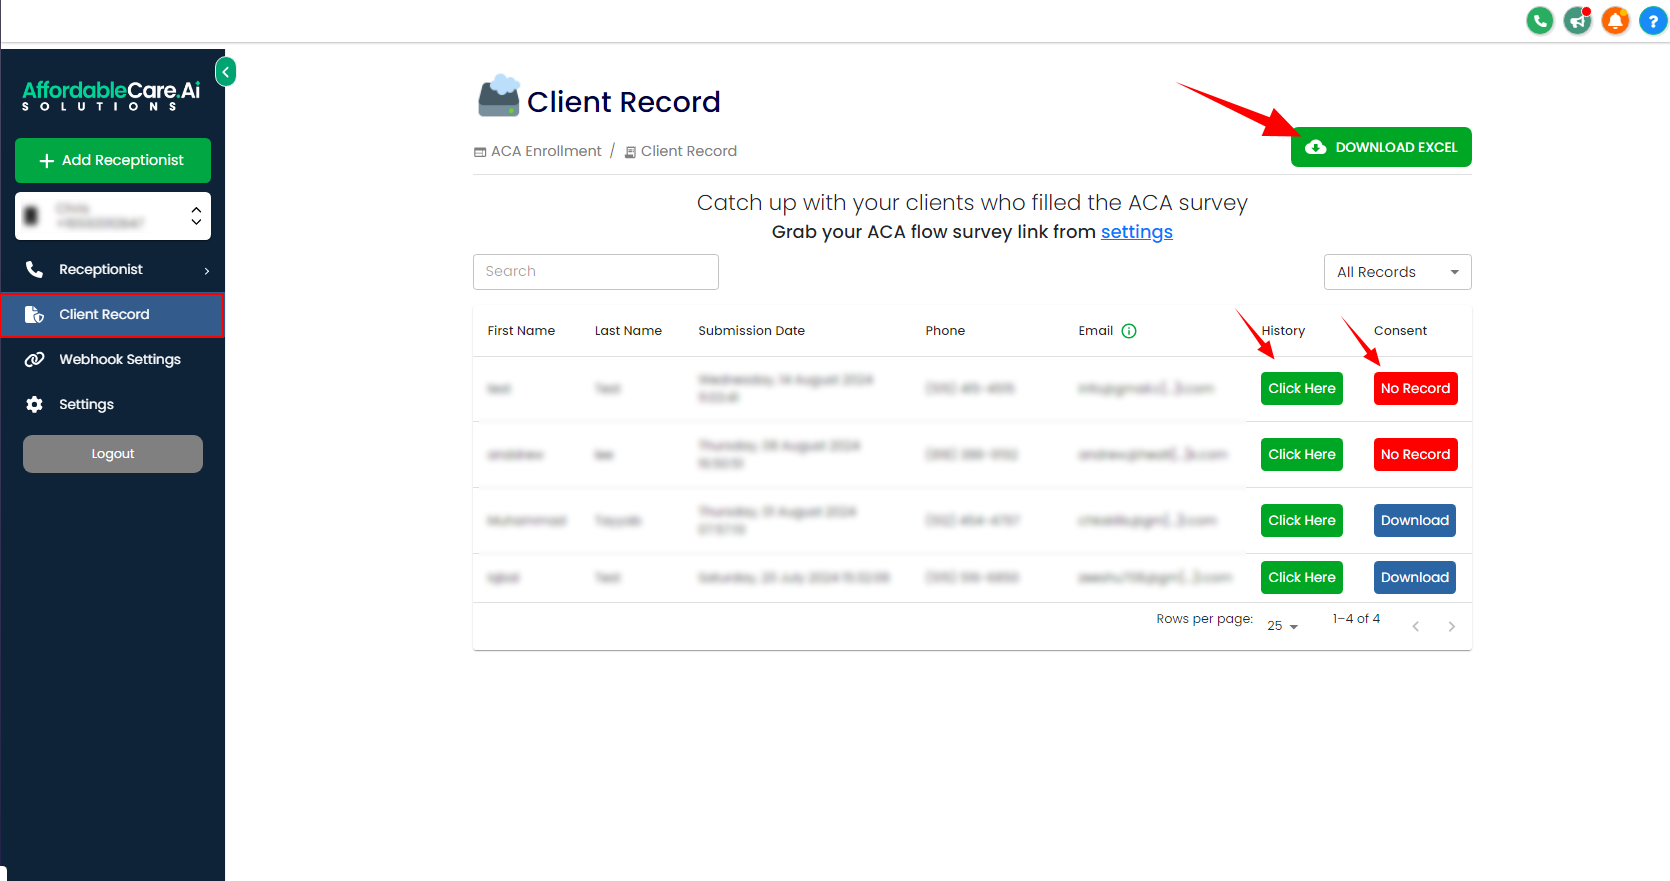
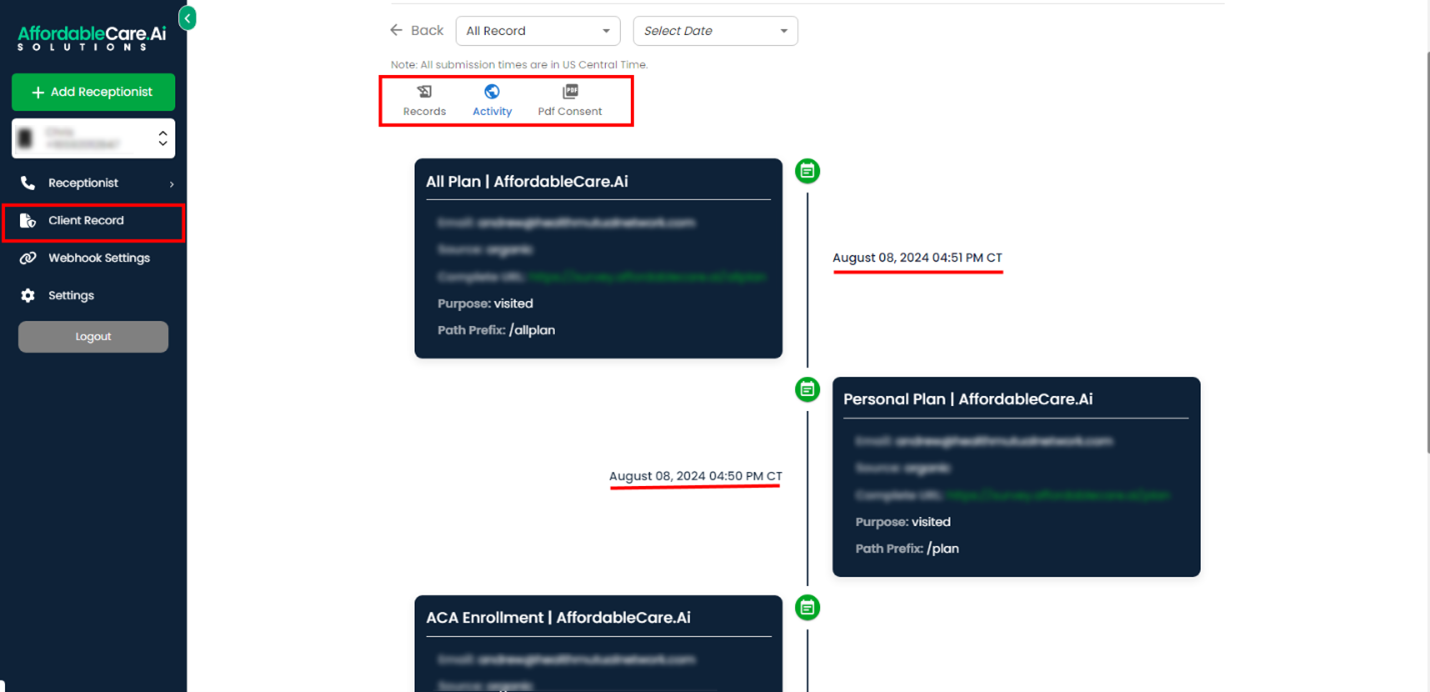
- By clicking on the History button, you are able to see all the activities. Like which page your visit at which date and time. Also, you can check all the consents the client fills up.
Frequently Asked Questions (FAQs) #
1. Do I need to import the ACA Flow Snapshot if I am using the ACA Solution CRM?
No, importing the ACA Flow Snapshot is only necessary if you are using your own GoHighLevel CRM. If you are using the ACA Solution CRM, this step is not required.
2. How do I update custom values after importing a snapshot into GoHighLevel?
You can update custom values by navigating to the Settings in your GoHighLevel account, selecting Custom Values, and editing the values to reflect your business details such as NPN number, agency information, and contact details.
3. What is a webhook, and why do I need to set it up in the agent portal?
A webhook is a tool used to automate data exchange between different systems. Setting up webhooks in the agent portal allows seamless data transfer for tasks like collecting completed application details, agent consents, and application review consents, improving the efficiency of your operations.
4. How can I add the agent portal link to the custom menu in GoHighLevel?
To add the agent portal link, log into your GoHighLevel agency account, navigate to Settings, select Custom Menu Link, create a new link, and paste the SSO URL of the agent portal. You can then enable the link to appear on the account sidebar for easy access.
5. What should I do if the workflow automatically adds a “Create Contact” action after saving a trigger?
If a “Create Contact” action is automatically added after saving a trigger, you should delete it. This step is necessary because the action has already been incorporated into the workflow, and a duplicate action may cause inconsistencies.
6. Where can I find the imported snapshots in my GoHighLevel account?
Imported snapshots can be found under the Imported Snapshots tab within Settings (Agency View) -> Account Snapshot.
7. How do I check client history and download consents in bulk?
To check client history, go to the Client Records section and click the History button to view client interactions and activities. To download consents in bulk, click the Download Excel button for all clients or select individual clients as needed.


