- Step 1: Access Automation Settings
- Step 2: Open the Digital Journey Workflow
- Step 3: Add Inbound Webhook Trigger
- Step 4: Copy and Paste the URL
- Step 5: Save and Access ACA Flow Link
- Step 6: Review Data Fetched by Webhook
- Step 7: Agent Consent Confirmation
- Step 8: Add Inbound Webhook Trigger for Agent Consent
- Step 9: Complete Agent Consent
- Step 10: Verify Data Fetch
- Step 11: Save Trigger and Workflow
- Step 12: Add Inbound Webhook Trigger for App Confirmation
- Step 13: Complete and Verify Application Consent
Step 1: Access Automation Settings #
First, go to the Automation section and open the folder named “01. Digital Journey.” 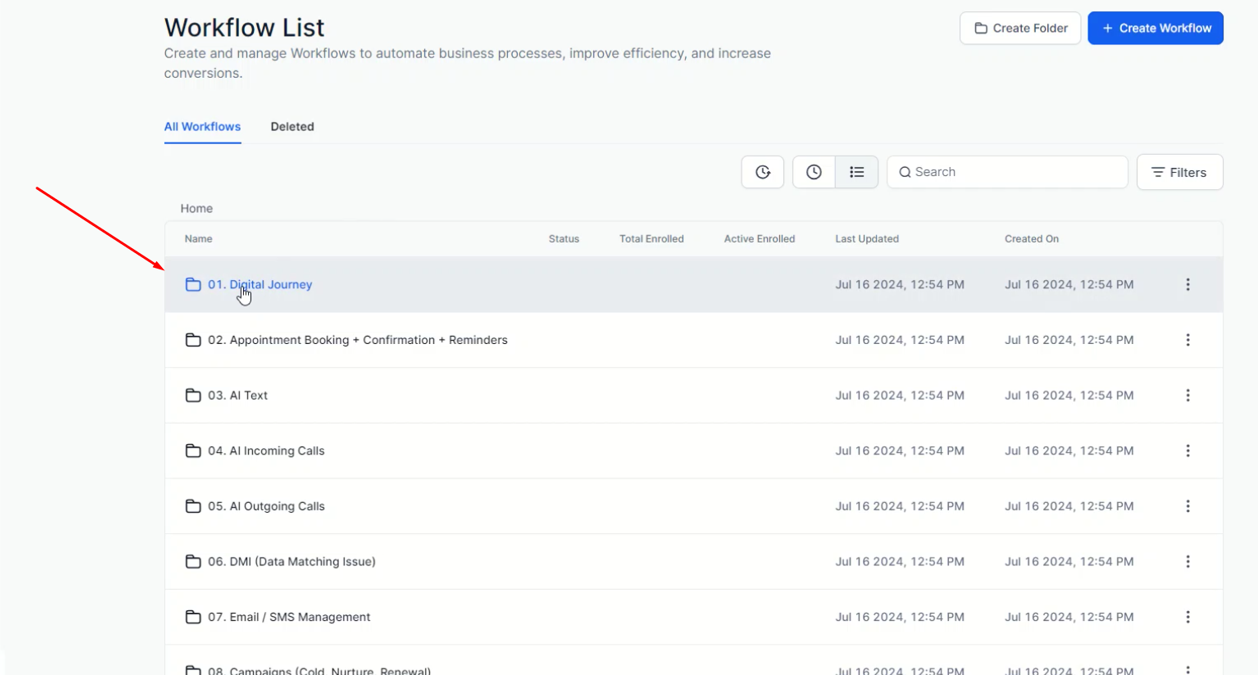
Step 2: Open the Digital Journey Workflow #
Navigate to the folder “1.1 Digital Journey Workflow to Store Data Via Webhook.” 
Step 3: Add Inbound Webhook Trigger #
Open the workflow “1. Get Complete Application Detail – Webhook.” Add the trigger called “Inbound Webhook.” 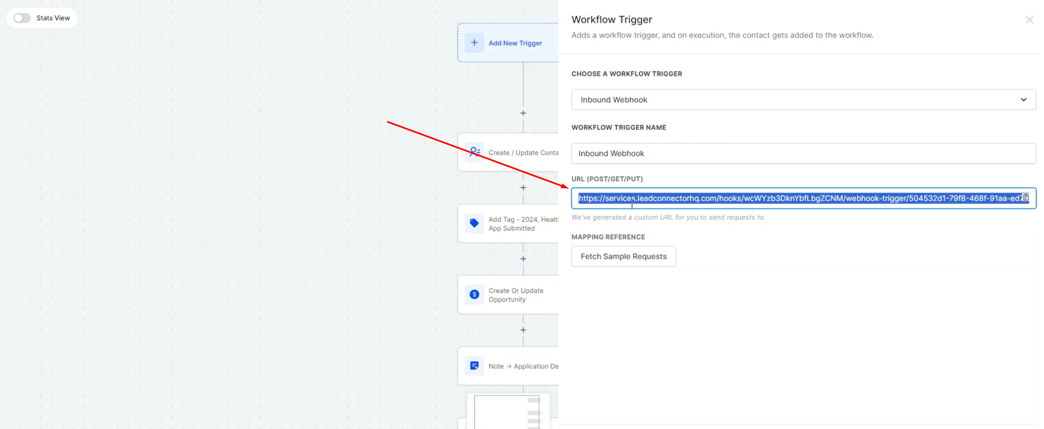
Step 4: Copy and Paste the URL #
Copy the URL (POST/GET/PUT) and paste it into your agent portal. 
Step 5: Save and Access ACA Flow Link #
After pasting the URL, it will be saved automatically. Go to the settings and copy your ACA Flow link. Paste the ACA Flow link into the next tab to fill out the survey. Provide all necessary information, such as your first name, type of insurance, income, phone number, and other details. 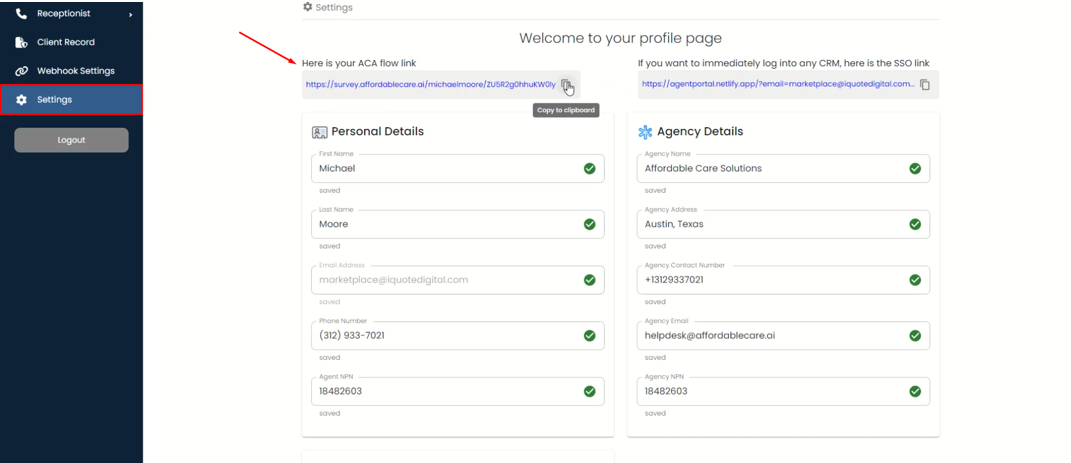
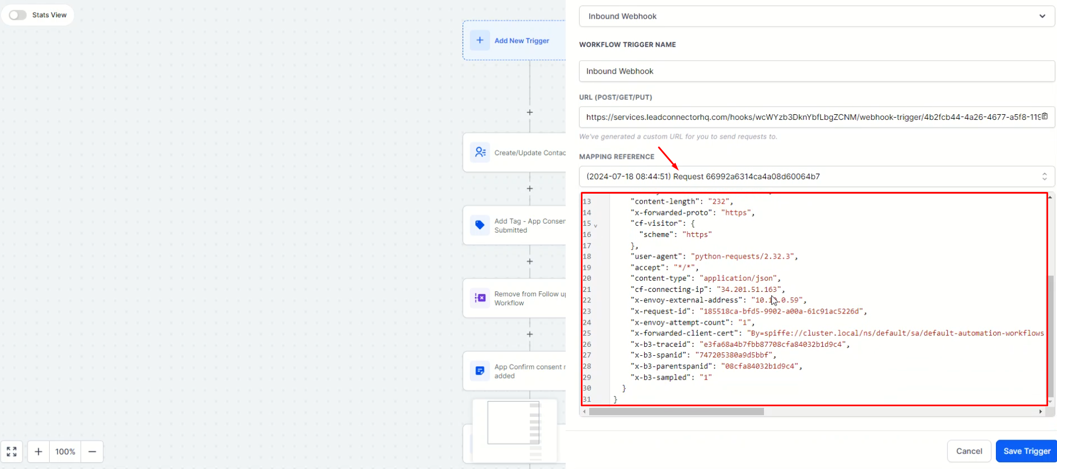
Step 6: Review Data Fetched by Webhook #
Submit the survey and receive the plan based on your information. Return to the workflow and check the data fetched by the webhook. Save the trigger and the workflow. 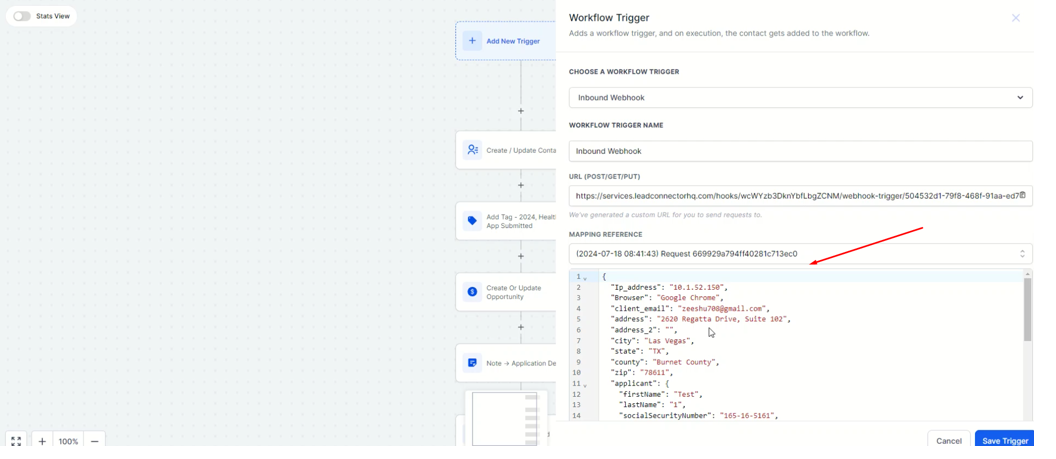
Step 7: Agent Consent Confirmation #
Open the second workflow named “02. Get Agent Consent PDF – Webhook.” 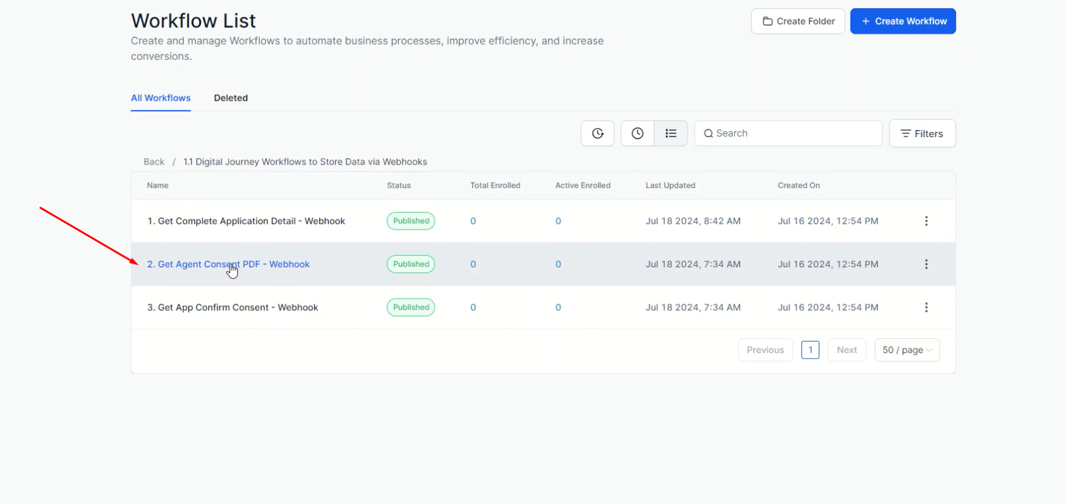
Step 8: Add Inbound Webhook Trigger for Agent Consent #
Repeat the previous steps: add an Inbound Webhook Trigger, copy the URL (POST/GET/PUT), and paste it into the Agent Consent Submission Webhook in your agent portal. 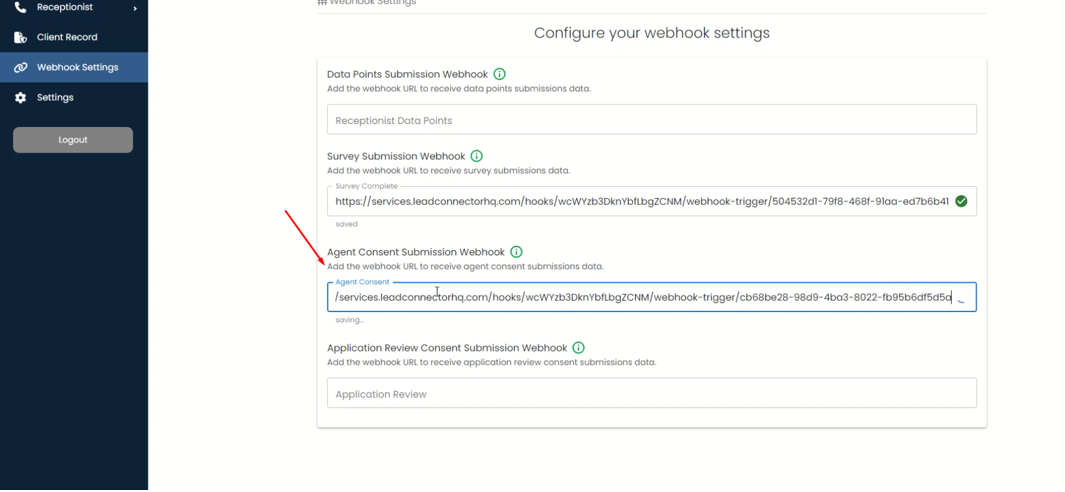
Step 9: Complete Agent Consent #
Fill out the agent consent by signing in the signature pad. 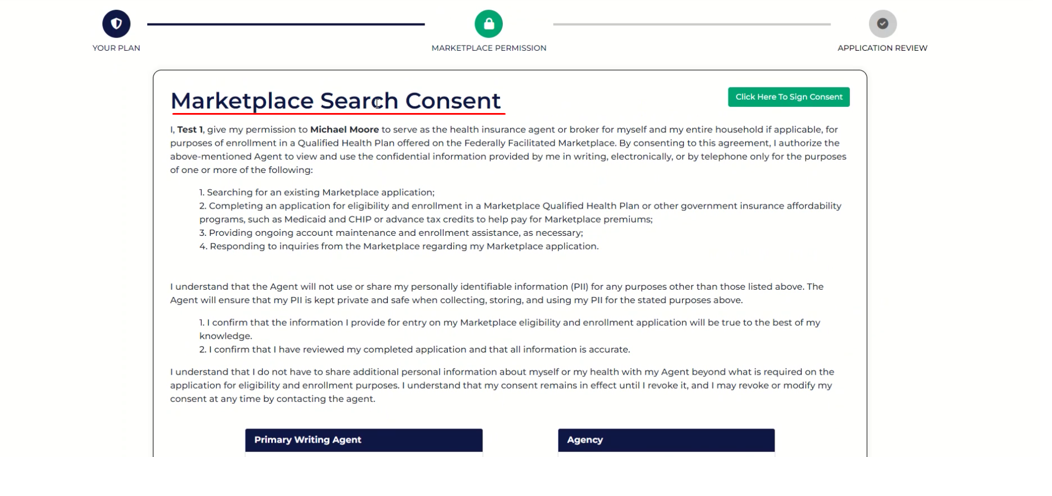
Step 10: Verify Data Fetch #
By simply click on the record you se that your data is fetched by the webhook. 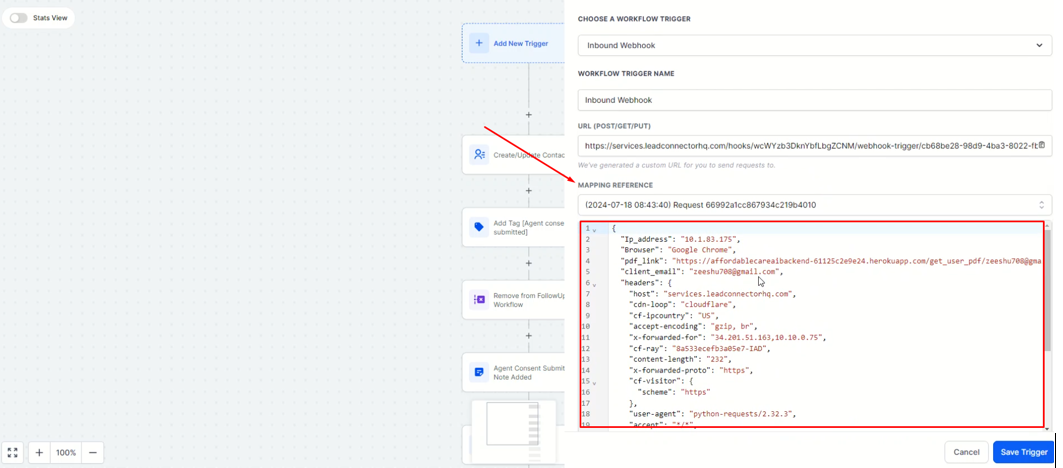
Step 11: Save Trigger and Workflow #
Save the trigger and workflow. Follow the same steps for “App Confirm Consent.” 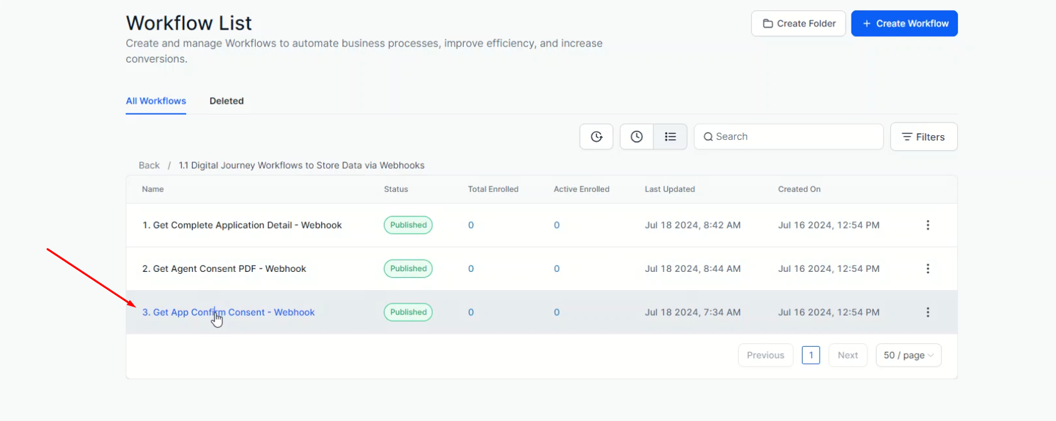
Step 12: Add Inbound Webhook Trigger for App Confirmation #
For app confirmation, follow the same steps: add the Inbound Webhook Trigger, copy the URL from the workflow, and paste it into your agent portal. 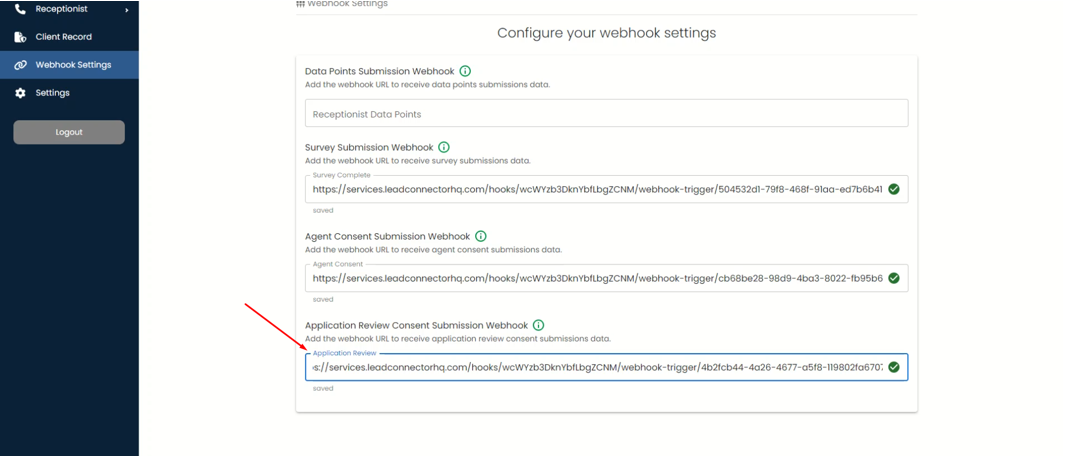
Step 13: Complete and Verify Application Consent #
After pasting the URL, complete the application consent by signing and submitting it. Check the workflow to verify that the data is fetched by the webhook. By following these steps, you can add webhooks to your agent portal.