
Table of Contents
Managing ACA data can feel overwhelming if you’re juggling multiple surveys, yearly enrollment files, and DMI reports. The ACA system simplifies this by letting you import, compare, and track everything in one place—and even sync it directly with your CRM like GoHighLevel.
In this guide, we’ll walk you through the full process step by step. And at the end, you can watch the full demo video for a hands-on view.
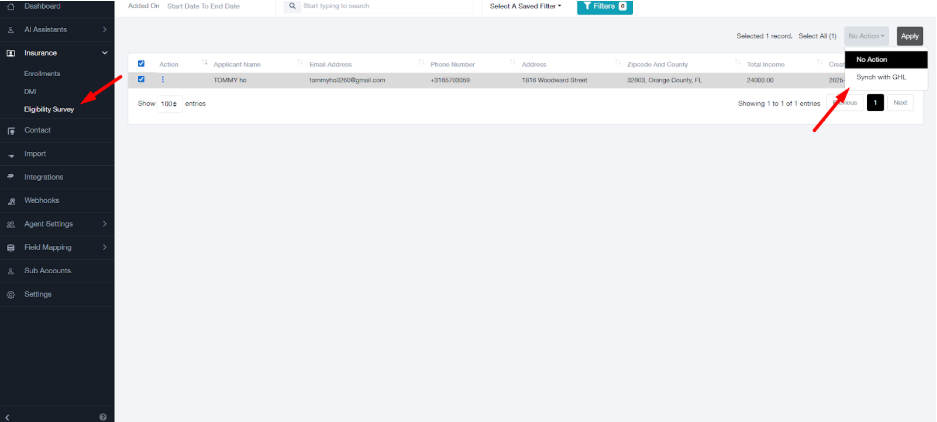
Step 1: Access the Eligibility Survey #
- Go to the Eligibility Survey section.
- Every time a person completes the survey (once, twice, or multiple times), you’ll see a separate entry.
- Apply filters to search for specific entries.
- Sync survey data with GoHighLevel (GHL) to keep your CRM updated.
Step 2: Import the Enrollment File #
- Upload your enrollment file (e.g., 2023, 2024, or 2025).
- Each record appears visually for quick tracking.
- This gives you a baseline before moving forward.
- Firstly Import the enrollment file then DMI.
Step 3: Import the DMI File #
- After importing the enrollment file, upload the DMI file.
- The system automatically maps DMI records with enrollment using the FFM ID.
Step 4: Review Contacts #
- Go to the Contacts section.
- See all survey data per contact.
- Compare survey results with basic information.
- Open the health viewpoint role main for full details.
Step 5: Compare Multiple Files #
- Upload three or four files and compare them side by side.
- Spot year-to-year changes.
- Identify updates or corrections quickly.
Step 6: Manage Multiple DMIs per Enrollment #
- A single enrollment may have multiple DMI records.
- All DMIs are shown under that one enrollment.
- Track and analyse them individually.
Step 7: Sync and Track Changes #
- Once reviewed, sync everything with GoHighLevel.
- Track changes between older and newer files.
- Ensure your records stay accurate.


