Client Renewal #
First, in the Client Renewal Automation folder, inside the workflow 1.1 – Segment Management -> Move to Relevant Renewal Campaign, when the 2025 Renewal tag is applied:
- The first condition checks if the contact does not have the 2024 tag and does not have the Health Client tag.
- The second condition checks if the contact has both the 2024 tag and the Health Client tag, and if the Crosswalk field is empty.
- The third condition checks if the contact has both the 2024 tag and the Health Client tag, and if the Crosswalk field is not empty.
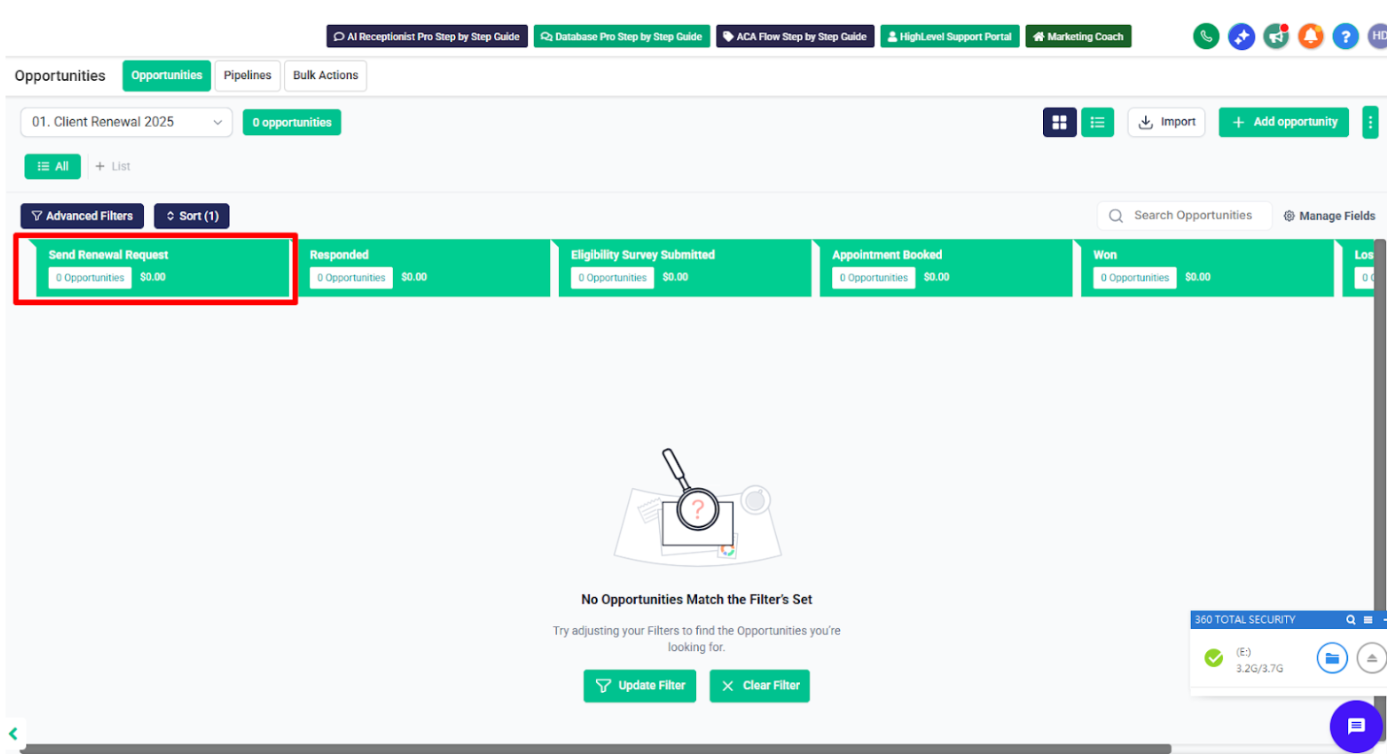
Based on the matching conditions, the contact will be added to the relevant renewal campaign and their pipeline stage will be updated to “Send Renewal Request” in the Client Renewal pipeline.
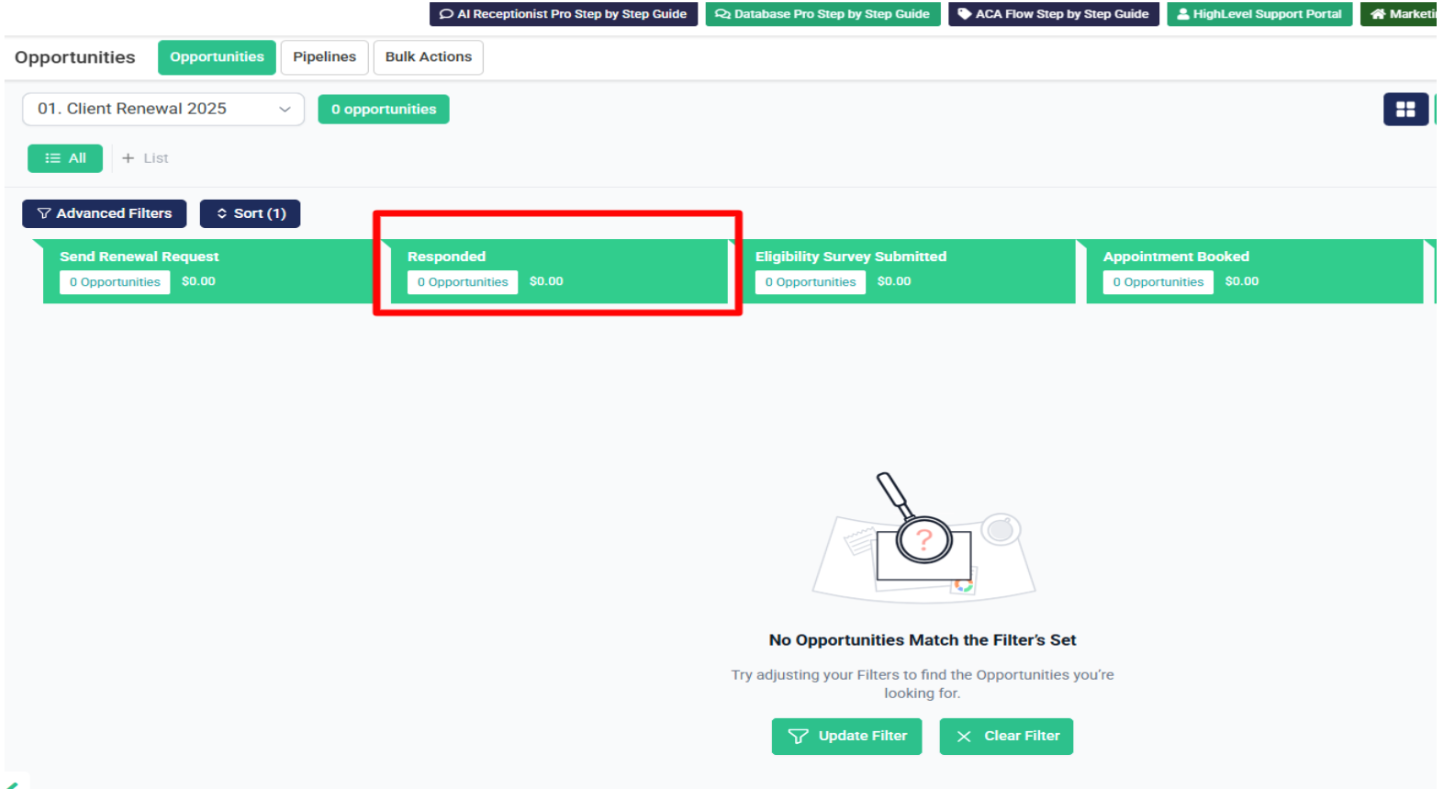
After that, whenever someone replies to any email from these campaigns, they will be enrolled into the workflow 1.2 – Got Replied From Campaign -> Move to Respond Stage.
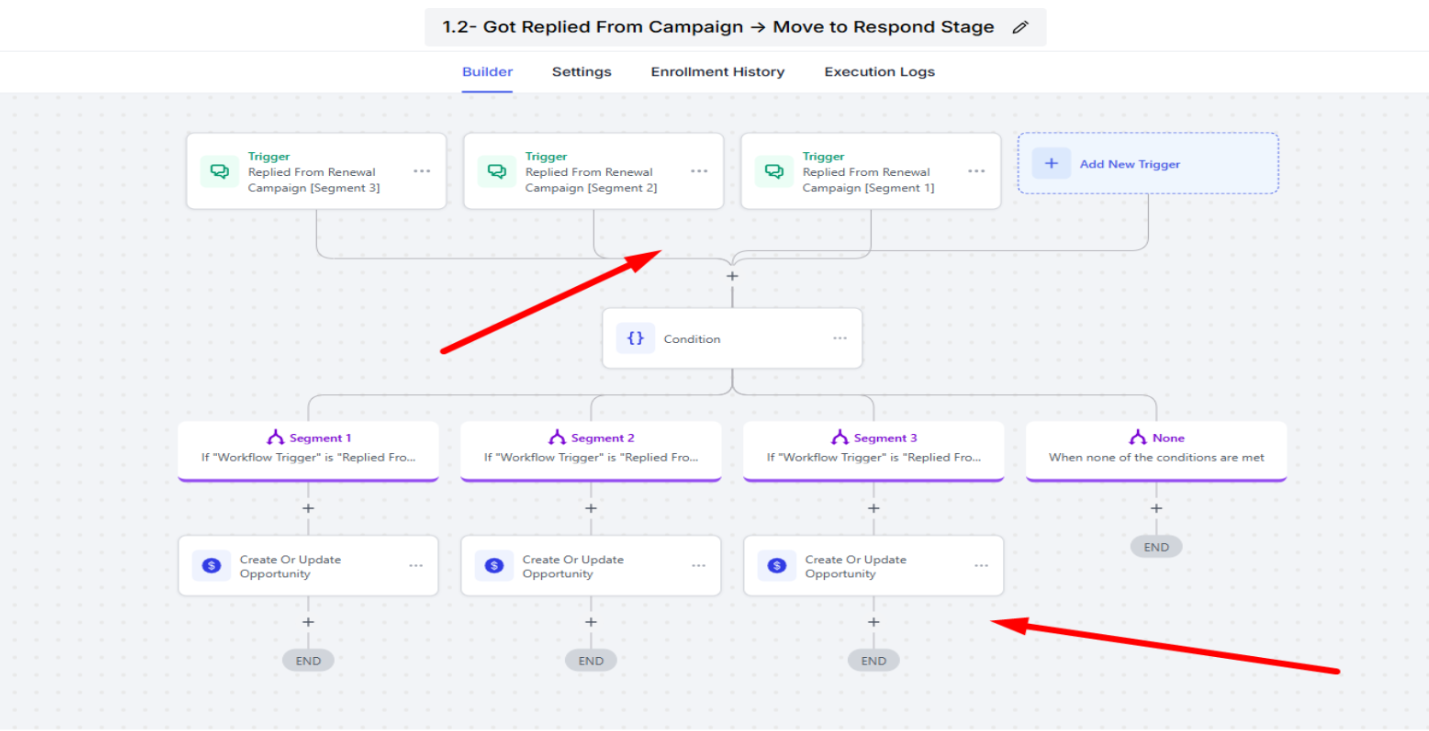
they will be moved to the “Responded” stage in the Client Renewal pipeline.
After that, in Workflow 1.3, when we apply the 2025 tag:
- The Health Client, 2025 Renewal, and HOT tags will be removed.

- The contact will be moved to the “Won” stage in the Client Renewal pipeline.
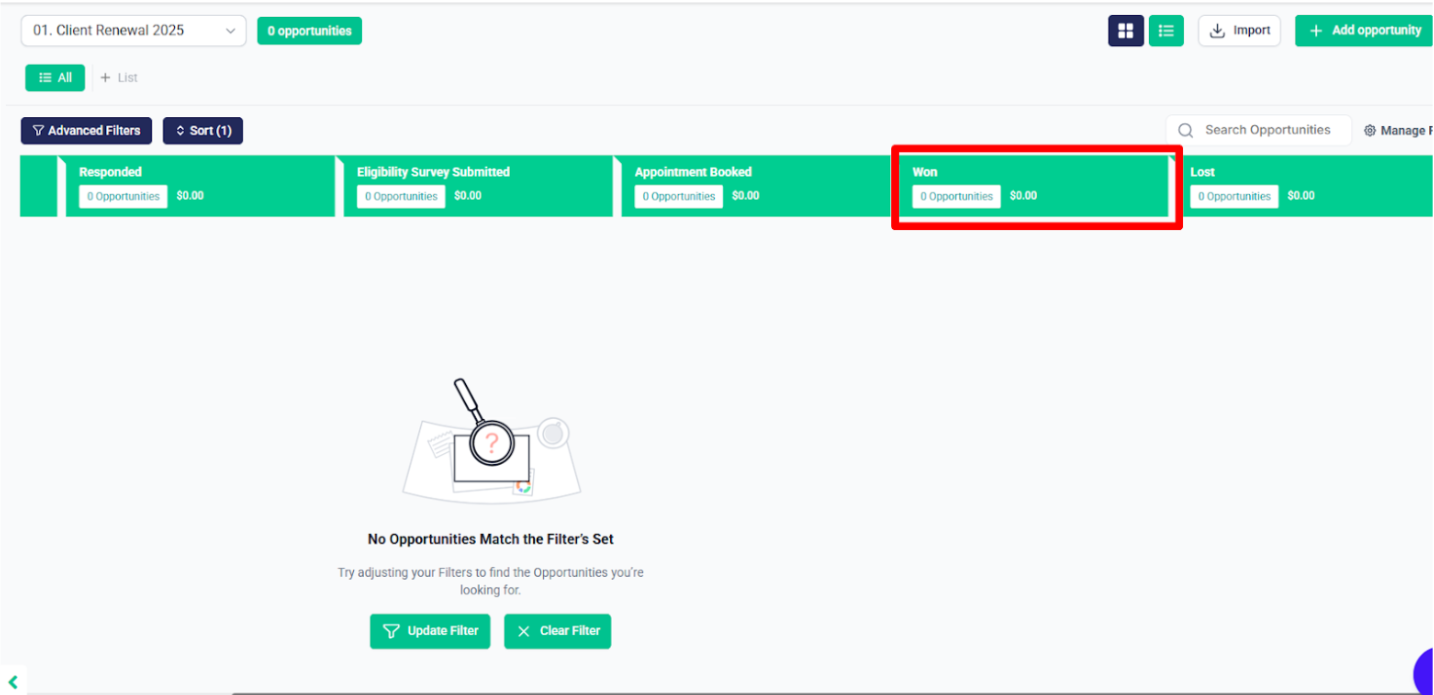
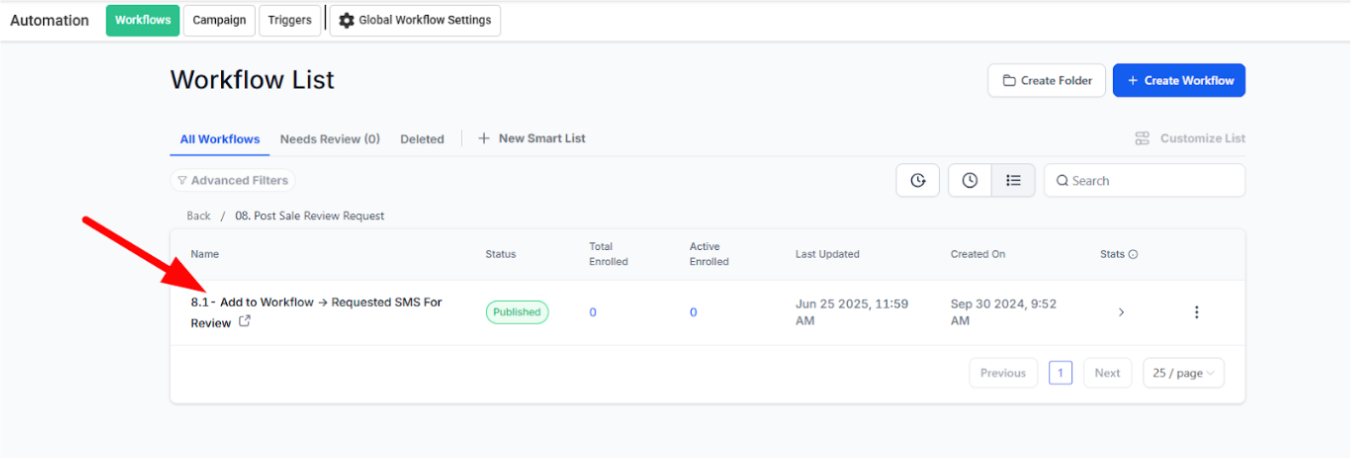
- Finally, they will be enrolled in the Post-Sale Automation workflow.
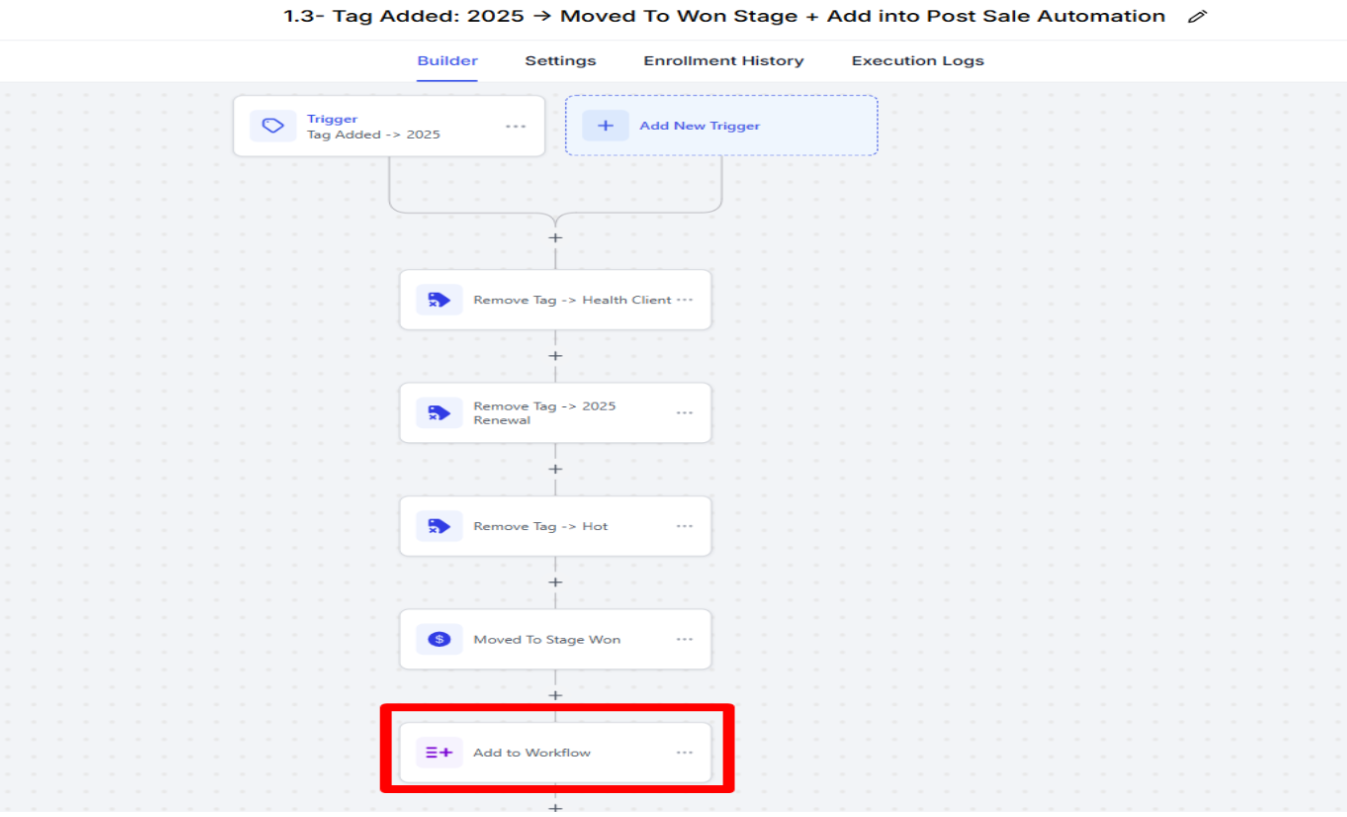
- They will be enrolled in this workflow.
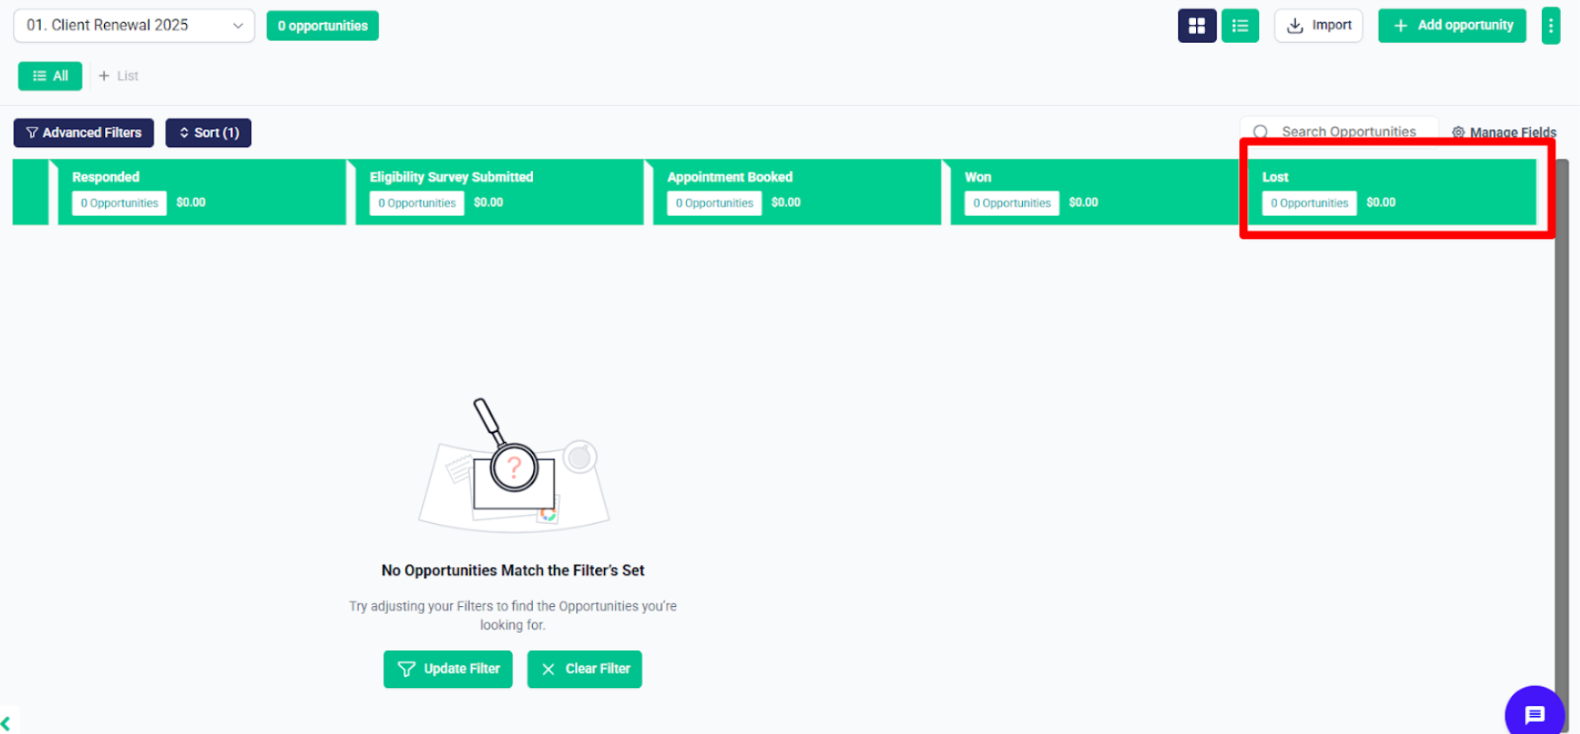
After that, when any of the following tags are applied: Lost, ACA Survey Submitted, AI Appointment Booked, or Appointment Set—then:
- The HOT tag will be removed.
- After this, in the if/else condition, it checks whether the 2025 renewal tag includes or not if include move to further actions; otherwise, it removes it from workflow
And the contact will be moved to the relevant stage in the client renewal pipeline accordingly.
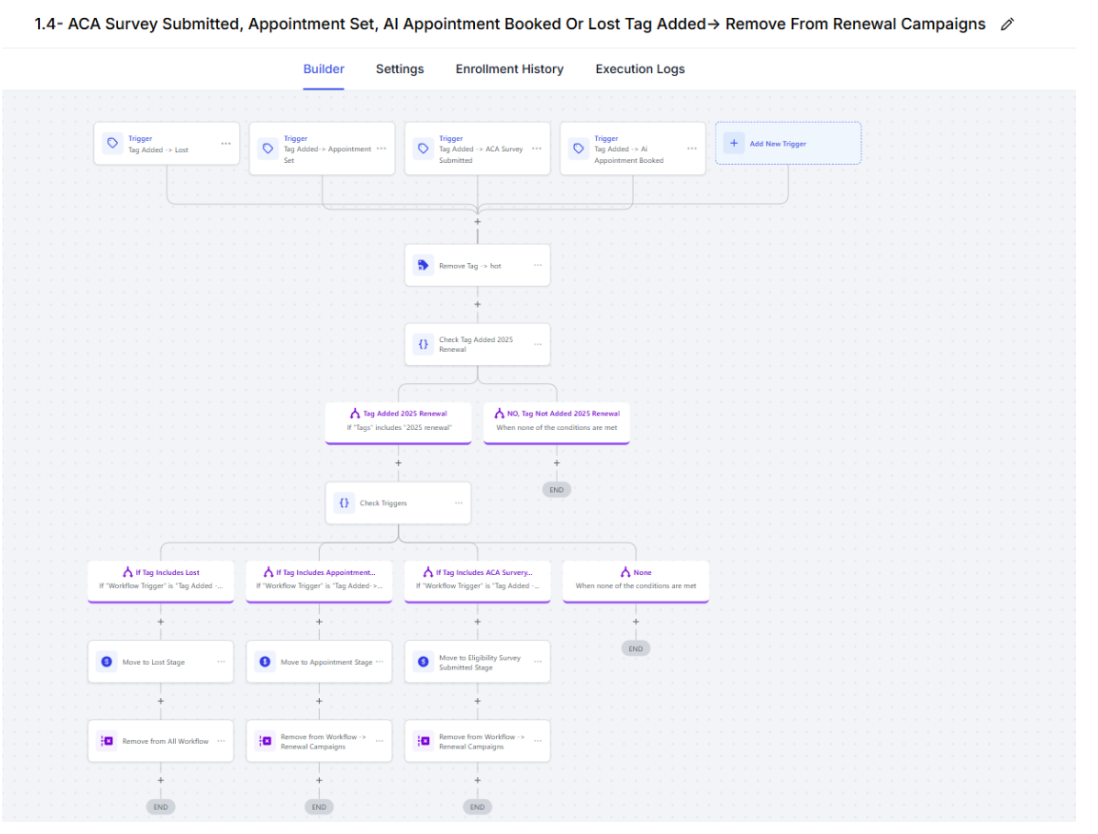
- If the “Lost” tag is added, then the contact will be moved to the “Lost” stage in the client renewal pipeline.
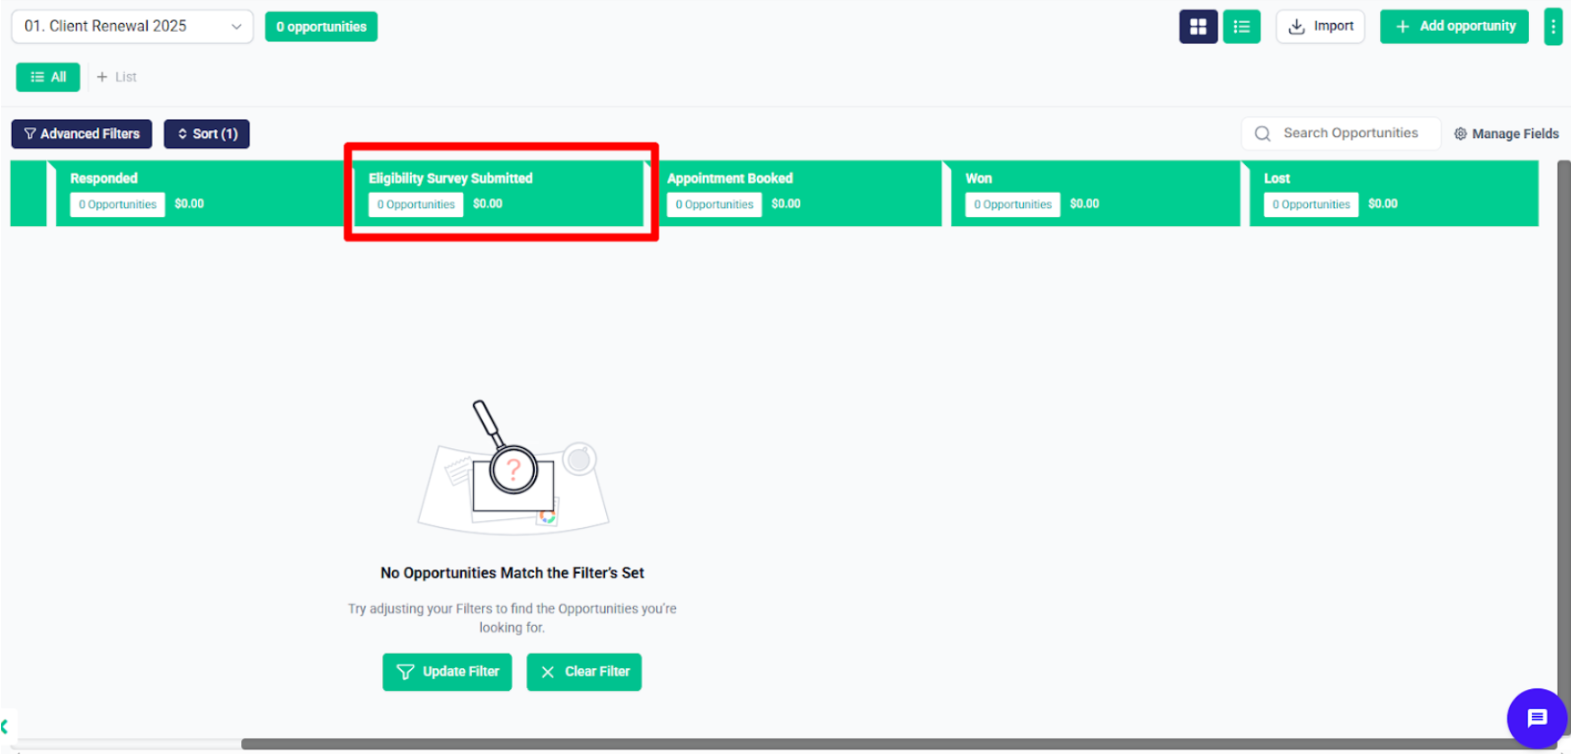
- If ACA survey submitted tag added then contact will be moved to the “Eligibility Survey Submitted” stage in the Client Renewal pipeline.
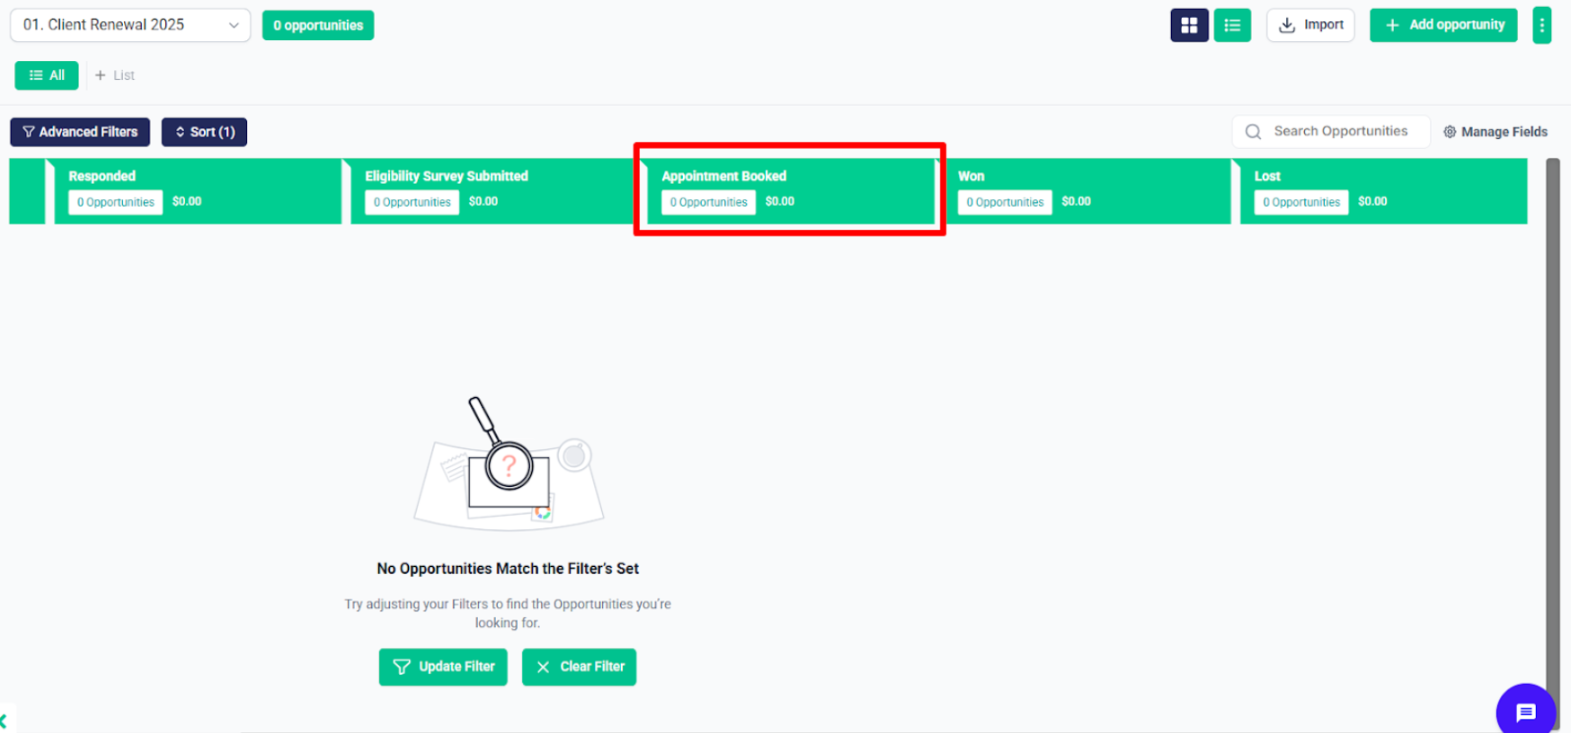
If the Appointment Set” or “AI Appointment Booked” tags are added, then contact will be moved to the “Appointment Booked Stage” stage in the Client Renewal pipeline.
AI Appointment Booked—An appointment has been automatically scheduled by the AI system.
Appointment Set—A manual or system-confirmed appointment has been scheduled.
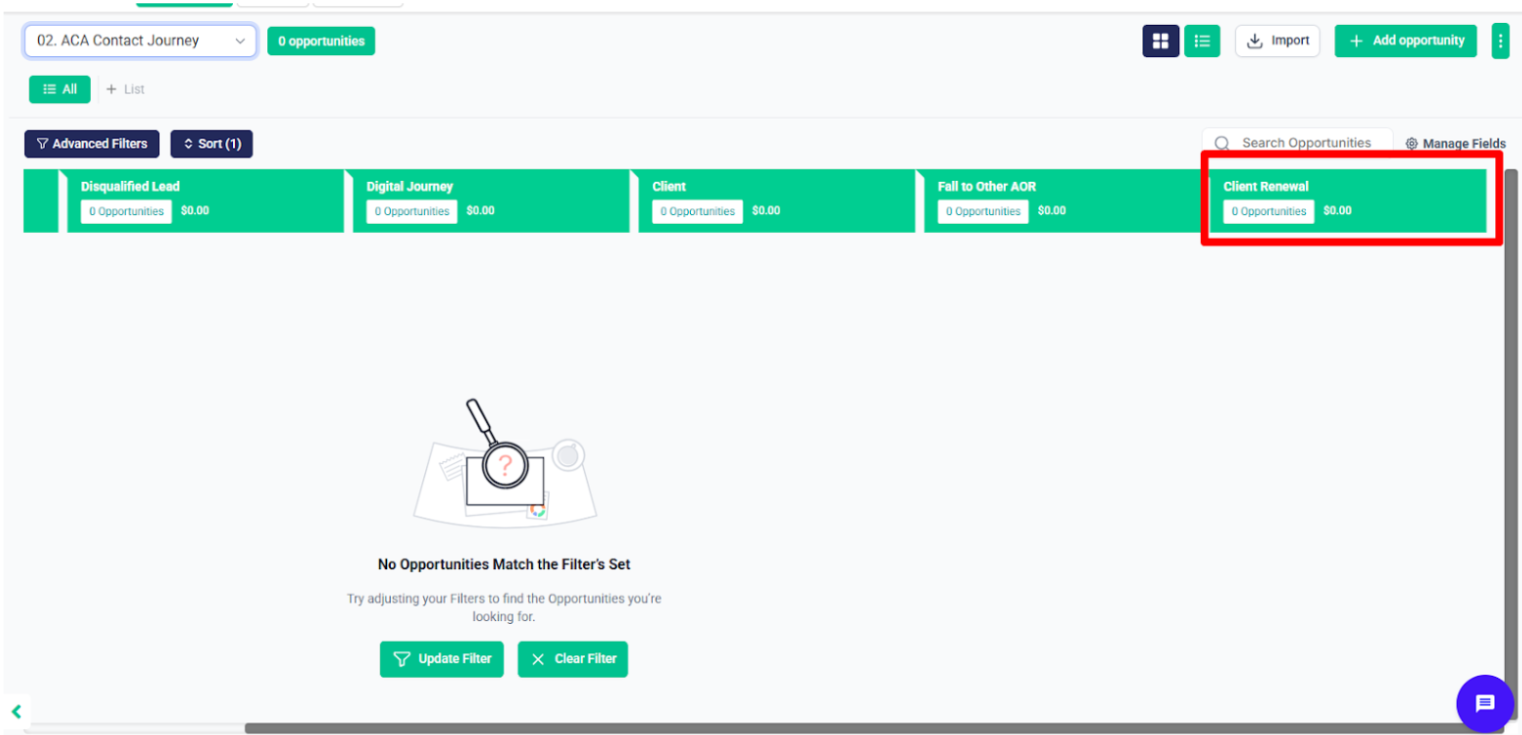
ACA Contact Journey #
After that, inside the ACA Contact Journey Automation folder, there’s a workflow called 2.1 – Contact Journey Pipeline Management.
- This workflow manages the complete journey of a contact.
- It checks which tag is applied and moves the contact to the relevant stage in the Contact Journey pipeline, which can also be referred to as the Master Pipeline.
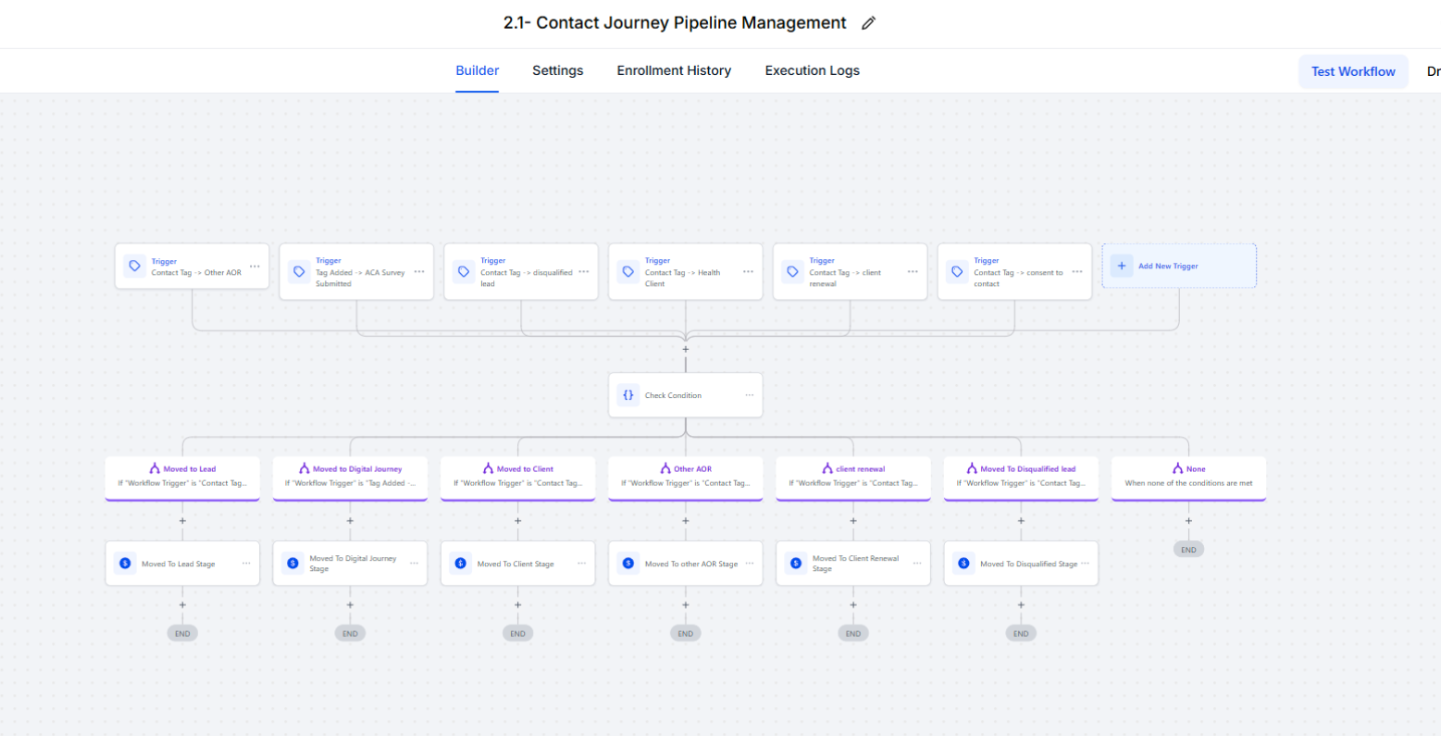
- When the Consent to Connect tag is applied, the contact will be moved to the “Lead” stage in the ACA Contact Journey Pipeline.

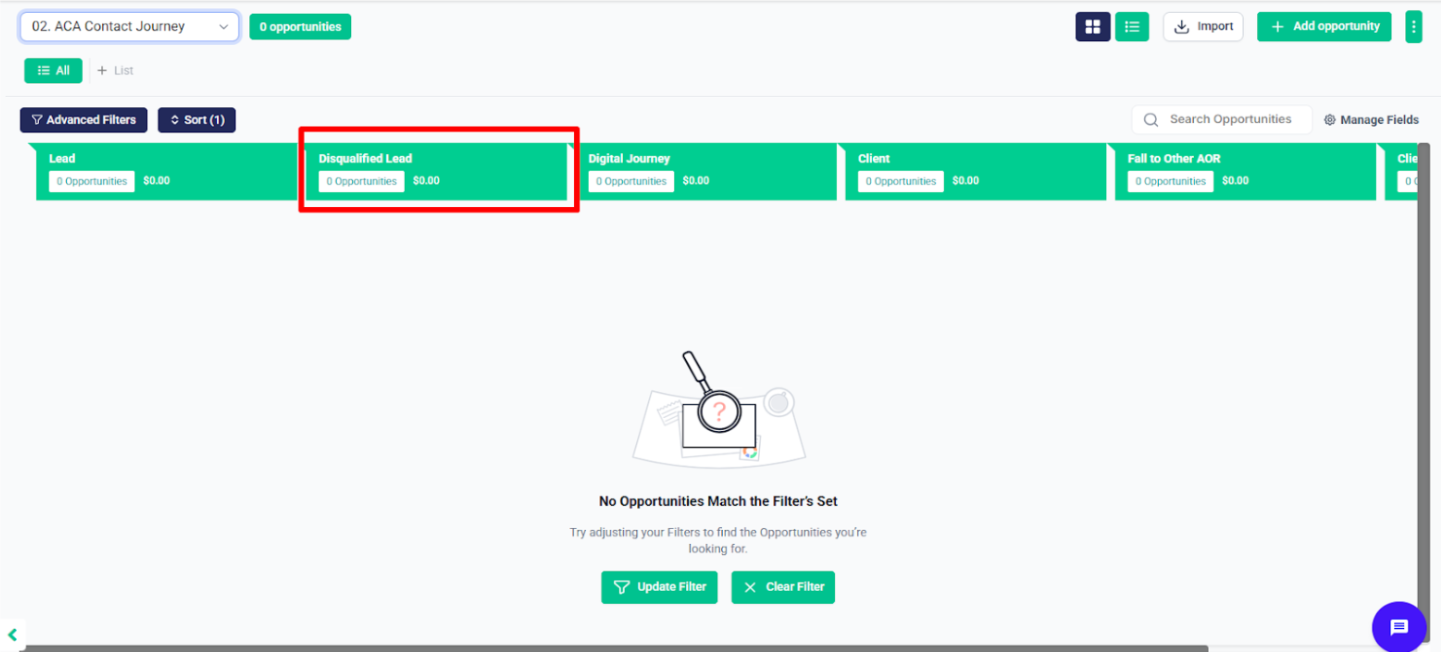
- When the Disqualified Lead tag is applied, the contact will be moved to the “Disqualified Lead” stage in the ACA Contact Journey Pipeline.
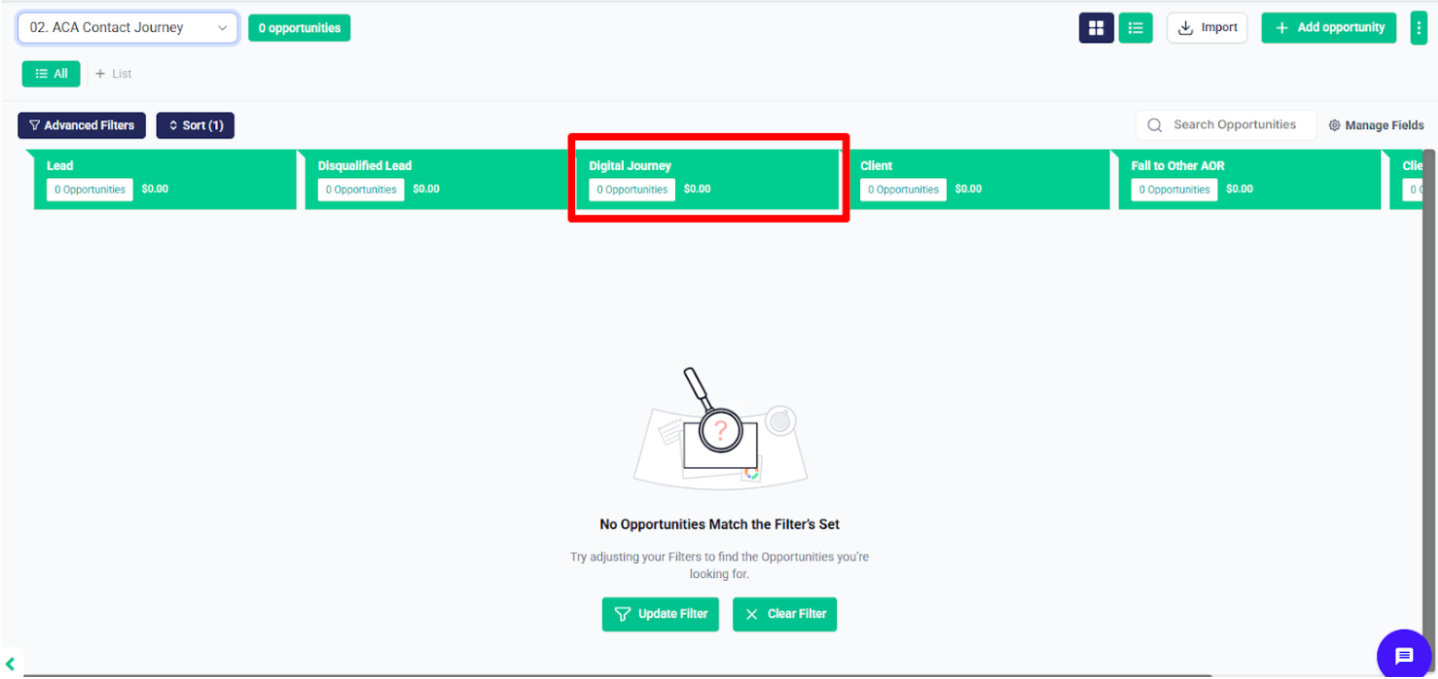
- When the ACA Survey Submitted tag is applied, the contact will be moved to the “Digital Journey” stage in the ACA Contact Journey Pipeline.
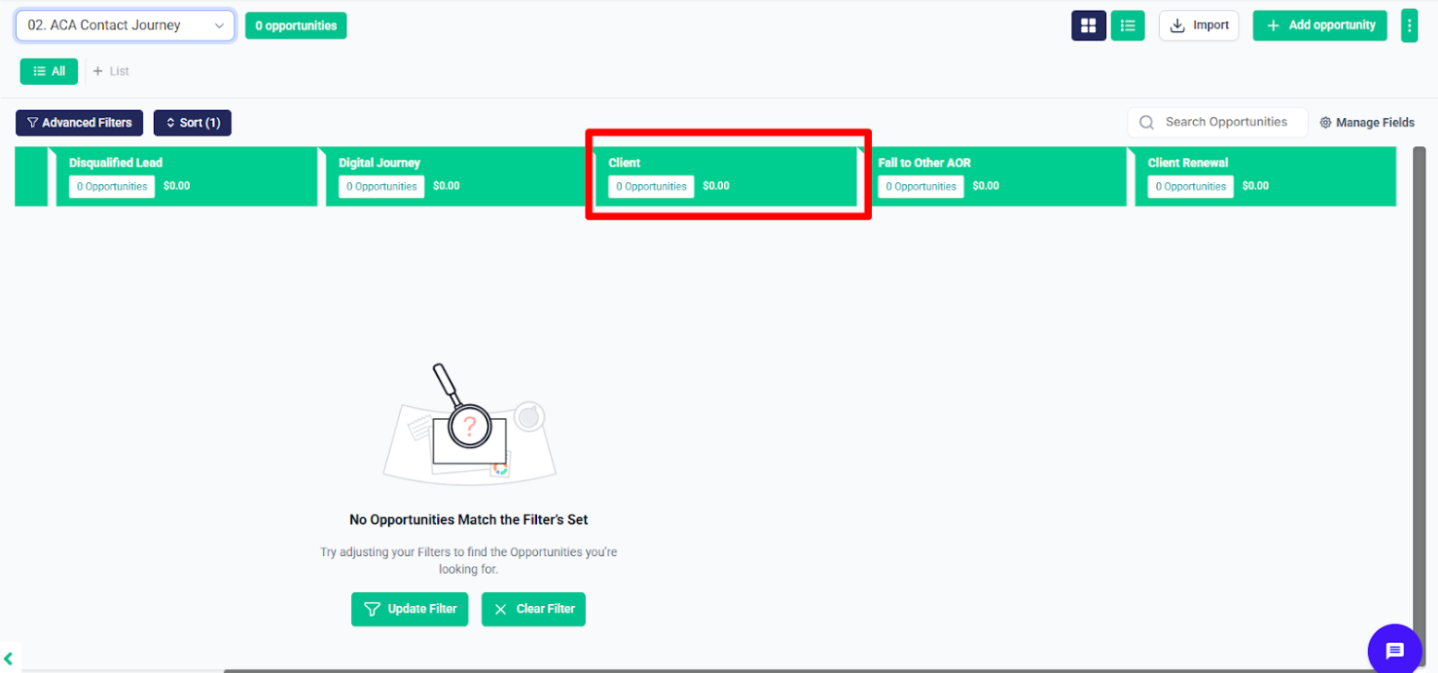
- When the Health Client tag is applied, the contact will be moved to the “Client” stage in the ACA Contact Journey Pipeline.
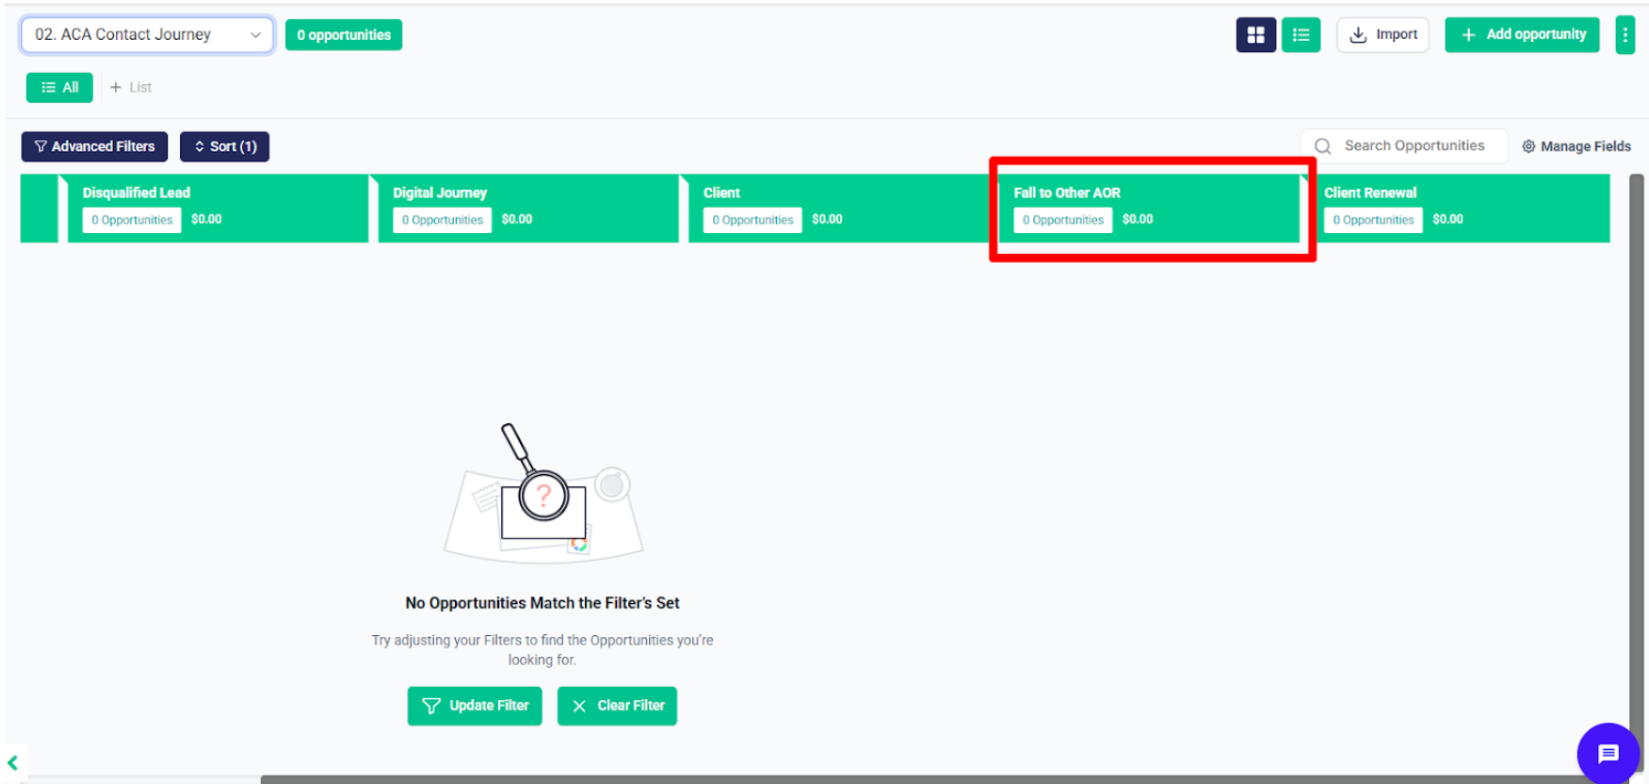
- When the Other AOR tag is applied, the contact will be moved to the “Fall on other AOR” stage in the ACA Contact Journey Pipeline.
- When the Client Renewal tag is applied, the contact will be moved to the “Client Renewal” stage in the ACA Contact Journey Pipeline.
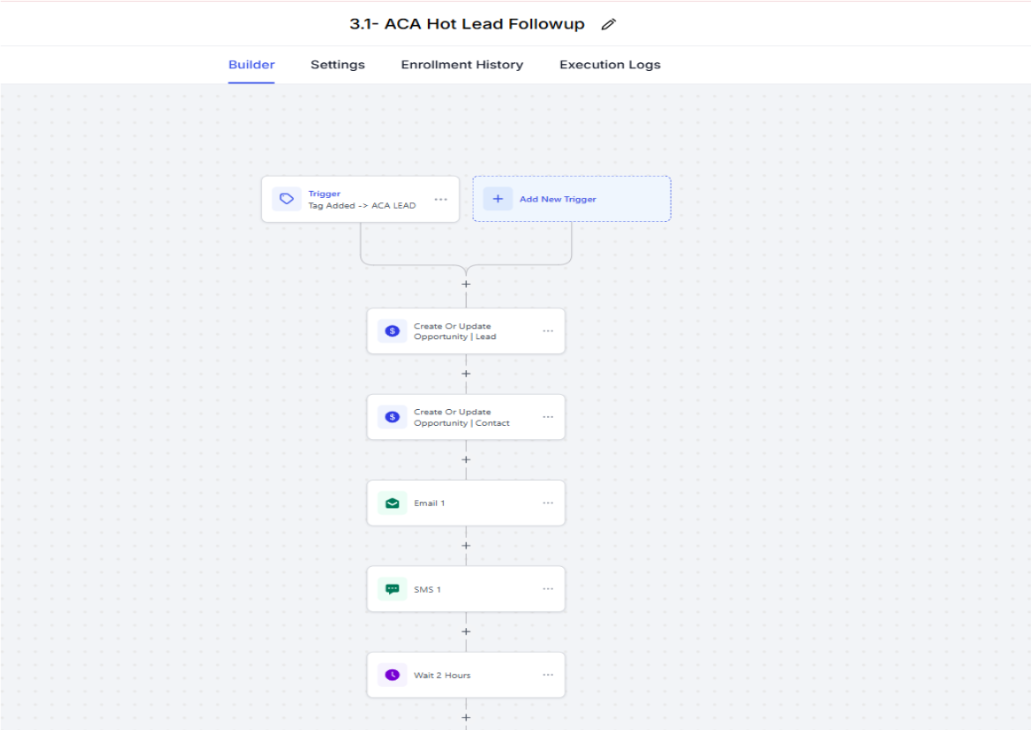
ACA Lead #
After that, in the ACA Lead folder, there’s a workflow called 3.1 – ACA Hot Lead Follow-Up. When the ACA Lead tag is added, an opportunity will be created in the ACA Lead pipeline at the stage “Consent to Connect Submitted”, and also the contact will be moved to the “Lead” stage in the ACA Contact Journey pipeline, and the contact will enter this follow-up campaign. The system will keep sending follow-up messages until the ACA Survey is submitted, and if the person books an appointment, they will get the Appointment Set tag. After the call happens, the system will add the right tag, like “No Show” or “Call Completed,” and move the contact to the right stage in the pipeline.
After that, in the workflow 3.2 – ACA Lead Pipeline Management—ACA Survey Submitted, Consent to Connect, AI Appointment Booked or Appointment Set and aca survey submitted or tiktok form submitted.
- After this, in the if/else condition, it check either Dental tag includes or not if include move to further actions; otherwise, it removes it from workflow
And the contact will be moved to the relevant stage in the ACA Lead pipeline accordingly.
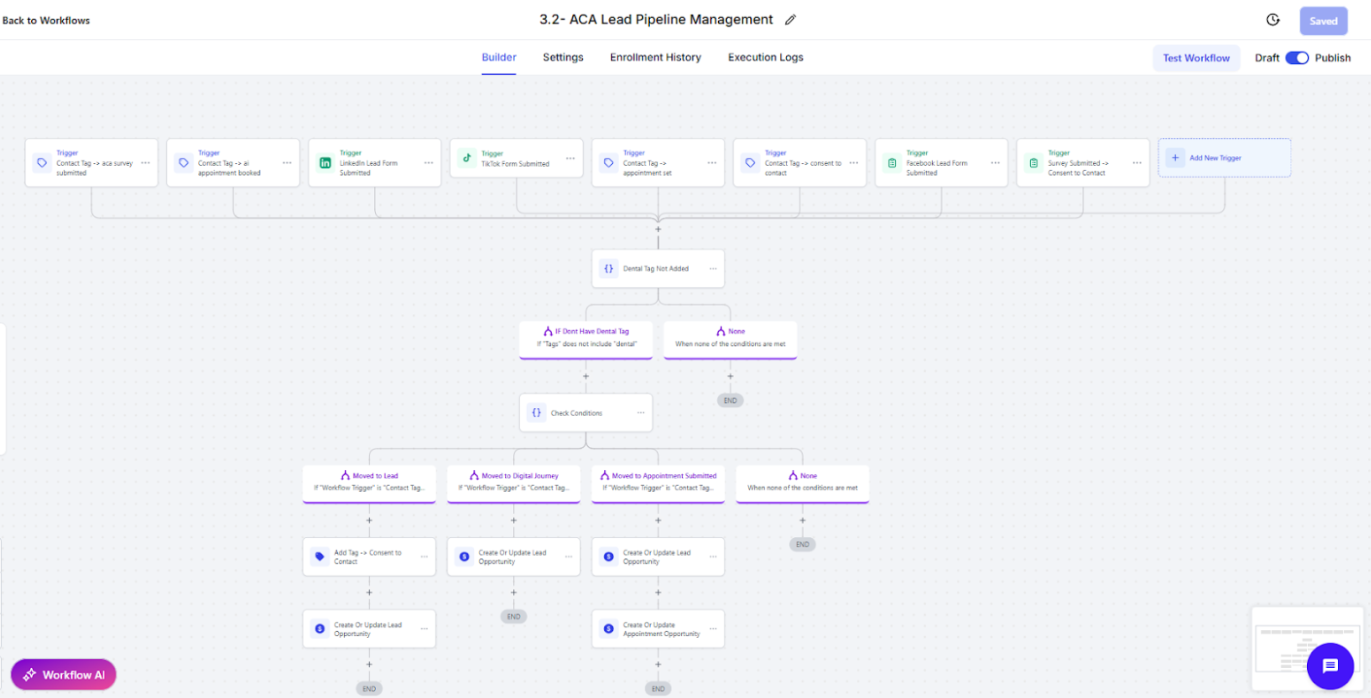
In the 3.2 ACA Lead Pipeline Management workflow, the first if/else condition checks which workflow was triggered.
If any of the following triggers occur:
- Consent to Connect tag is added
- Facebook or LinkedIn form is submitted
- Consent to Connect survey is submitted
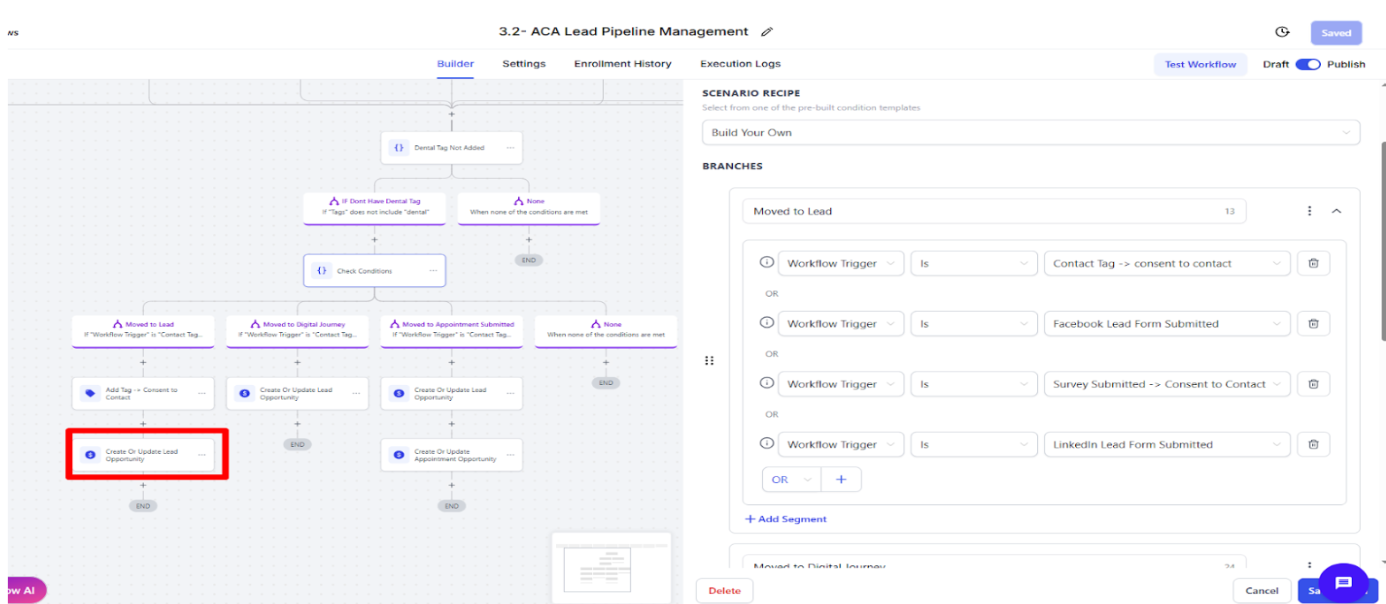
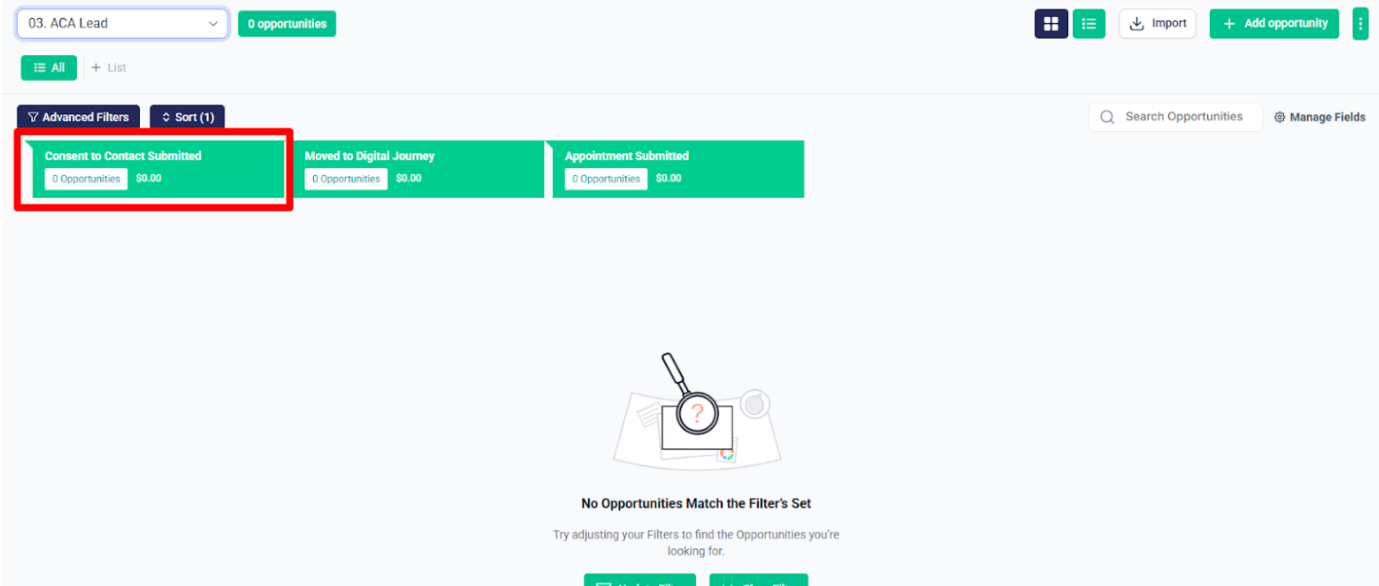
Then, an opportunity will be created in the ACA Lead pipeline at the “Consent to Connect” stage.
In the 3.2 – ACA Lead Pipeline Management workflow, the second if/else condition checks which workflow was triggered.
In the 3.2 ACA Lead Pipeline Management workflow, the second if/else condition checks which workflow was triggered.
If any of the following triggers occur:
- Aca survey submission tag is added
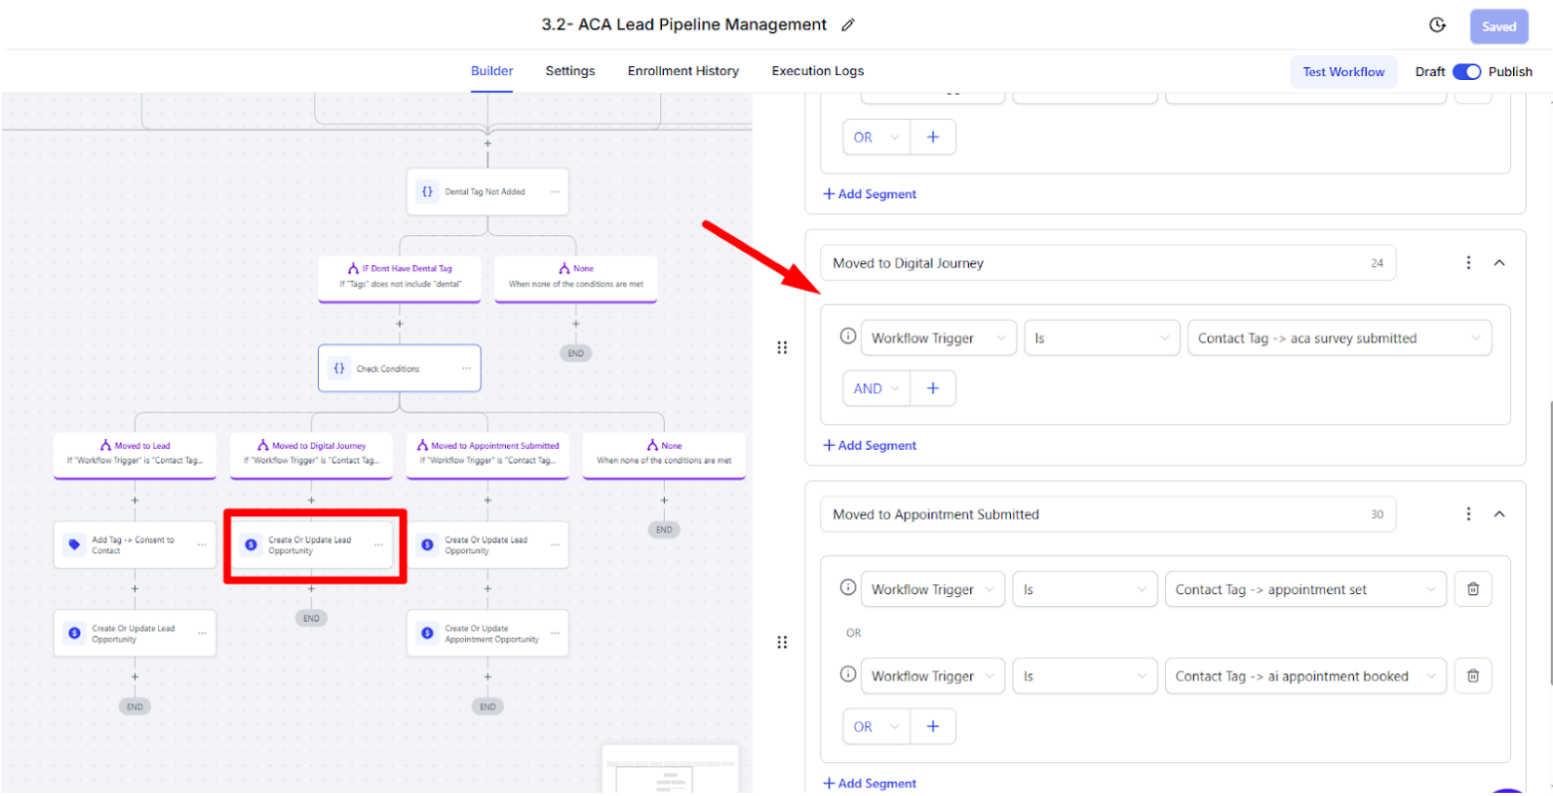
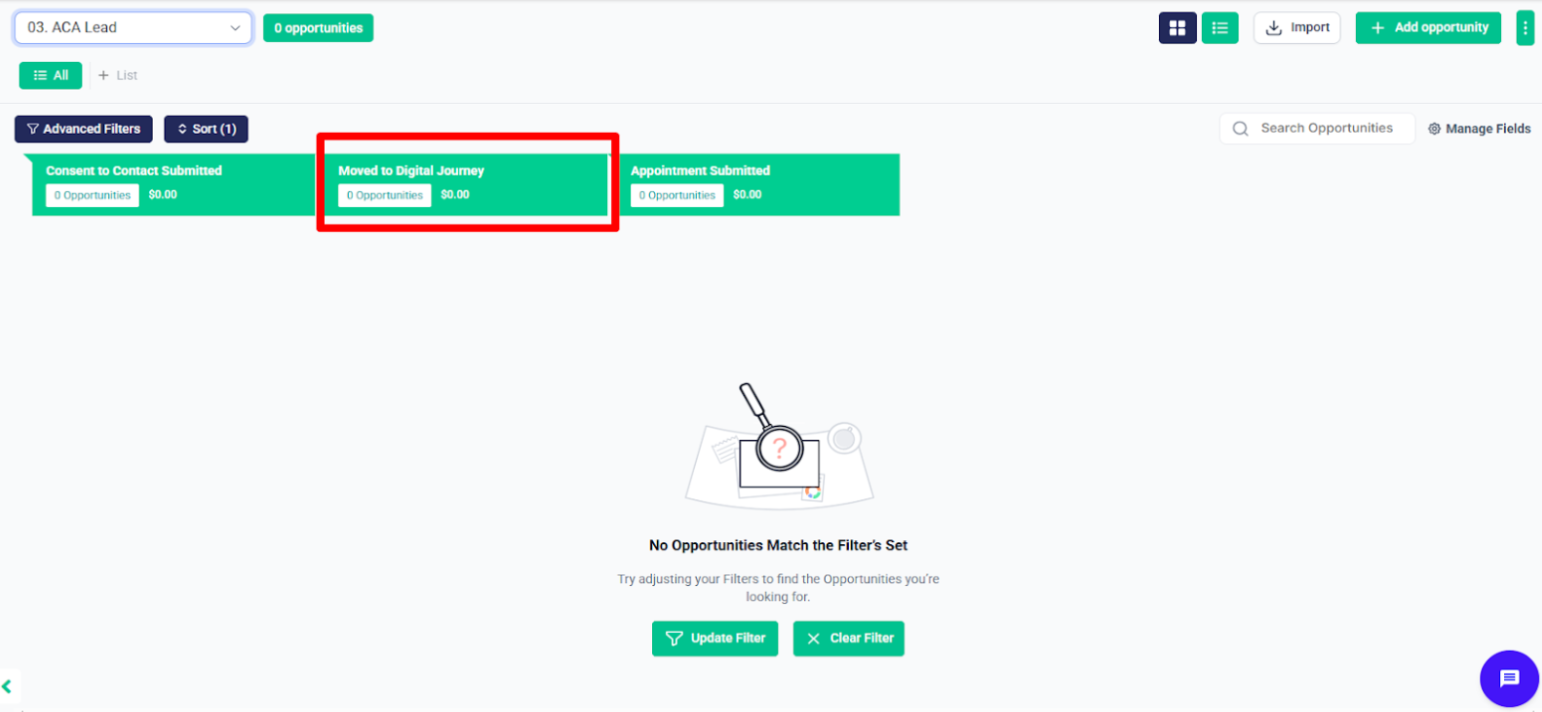
Then, an opportunity will be created in the ACA Lead pipeline at the “Moved to Digital Journey” stage.
In the 3.2 – ACA Lead Pipeline Management workflow, the Third if/else condition checks which workflow was triggered.
If any of the following triggers occur:
- Appointment Set or AI Appointment Booked submitted tag is added
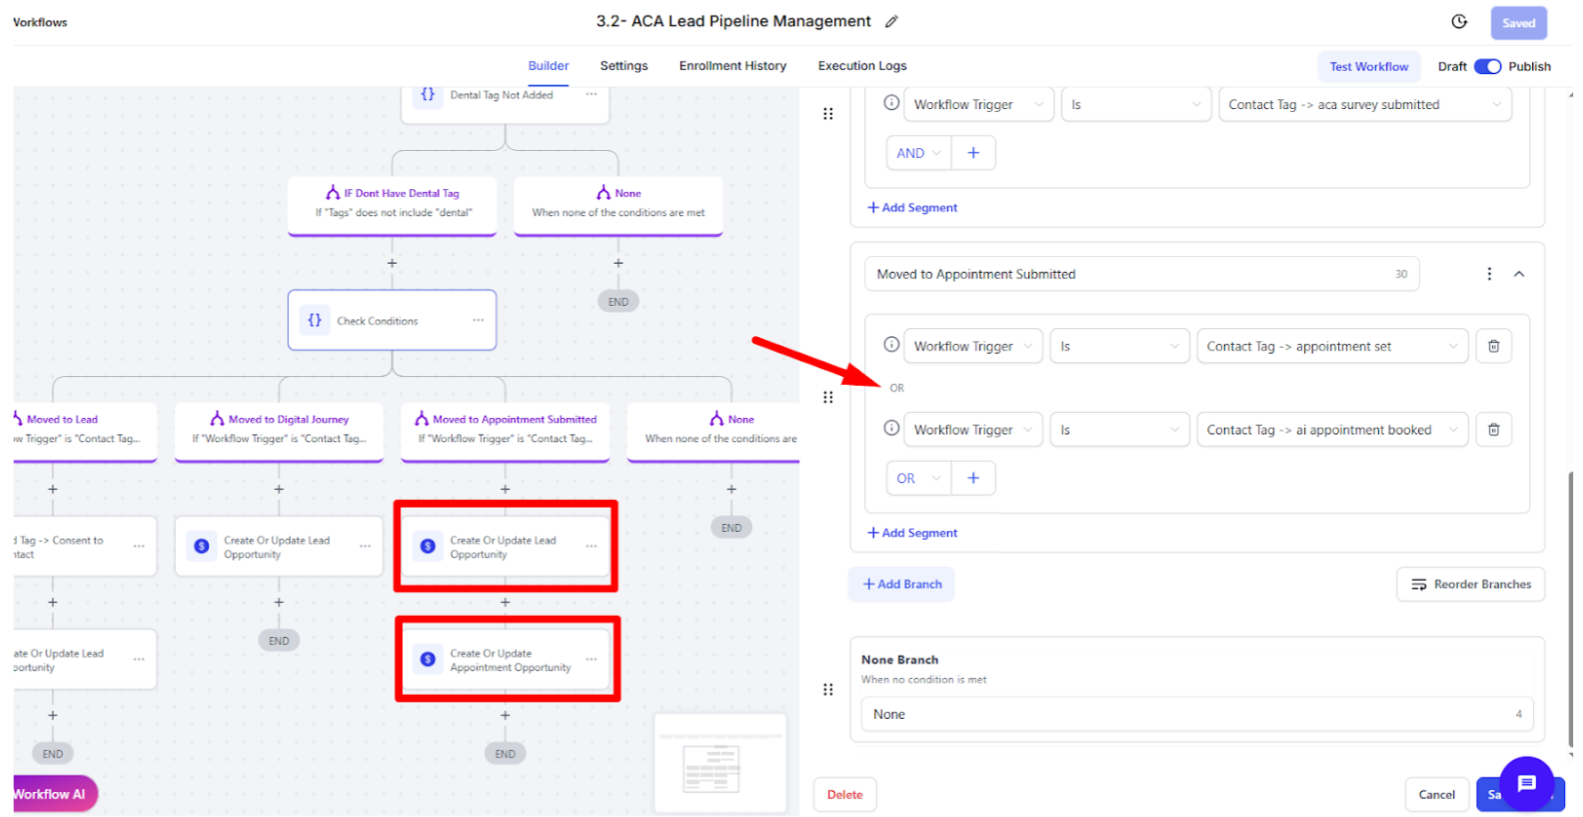
Then, an opportunity will be created in the ACA Lead pipeline at the “Appointment Submitted” stage.
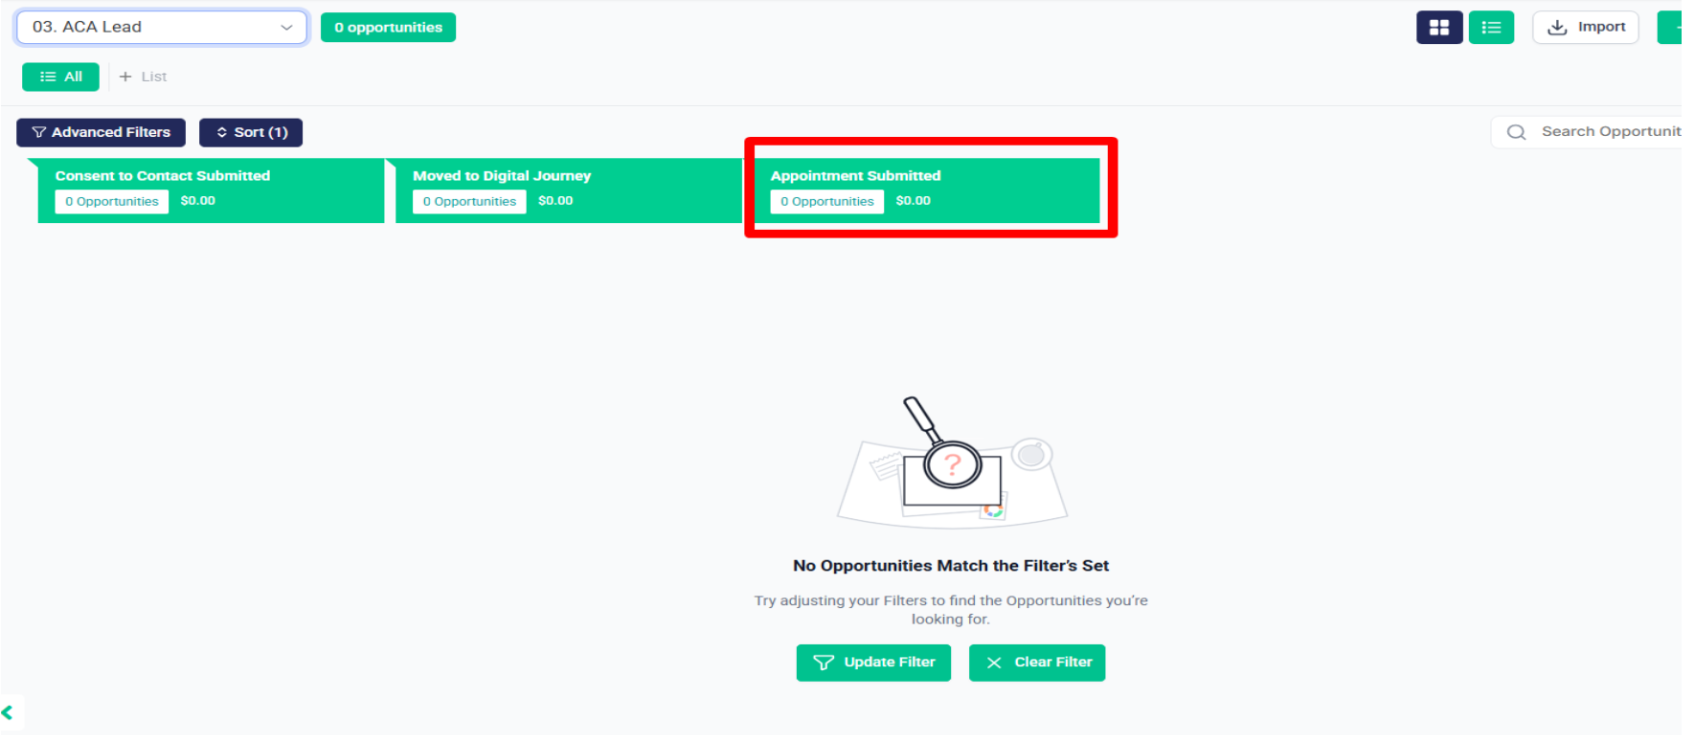
And an opportunity will also be created in the Appointment Journey pipeline at the “Appointment Booked” stage.
Appointment Journey #
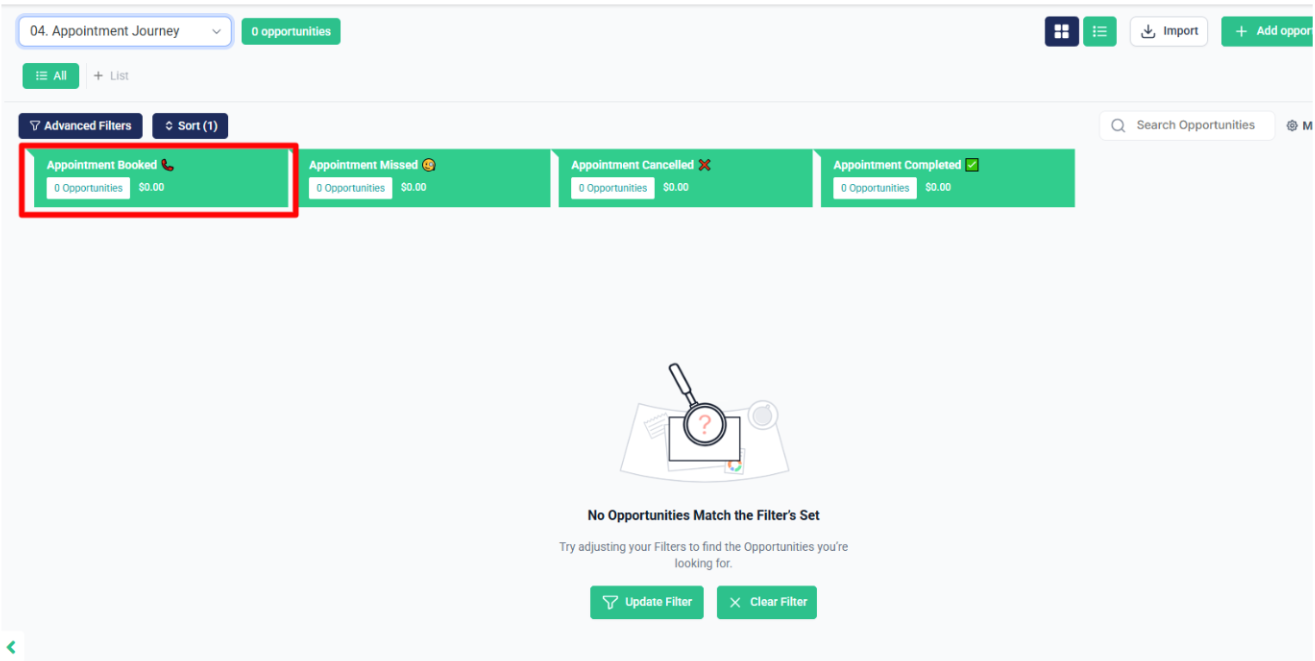
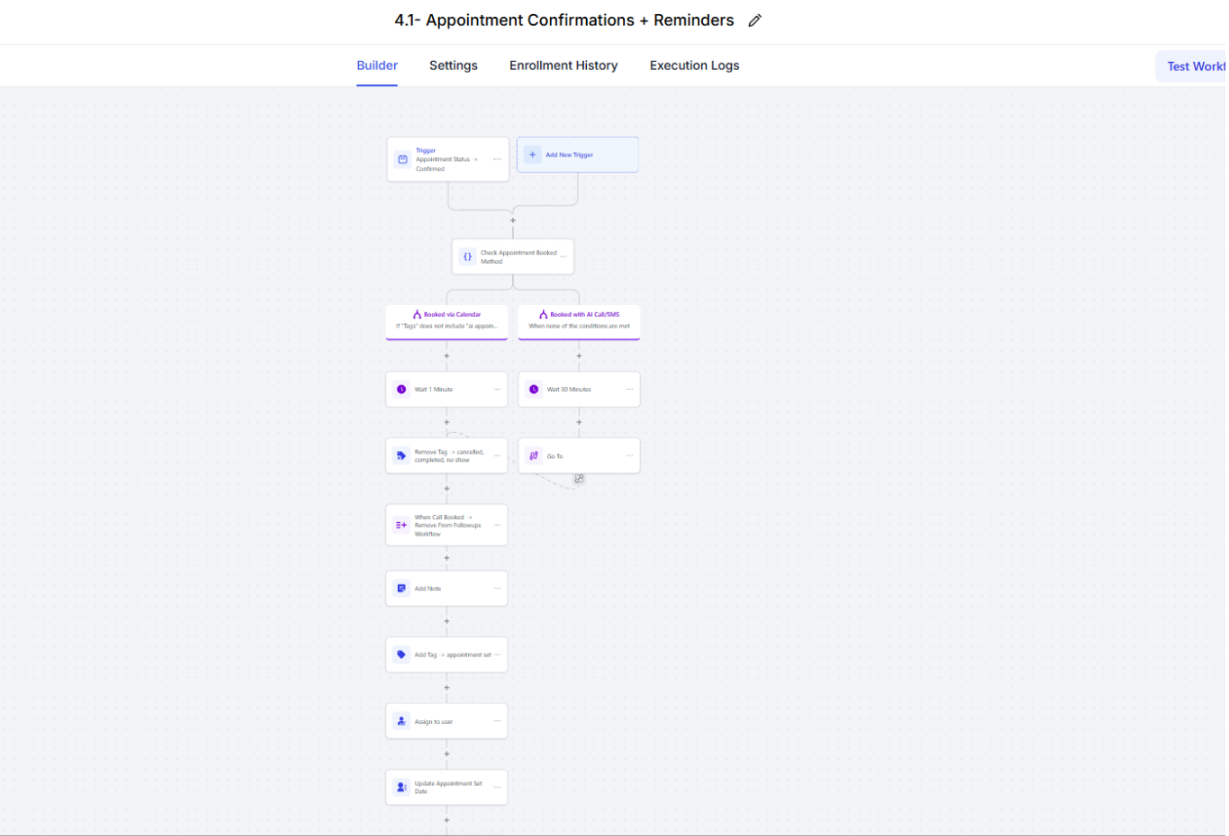
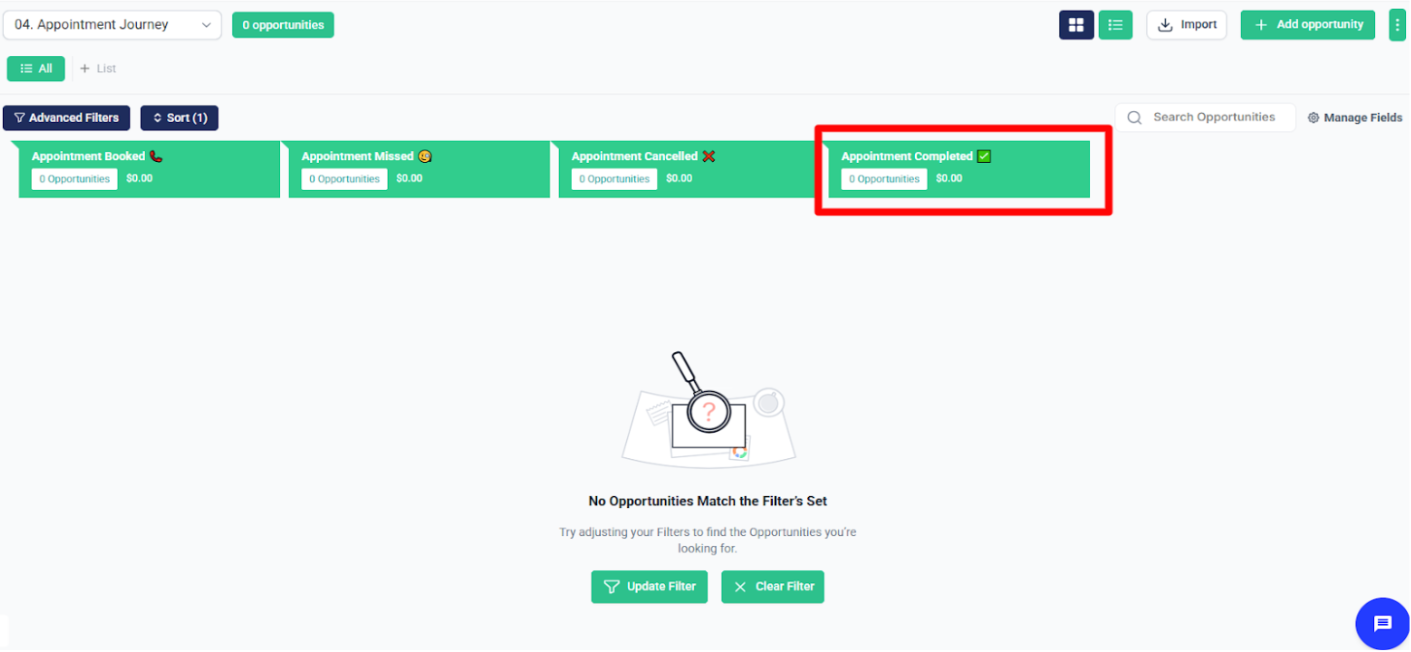
After that, inside the Appointment Journey Automation folder, there’s a workflow called 4.1 – Appointment Confirmations + Reminders.
When someone books an appointment, they will receive confirmation emails, and an opportunity will be created in the Appointment Journey pipeline at the “Appointment Booked” stage. Along with this, the system will also send appointment reminders automatically.
And the contact will be moved to the Appointment Booked Stage in the Appointment Journey pipeline.

After that, even if the appointment is booked, if the contact’s appointment status is set to “No Show” or the “No Show” tag is applied, the contact will be moved to the “Appointment Missed” stage in the Appointment Journey pipeline.

And if the appointment status is set to “Cancelled”, then the contact will be moved to the “Appointment Cancelled” stage in the Appointment Journey pipeline.
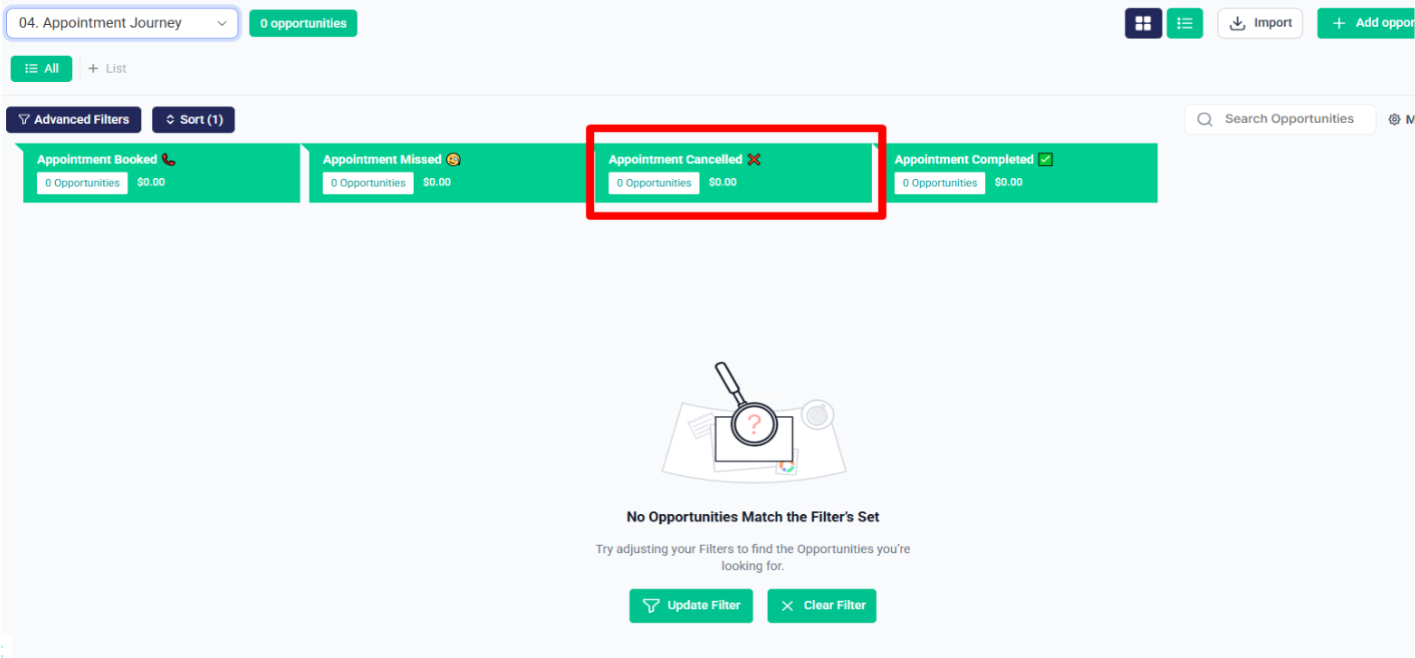
After that, even if the appointment was booked, if the contact’s appointment status is set to “Completed” or the “completed” tag is applied, the contact will be moved to the “Appointment Completed” stage in the Appointment Journey pipeline.
Digital Journey #
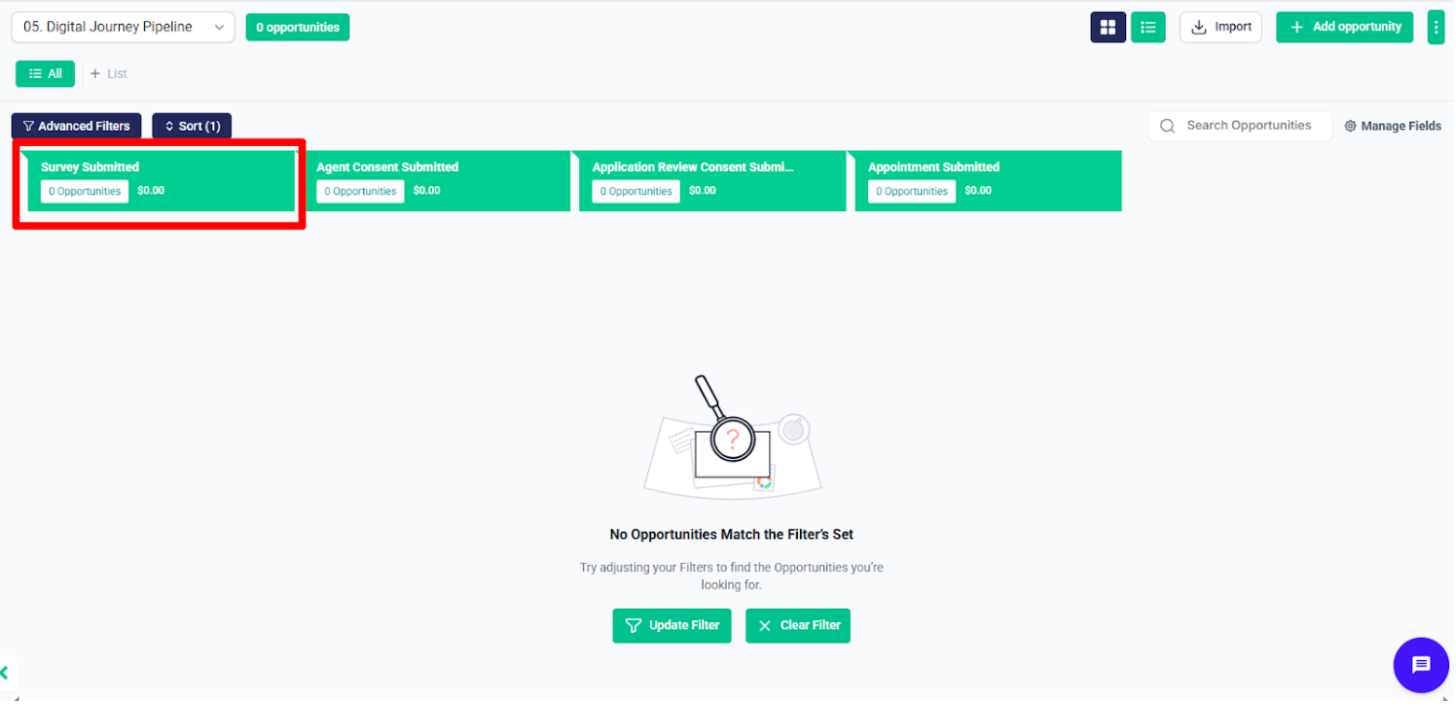
After that, in the Digital Journey workflow folder, when someone submits the Eligibility Survey, the data will be saved in System through a webhook. At the same time:
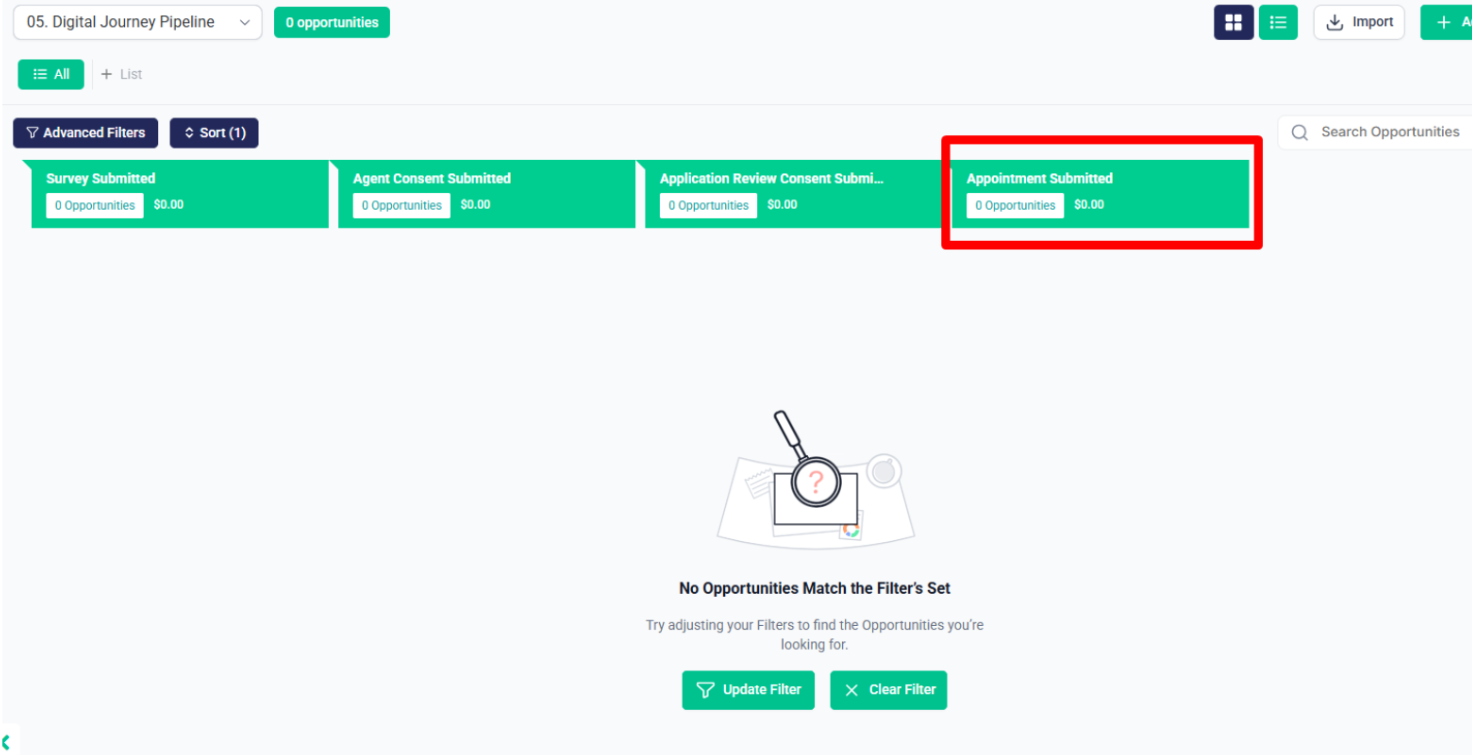
- An opportunity will be created in the Digital Journey pipeline at the “Survey Submitted” stage
- The contact will also receive the ACA Survey Submitted tag.
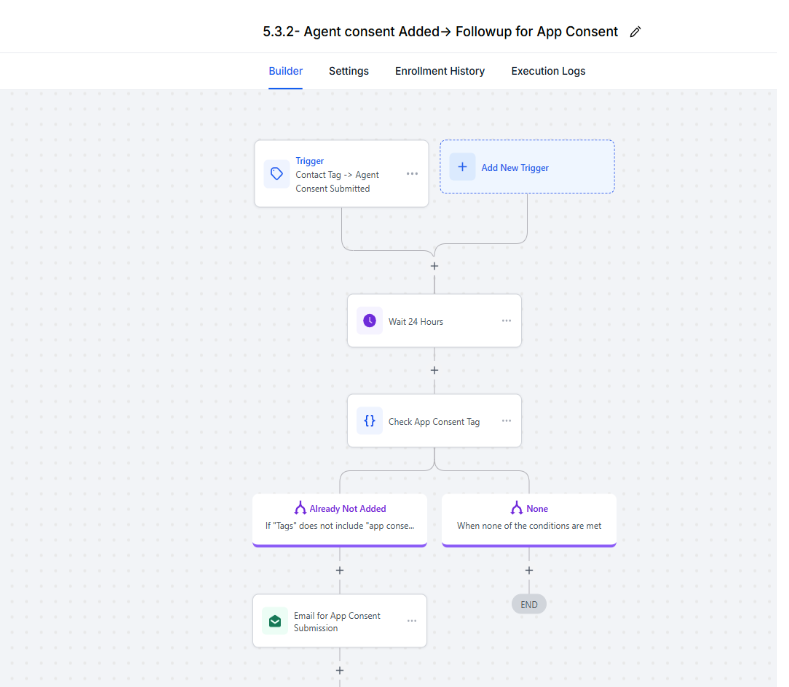
After that, inside the Digital Journey folder, there is a subfolder named Client Follow-Up, which contains the workflow 5.2.1 – ACA Survey Submitted Tag Added -> Follow-Up for Agent Consent.
As soon as the ACA Survey Submitted tag is applied, the contact will be added to the Agent Consent follow-up campaign to start the follow-up process.
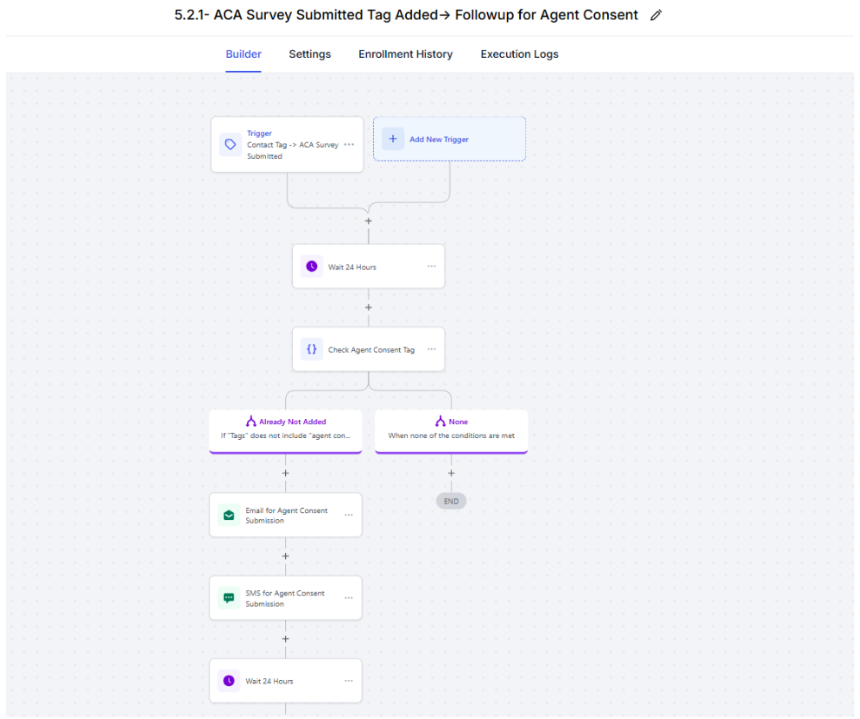
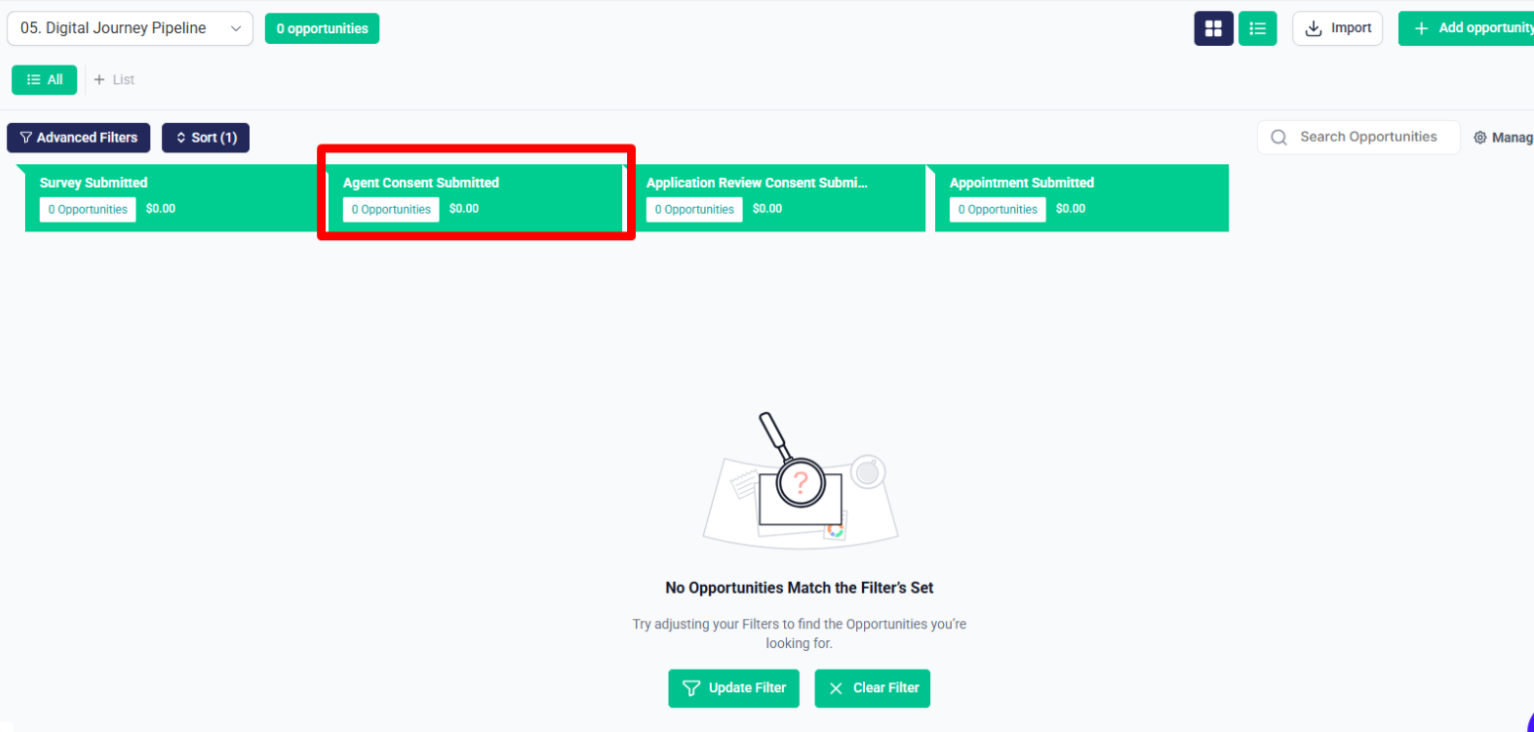
And once the Agent Consent is submitted “agent consent submitted” tag is added, an opportunity will be created in the Digital Journey pipeline at the stage “Agent Consent Submitted”.
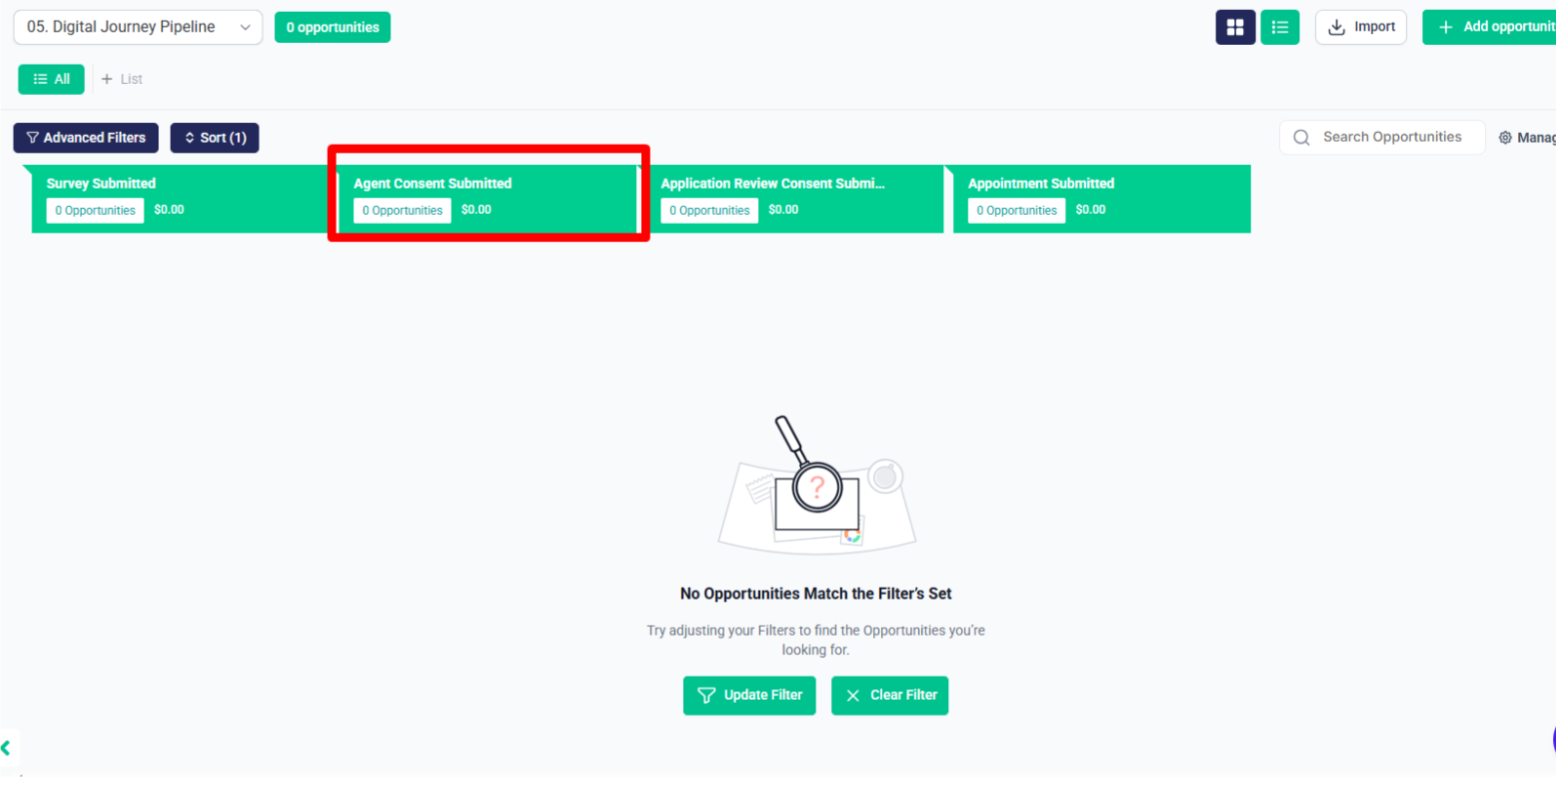
As the Agent Consent Submitted tag is applied, the contact will be added to the App. Review Consent follow-up campaign to start the follow-up process.
And once the Agent Consent is submitted “agent consent submitted” tag is added, an opportunity will be created in the Digital Journey pipeline at the stage “Agent Consent Submitted”.
As the App Consent Submitted tag is applied, the contact will be added to the Appointment follow-up campaign.
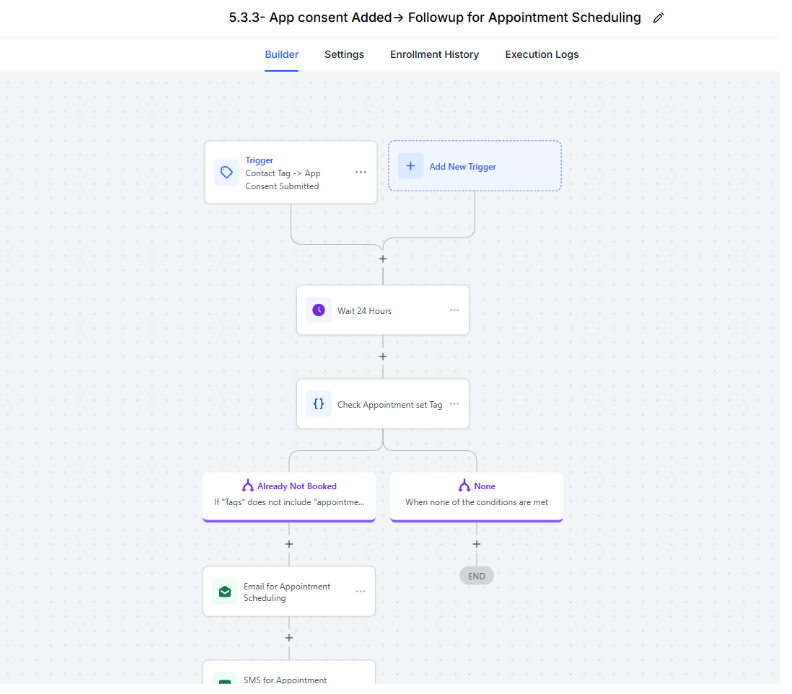
And once the Application Review Consent is submitted “app consent submitted” tag is added, an opportunity will be created in the Digital Journey pipeline at the stage “Application Review Consent Submitted”.
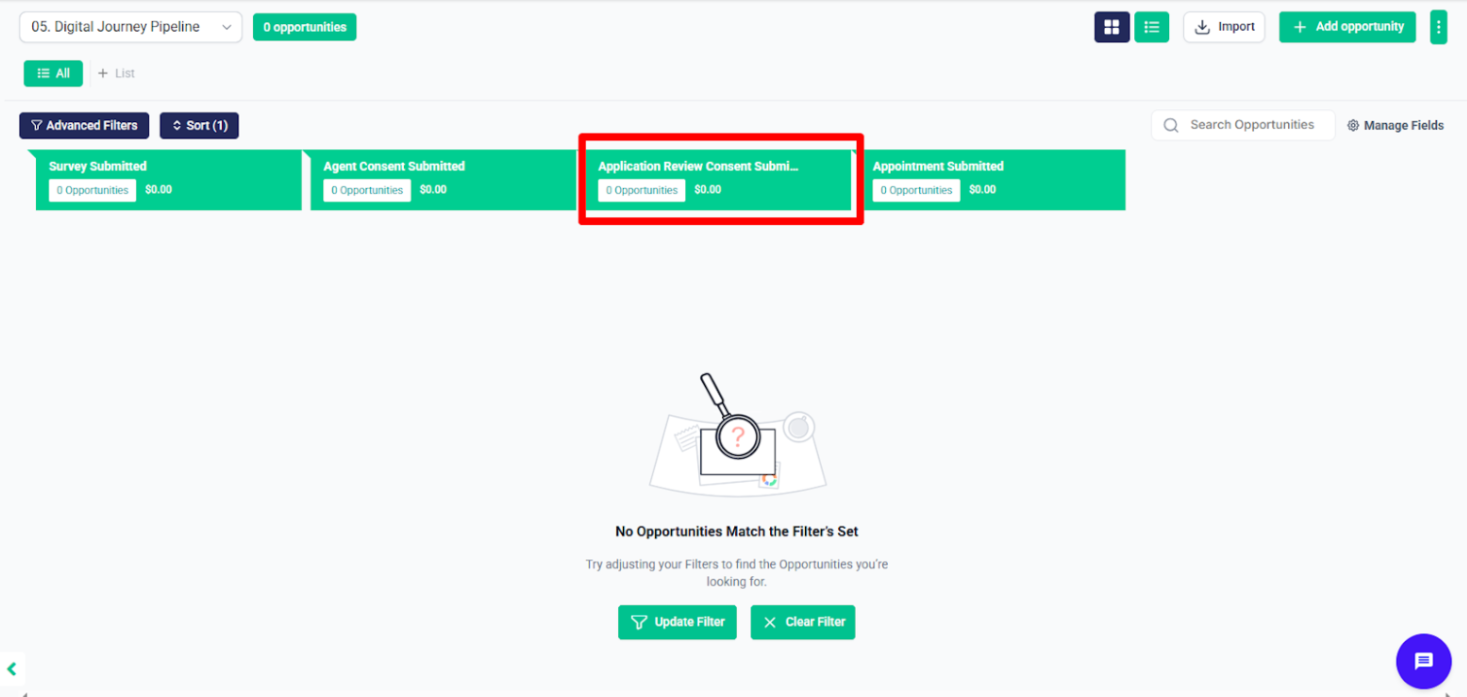
And after that if the appointment is booked opportunity will be created in the Digital Journey pipeline at the stage “Appointment Submitted”.
Agent Consent + App. Review Consent Management #
After that, in the Automation folder named 05.1 Agent Consent + App. Review Consent Management, which is linked with the Digital Journey workflow folder, when the Send Agent Consent tag is applied:
The contact will be added to the Agent Consent follow-up sequence.
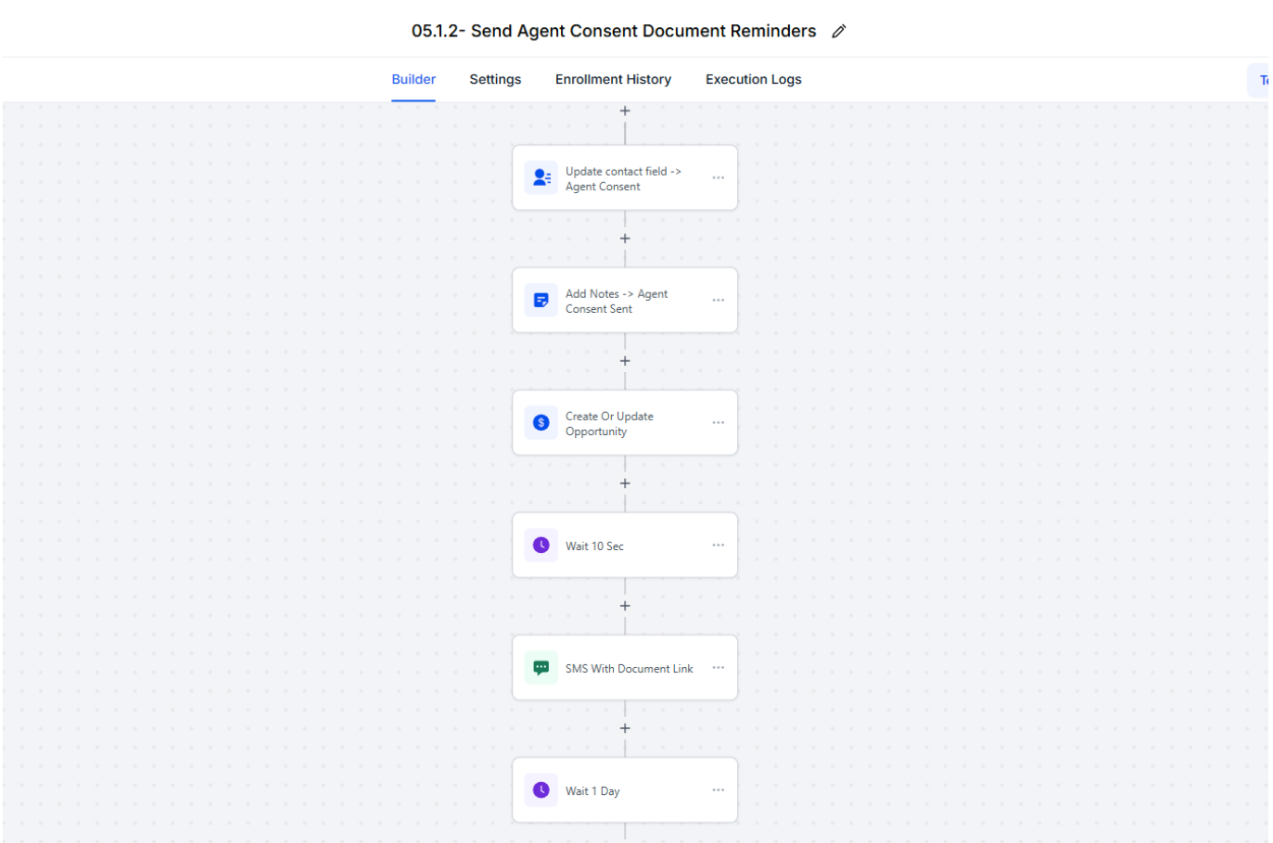
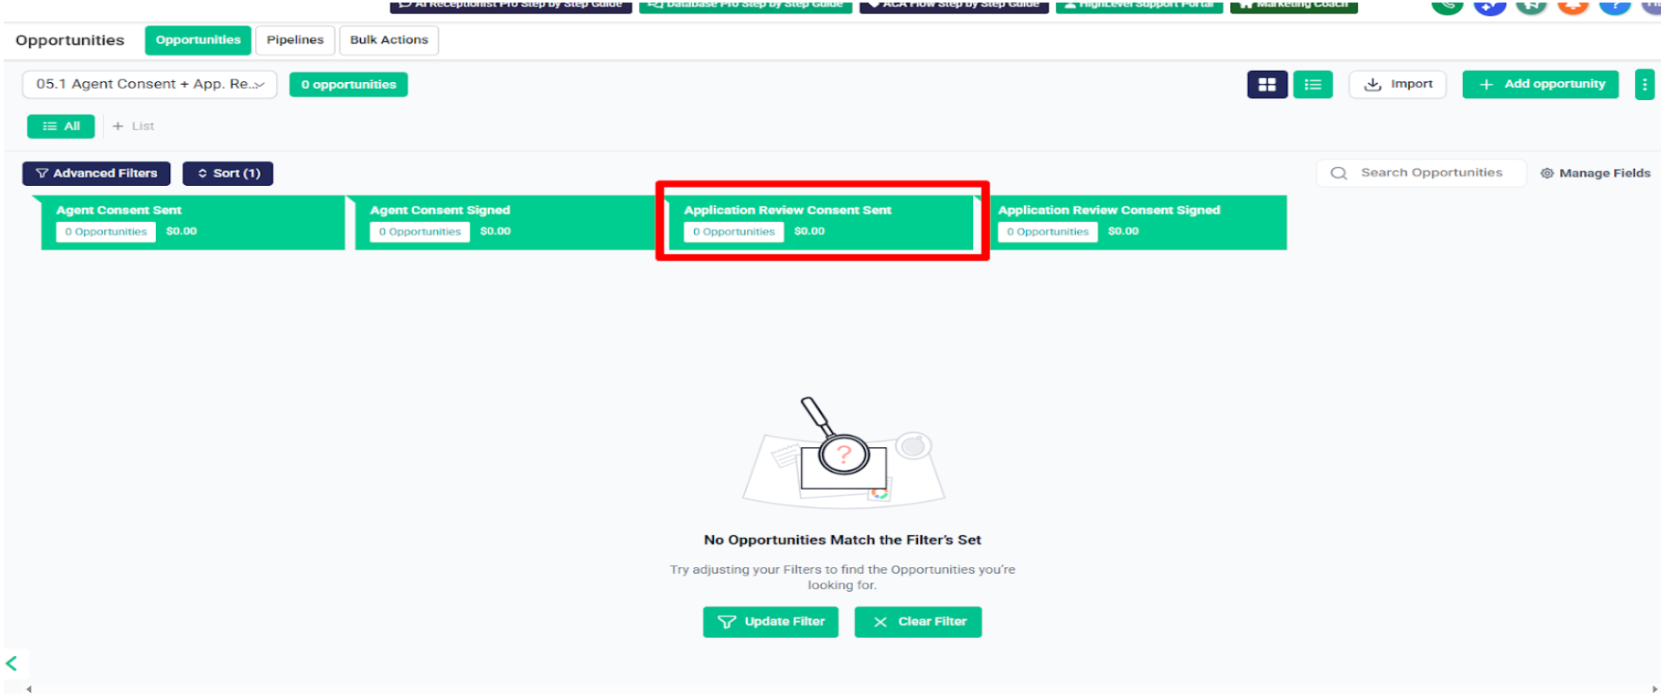
An opportunity will be created in the 05.1 Agent Consent + App. Review Consent Management pipeline at the stage “Agent Consent Sent”.
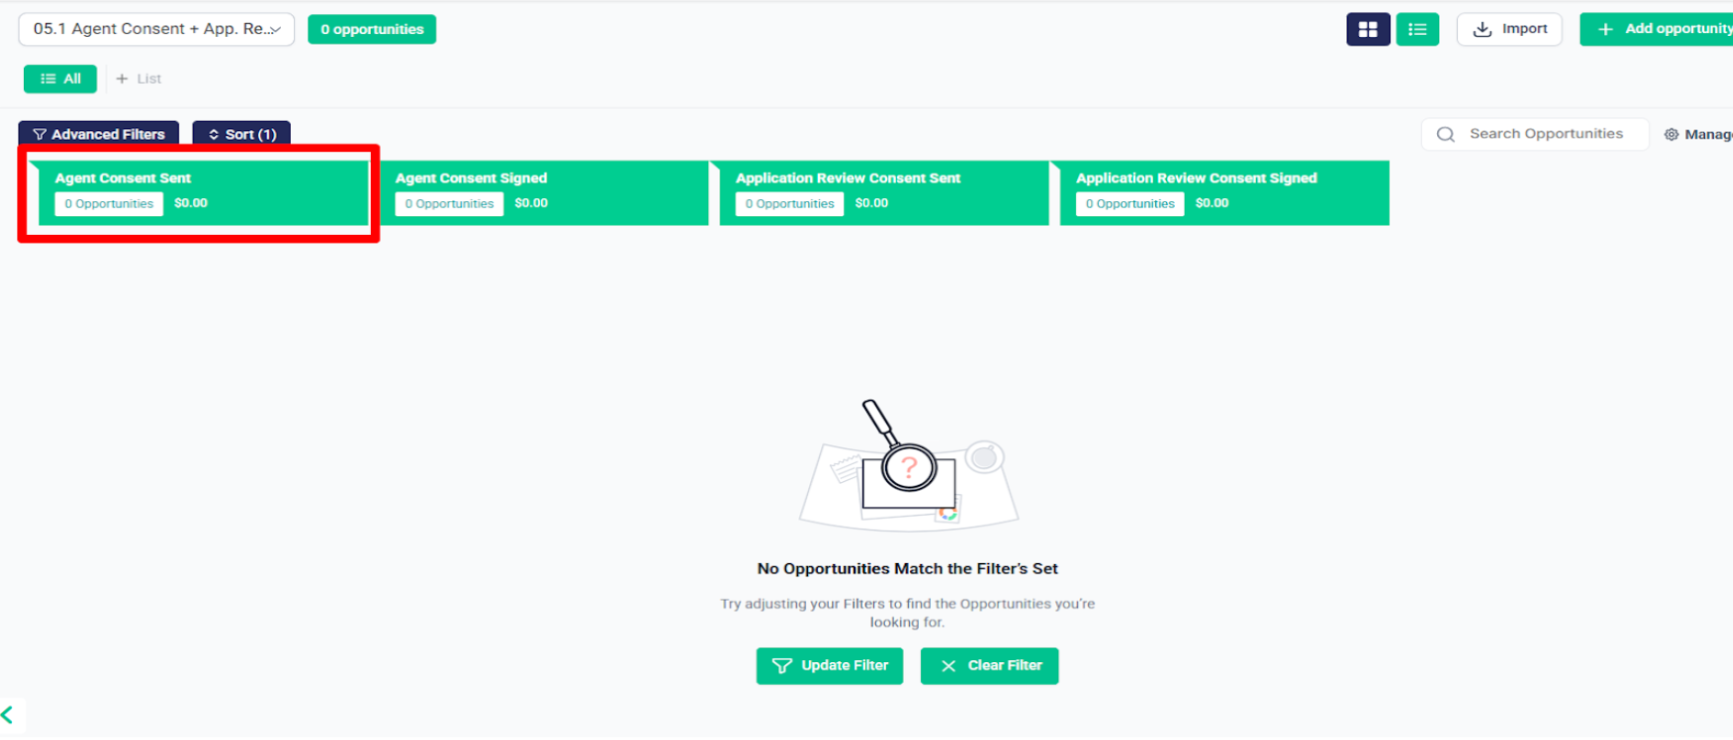
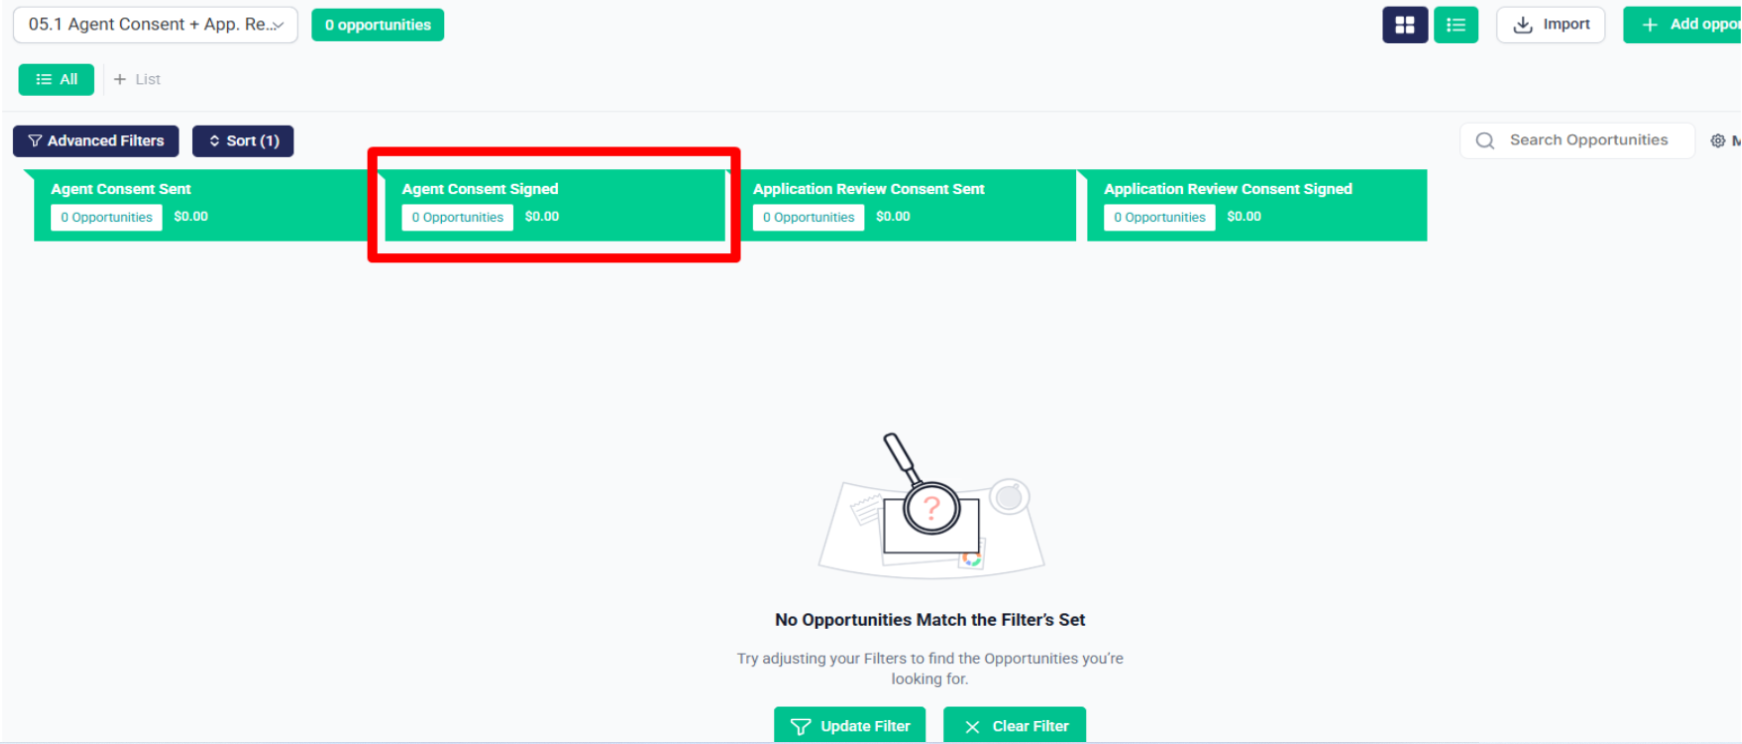
- And once the Agent Consent is signed, the contact will be removed from the Agent Consent follow-up, and they will be moved to the “Agent Consent Submitted” stage in the 05.1 Agent Consent + App. Review Consent Management pipeline.
when the Send Application Review Consent tag is applied:
The contact will be added to the Application Review Consent follow-up sequence.
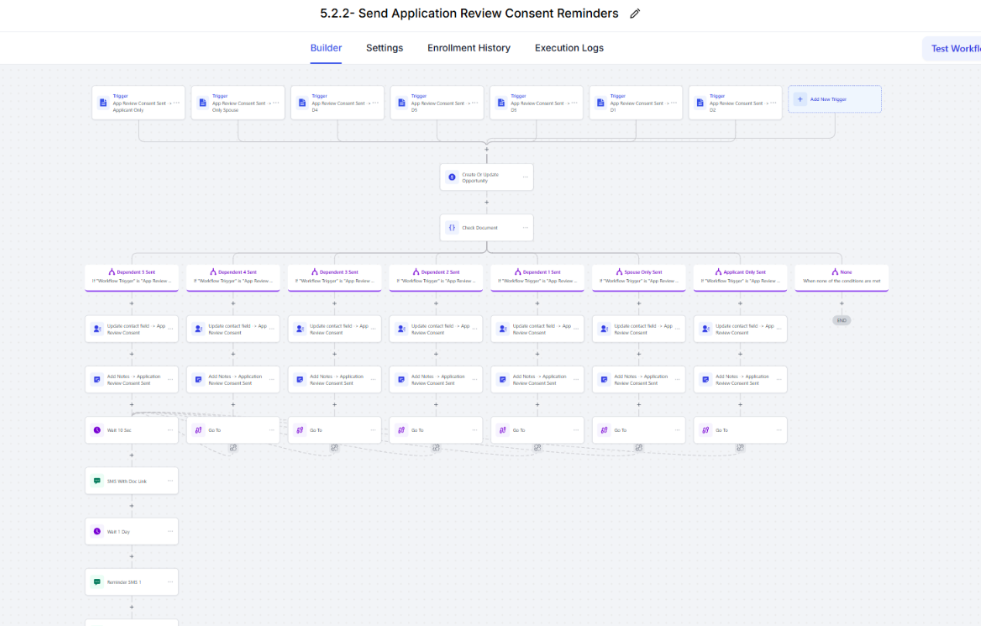
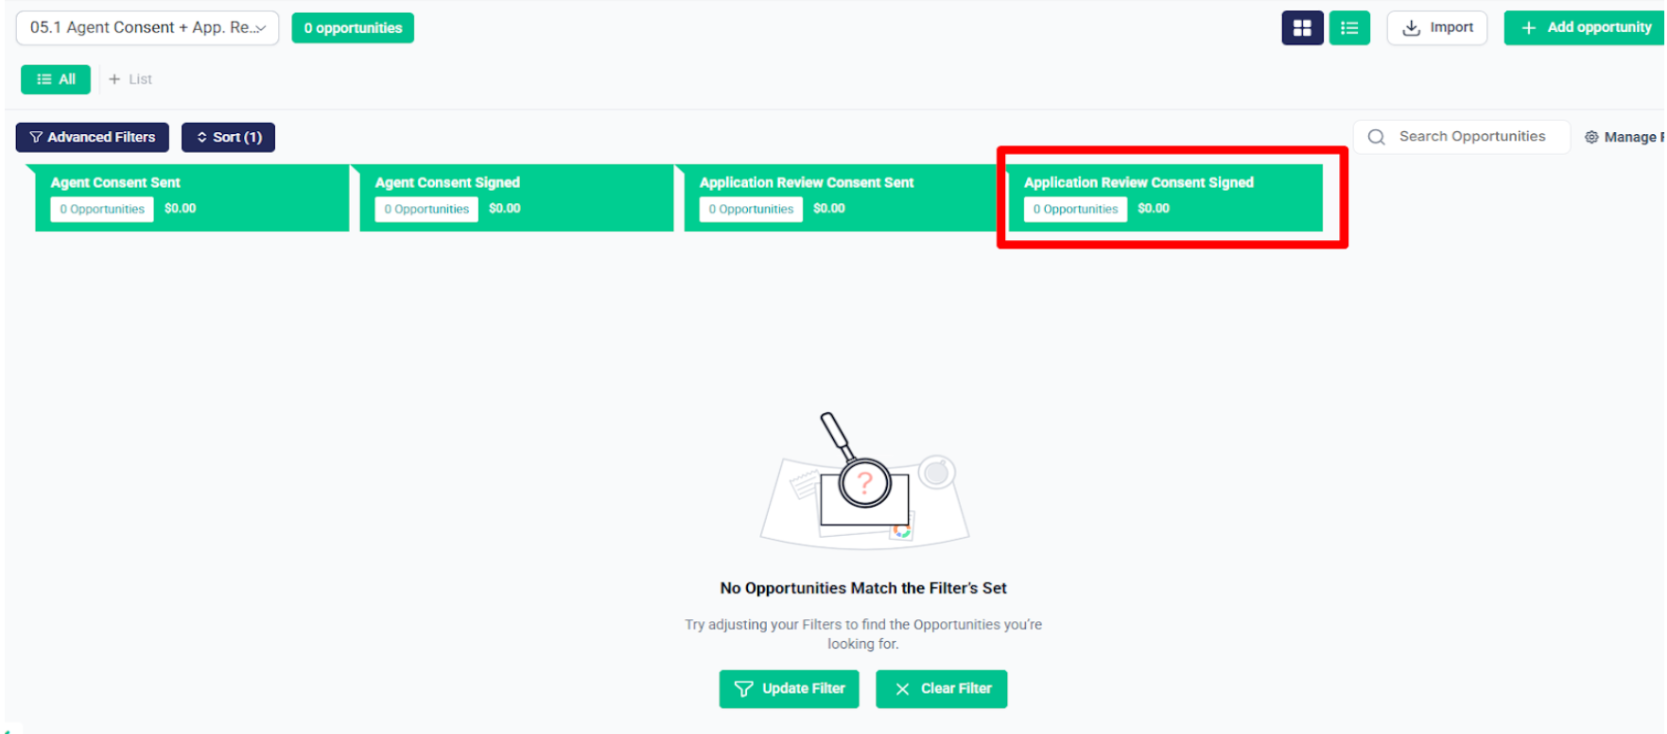
An opportunity will be created in the 05.1 Agent Consent + App. Review Consent Management pipeline at the stage “Application Review Consent “.
- And once the Application Review Consent is signed, the contact will be removed from the Application Review Consent follow-up, and they will be moved to the “Application Review Consent ” stage in the 05.1 Agent Consent + App. Review Consent Management pipeline.
DMI (Data Matching Issue) #
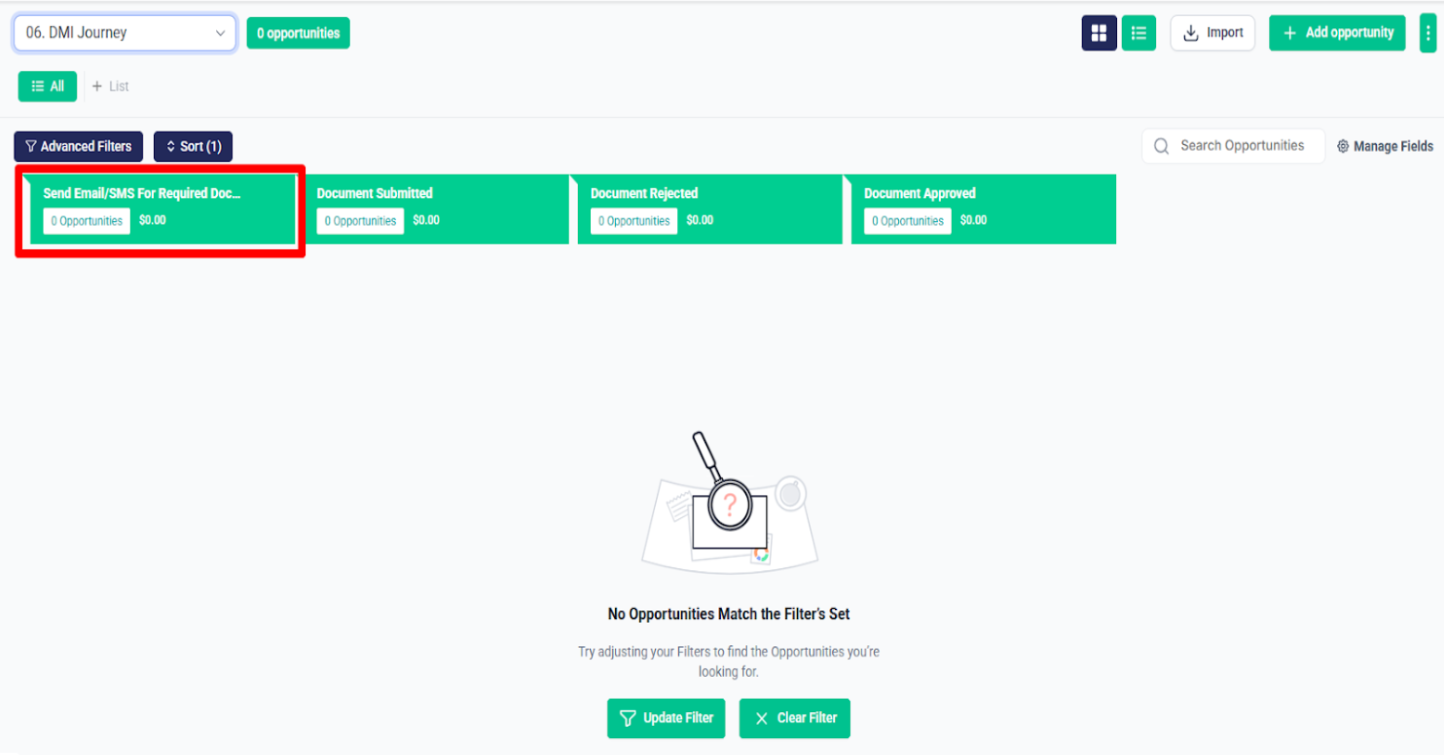
The next automation folder is 06. DMI (Data Matching Issue), which contains workflows used when specific documents are required — such as Proof of Citizenship, Proof of Tricare Coverage, etc.
- When a document is required, and add to email follow up is sent with a form link requesting the needed document to proceed with the application.
These workflows are triggered when we update a custom field, add a tag, or the form is filled.
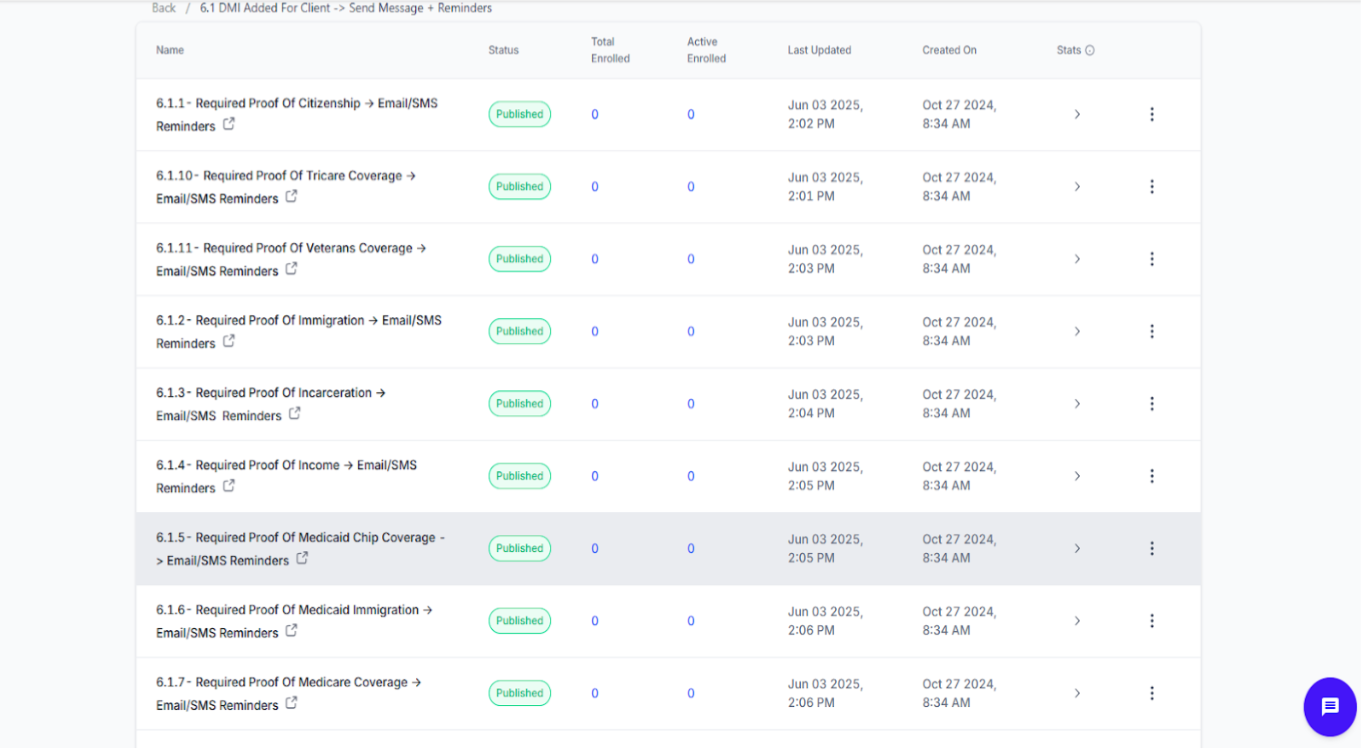
- As soon as the email is sent, an opportunity is created in the DMI pipeline at the “Email Sent” stage.
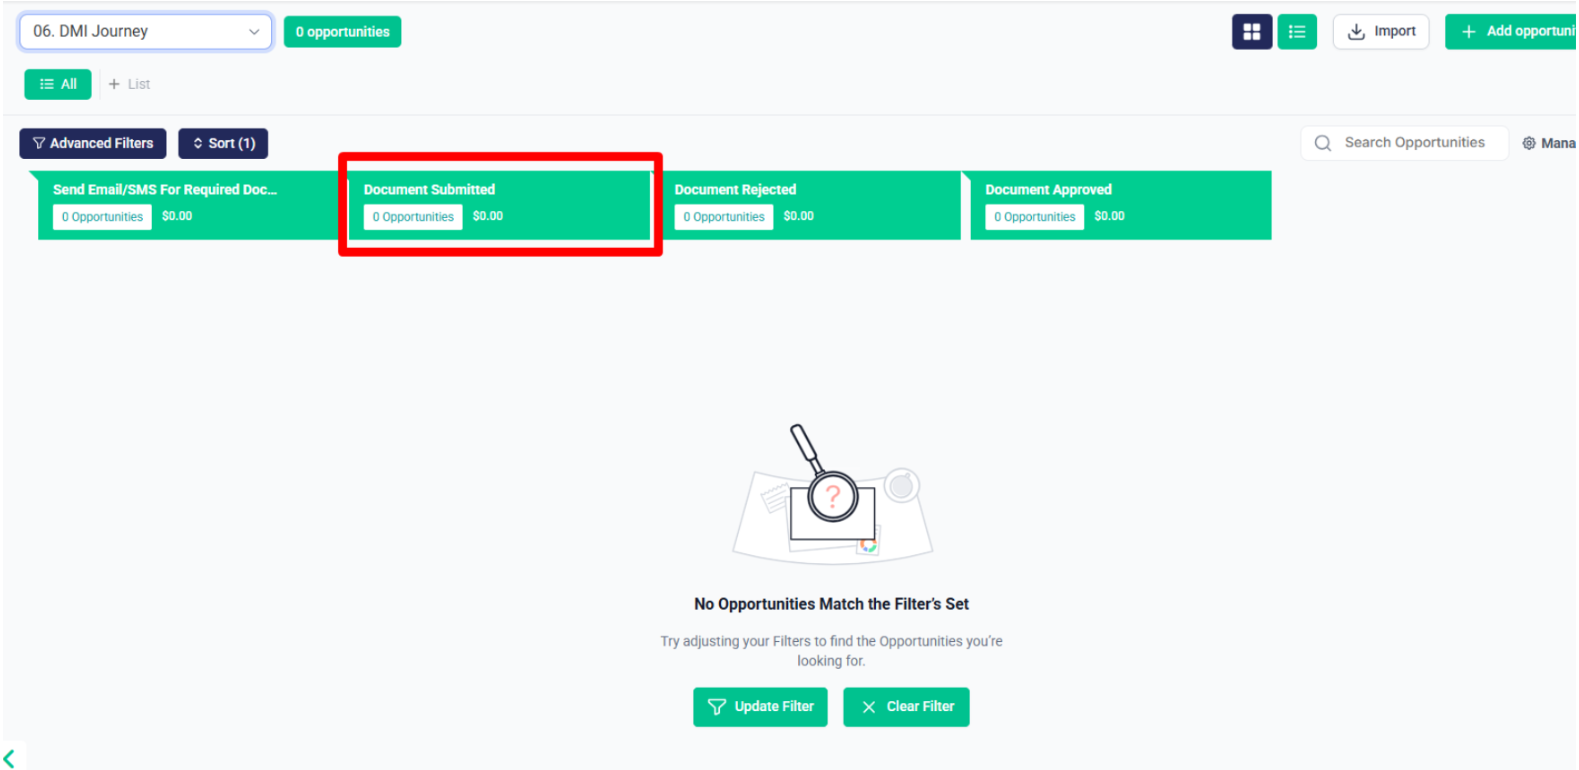
In the same automation folder, there’s a workflow named 6.2.1 – DMI Proof Form Submitted -> Remove From Reminders + Notify.
When a document-related form is submitted (such as Proof of Citizenship or Tricare Coverage):
- The contact will be removed from all reminder workflows related to that document.
The internal team will be notified about the form submission.

- The opportunity will be moved to the “Document Submitted” stage in the DMI pipeline.
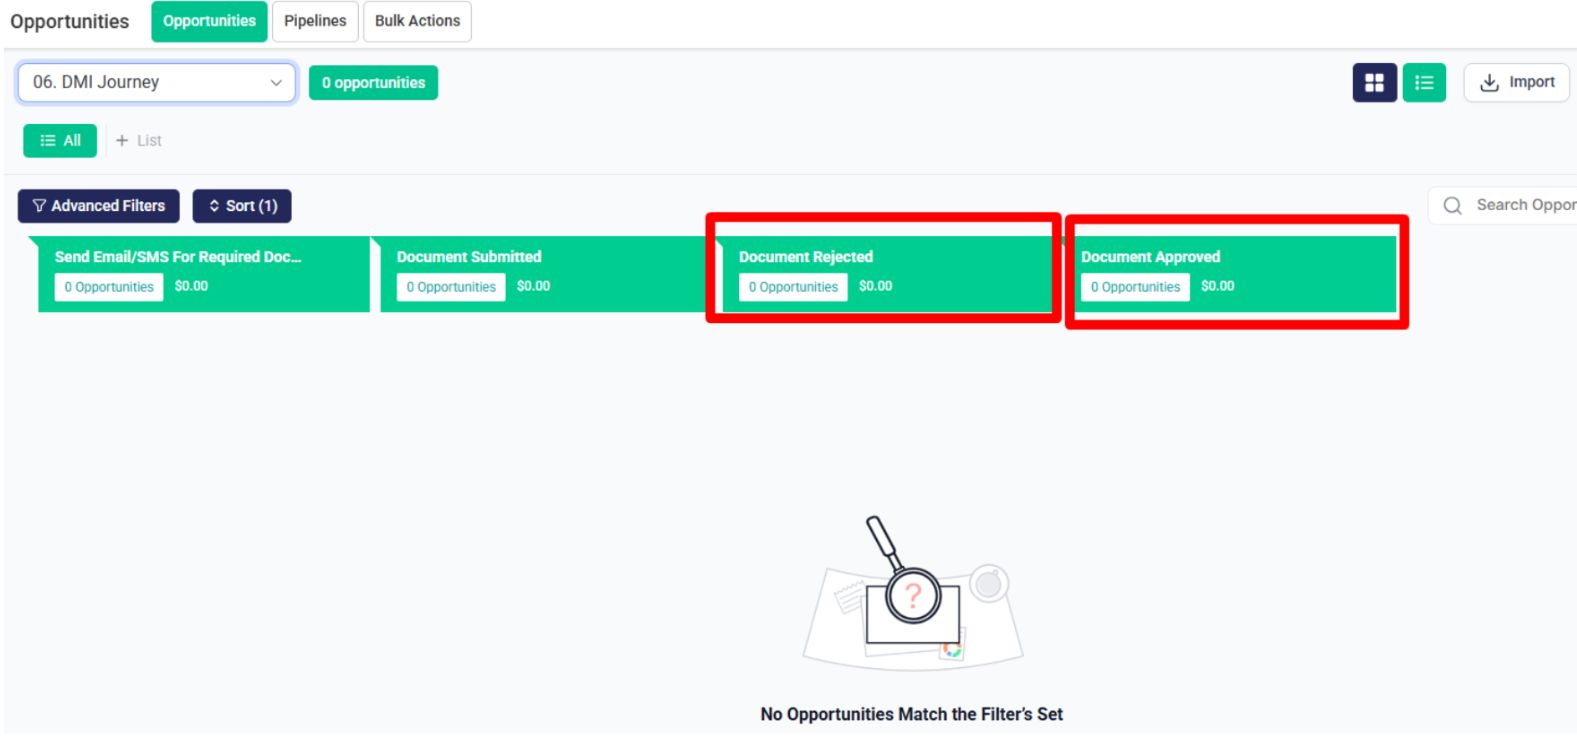
And then, if the agent manually accepts or rejects the document by updating the pipeline stage in the DMI pipeline:
The contact will automatically receive an email or SMS informing them whether the document was accepted or rejected.
Email/SMS Management #
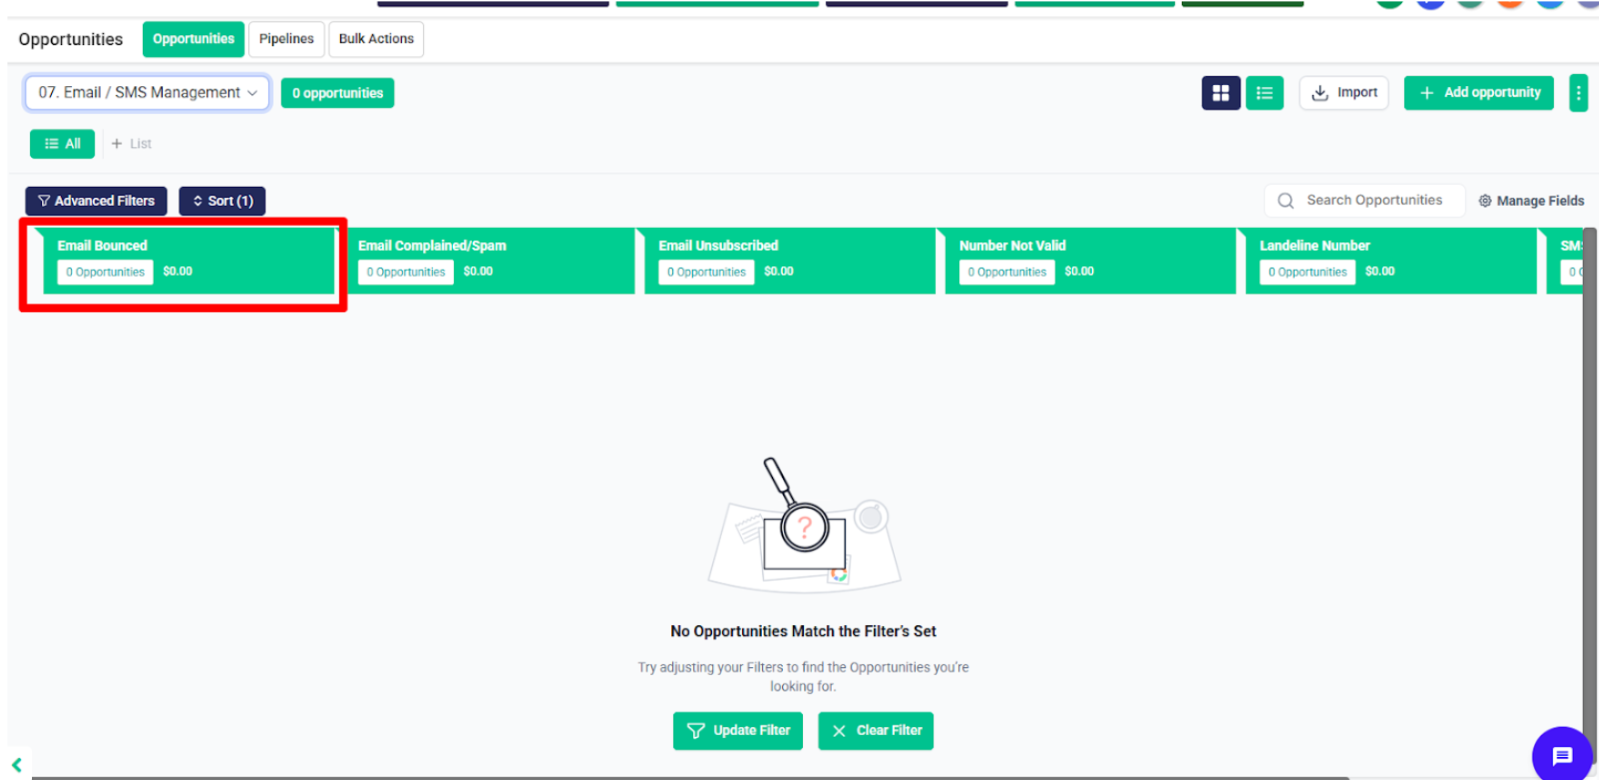
After that, in the 07. Email / SMS Management automation folder, there’s a subfolder called 7.1 – Email Status, which contains the workflow 7.1.1 – Email Bounced -> Enable DND.
Whenever an email bounces:
- The contact will automatically receive the Email Bounced tag.
DND (Do Not Disturb) will be enabled for email to prevent further email attempts.
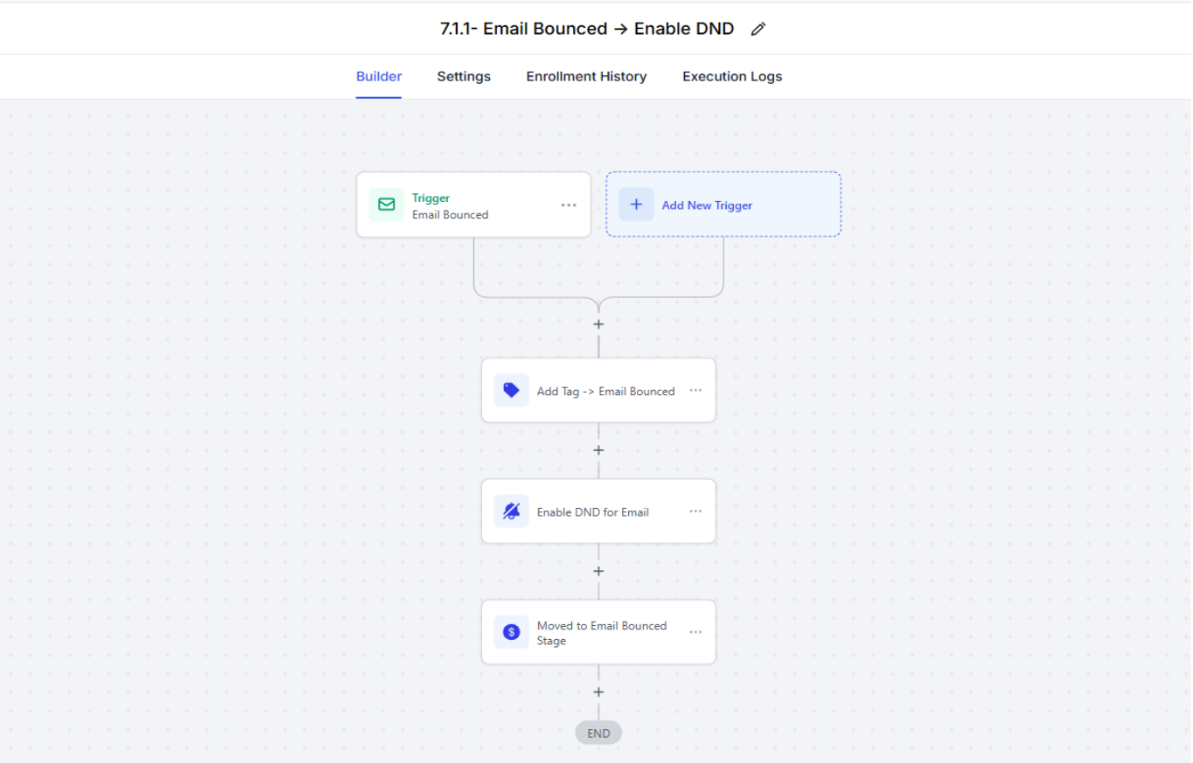
- An opportunity will be created in the 07. Email / SMS Management pipeline at the “Email Bounced” stage.
After that, in the same folder, there’s a workflow named 7.1.2 – Email Complained/SPAM -> Enable DND.
Whenever an email is marked as complained or spam:
- The contact will receive the Email Complained tag.
DND (Do Not Disturb) will be enabled for email to stop future email communication.
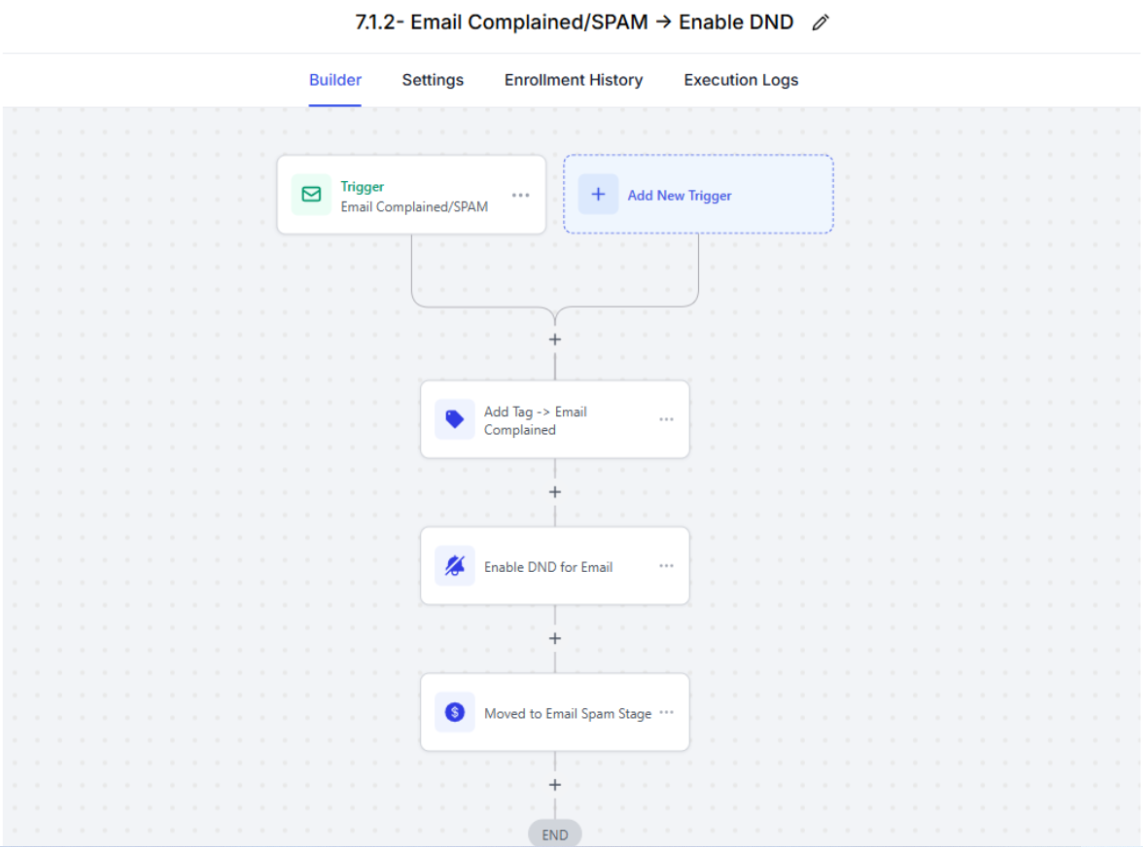
- An opportunity will be created in the 07. Email / SMS Management pipeline at the stage “Email Complained/SPAM”.

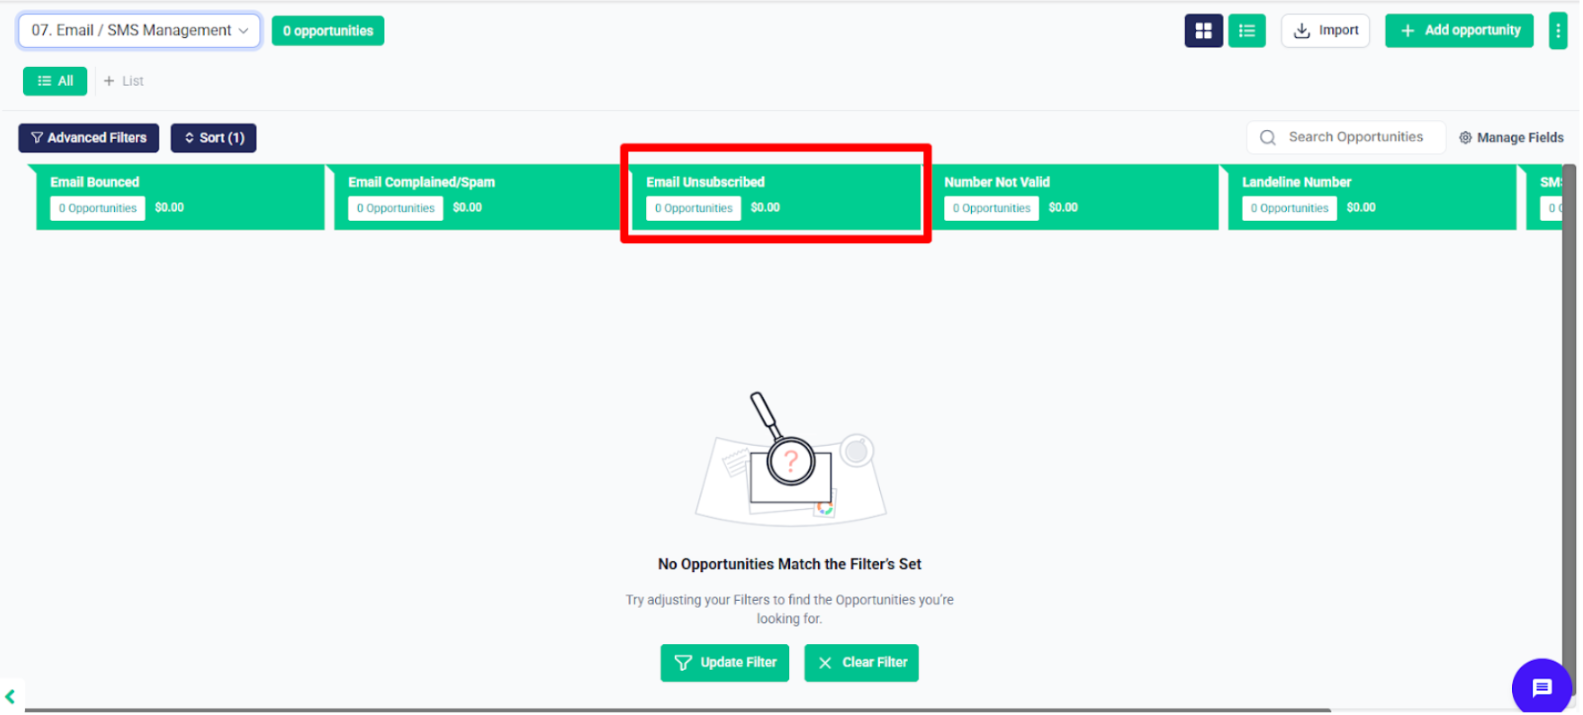
After that, in the same folder, there’s a workflow named 7.1.3 – Email Unsubscribed -> Enable DND.
Whenever an email is marked as Unsubscribed:
- The contact will receive the Email Unsubscribed tag.
DND (Do Not Disturb) will be enabled for email to stop future email communication.
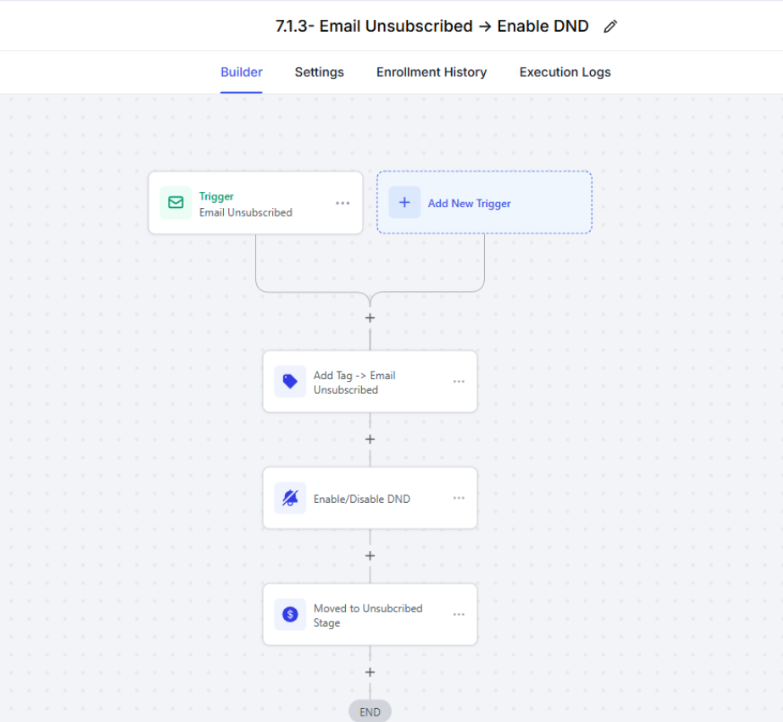
- An opportunity will be created in the 07. Email / SMS Management pipeline at the stage “Email Unsubscribed”.
After that, in the folder 7.2 – SMS Status, there’s a workflow called 7.2.1 – DND on STOP Message.
When a contact is marked as DND for SMS, or if they reply with keywords like Stop, Remove, Not Interested, or Out:
- DND will be enabled for all channels (Email, SMS, Calls).
- The HOT tag will be removed from the contact.
The contact will be removed from all active workflows to stop further communication.
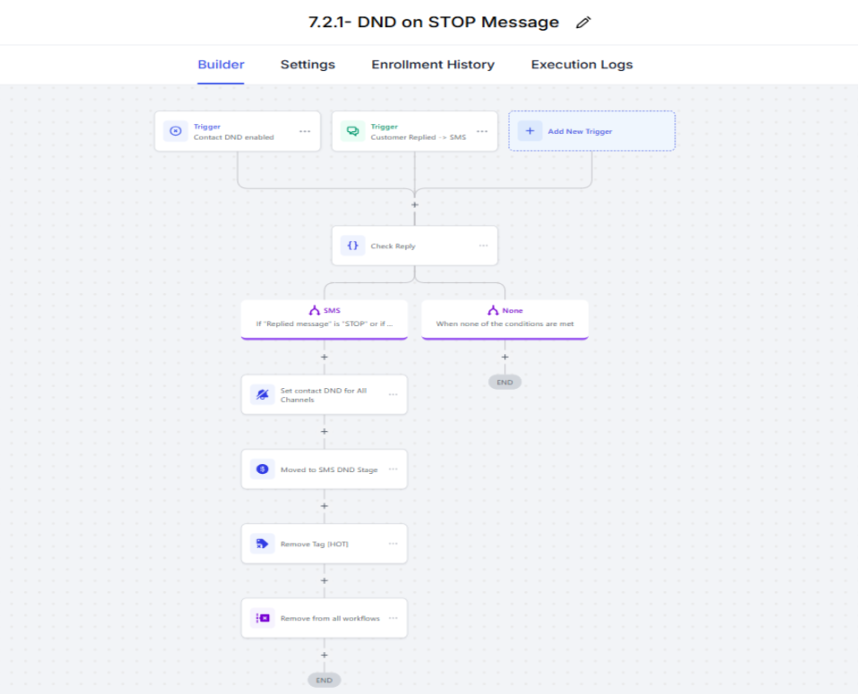
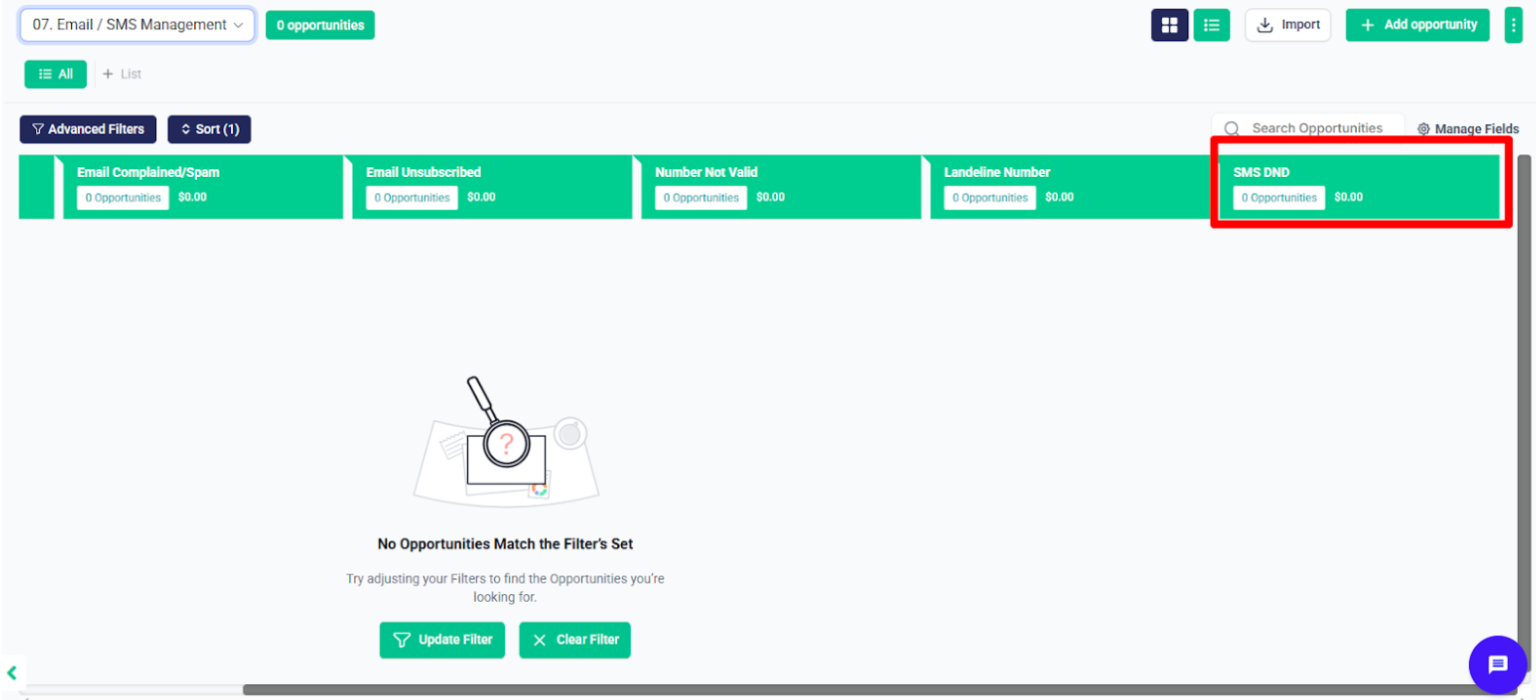
- An opportunity will be created in the 07. Email / SMS Management pipeline at the stage “Email/SMS DND”.
After that, there’s a workflow named 7.2.2 – SMS Error -> Enable DND.
If any error occurs while sending an SMS, then:
- DND will be enabled for all channels (Email, SMS, Calls).
- DND will be enabled for SMS to prevent further message failures.
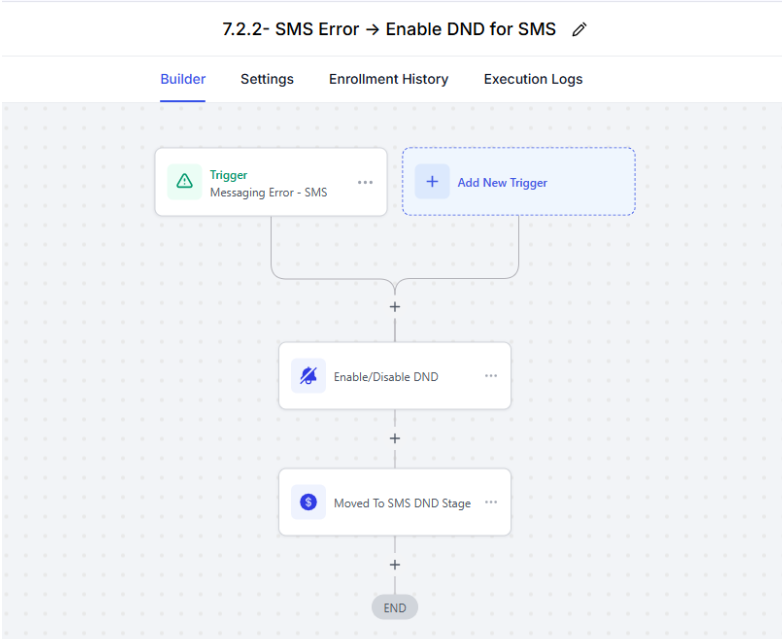
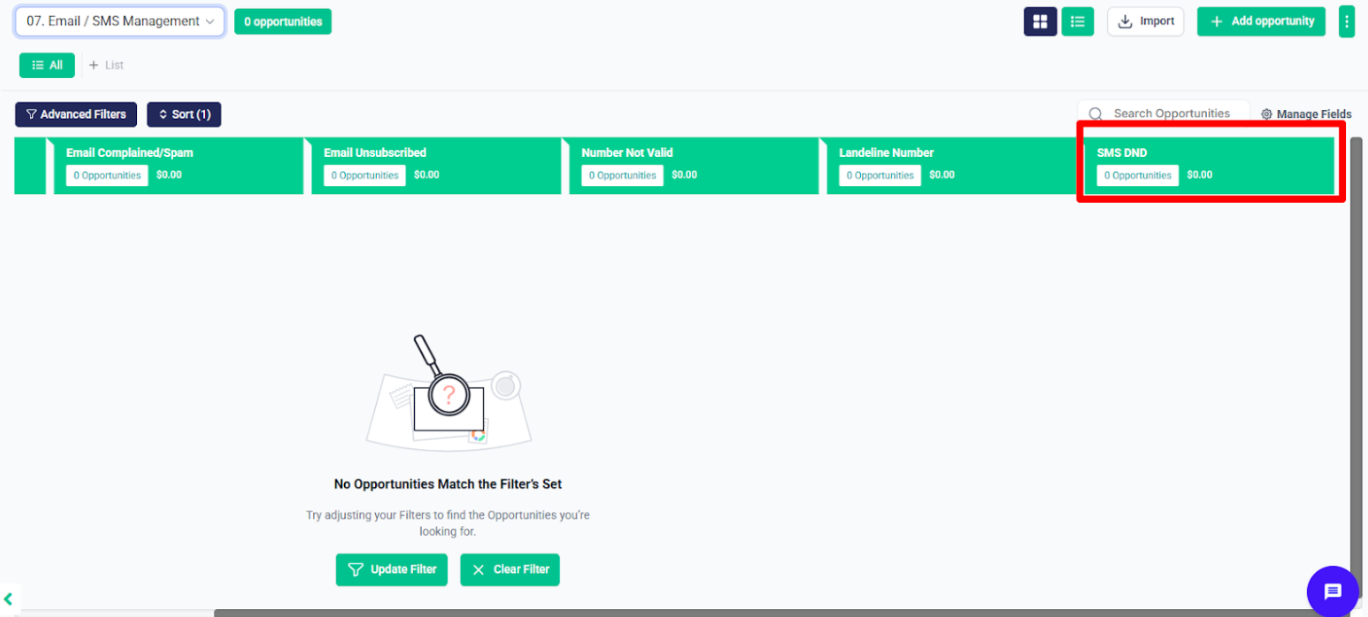
- An opportunity will be created in the 07. Email / SMS Management pipeline at the stage “SMS DND”.
After that, there’s a workflow named 7.2.3 – Filter & Verify Phone Number.
This workflow checks whether the phone number is invalid or a landline. It uses an if/else condition to determine which workflow triggered the check.
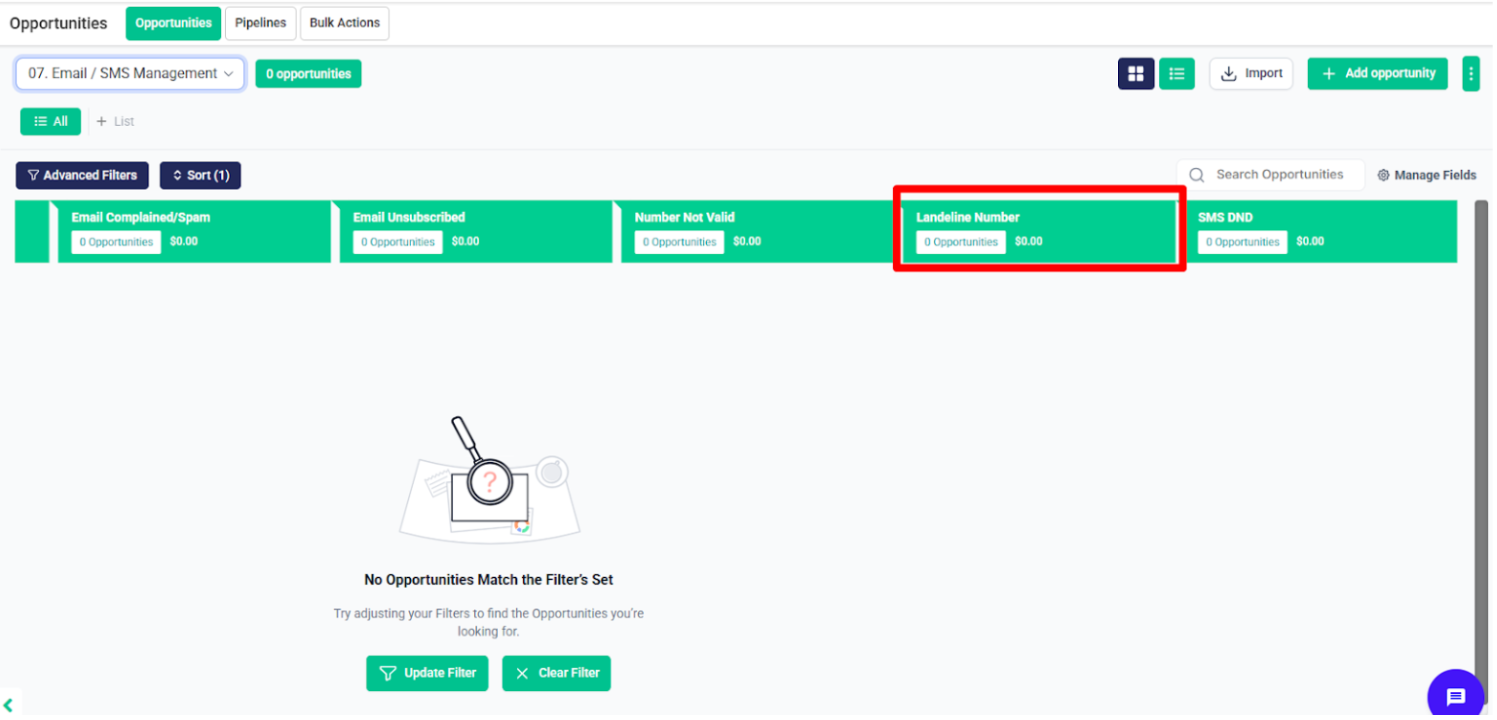
- If the number is detected as a landline, the contact will receive the Landline Number tag, DND will be enabled for SMS.
DND will be enabled for SMS to prevent further message failures.
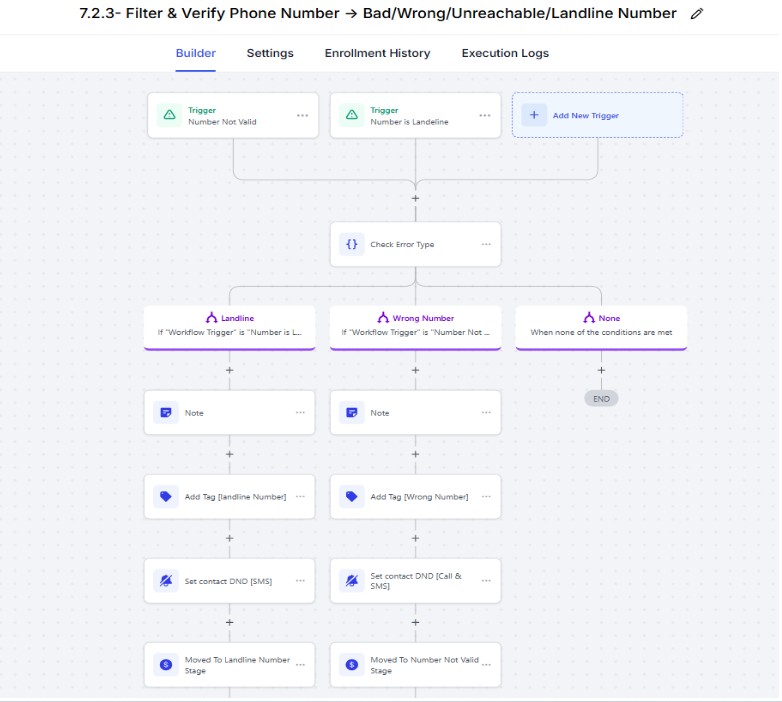
- An opportunity will be created in the 07. Email / SMS Management pipeline at the “Landline Number” stage.
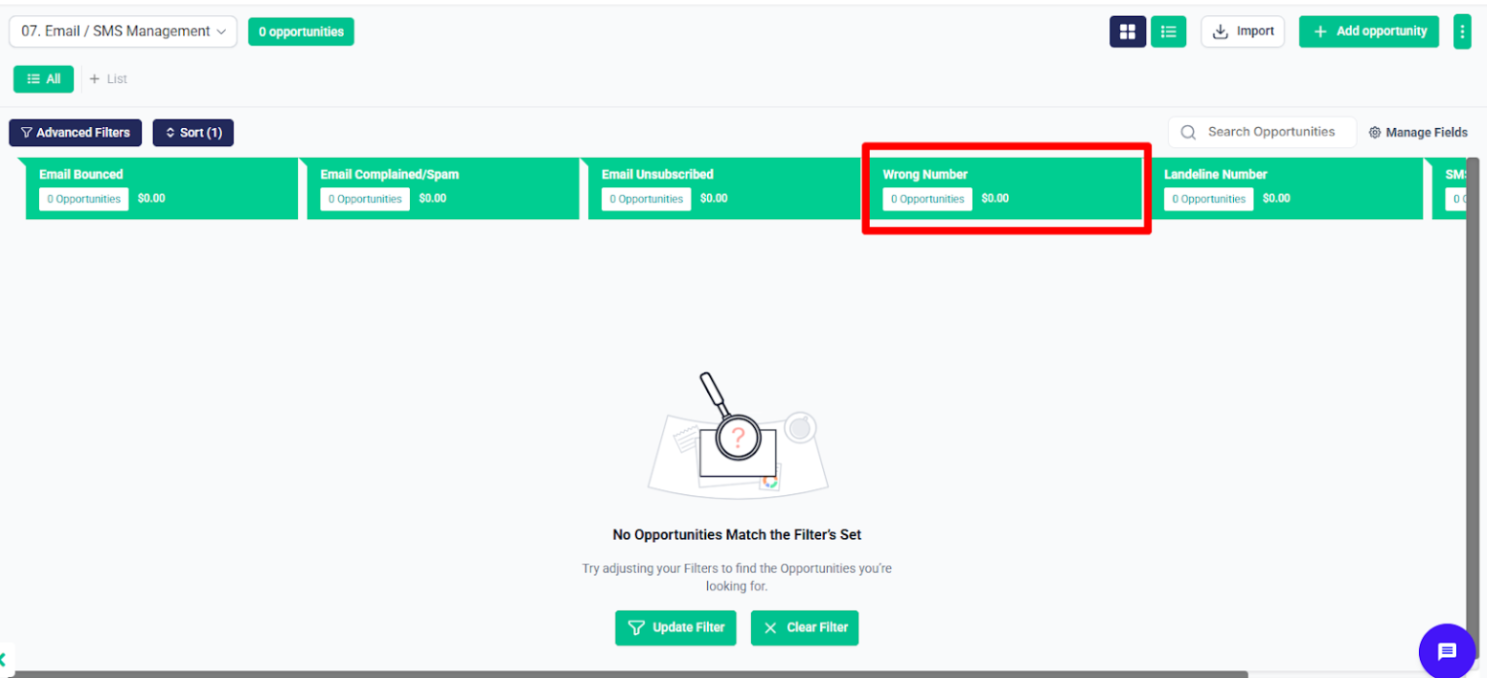
- If the number is identified as invalid or wrong, the contact will receive the Wrong Number tag, and an opportunity will be created in the “Wrong Number” stage of the same pipeline.
Dental Lead #
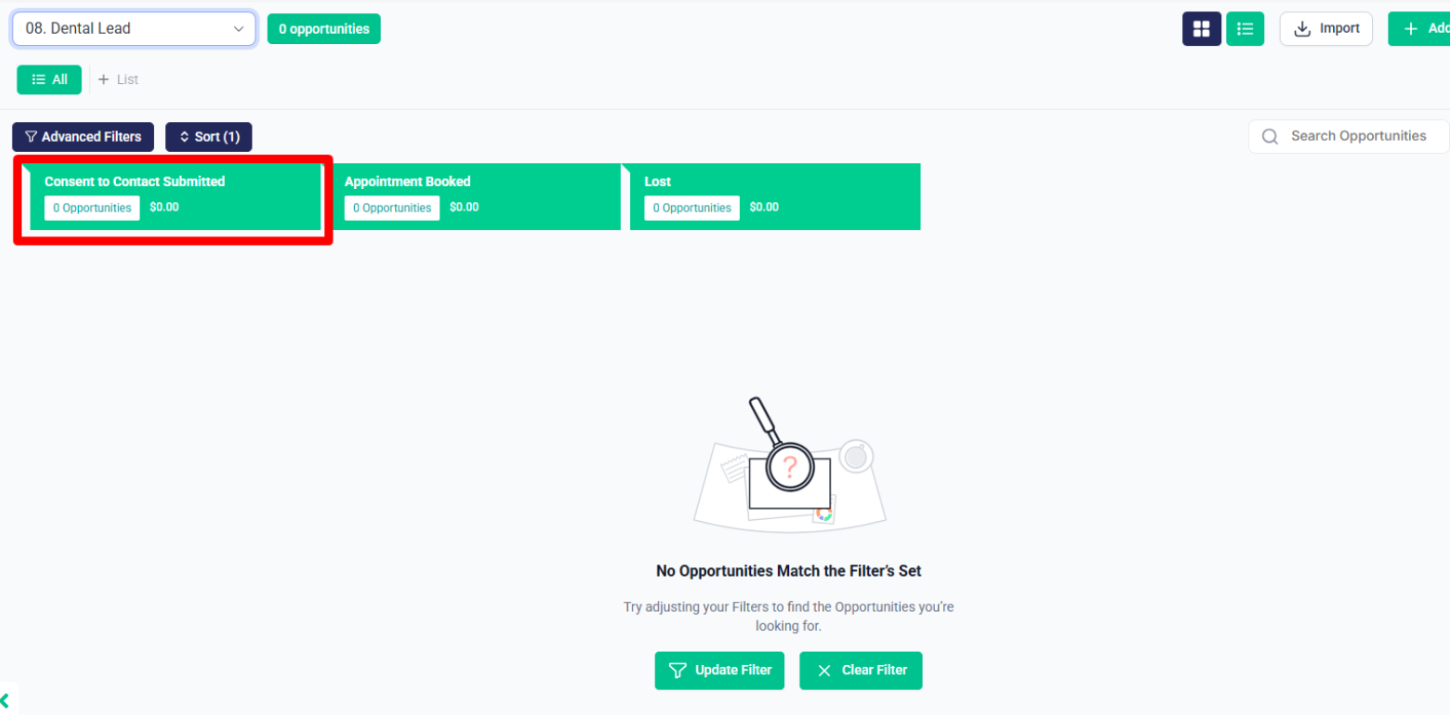
After that, in the Dental Lead folder, there’s a workflow called 8.1 – Dental Hot Lead Follow-Up. When the Dental Lead tag is added, an opportunity will be created in the Dental Lead pipeline at the stage “Consent to Connect Submitted”, and the contact will enter this follow-up campaign. It will keep sending follow-up messages until an appointment is booked. If the person books an appointment, they will get the Appointment Set tag. After the call happens, the system will apply the appropriate tag like No Show or Call Completed, and move the contact to the correct stage in the Appointment Journey pipeline.
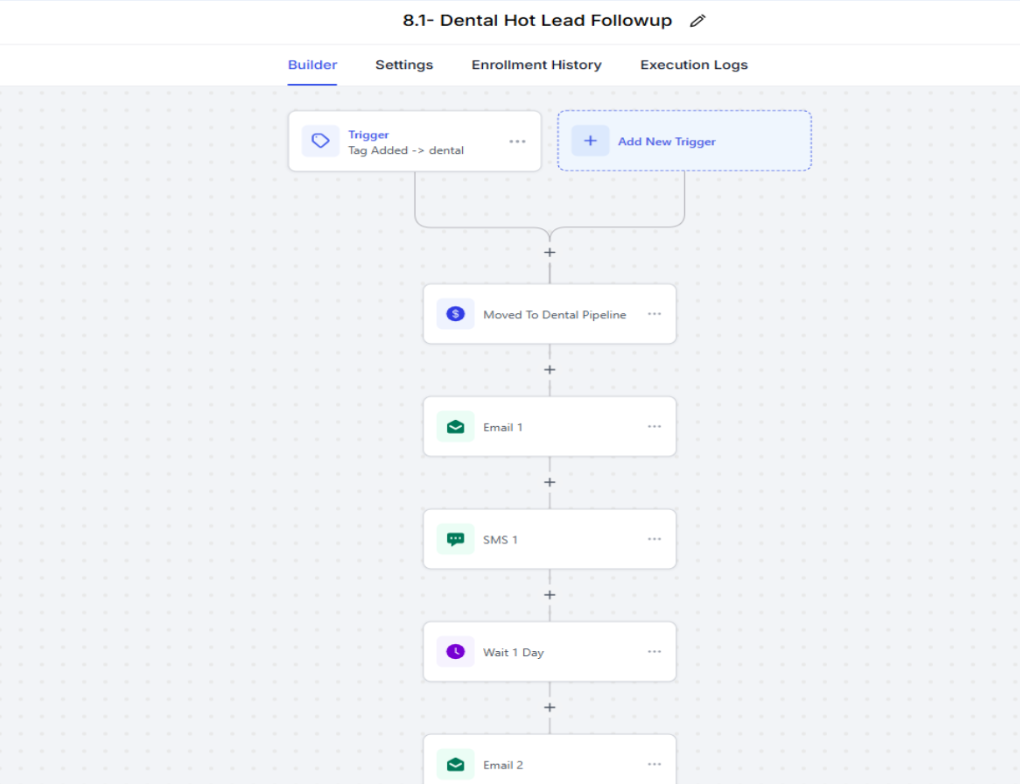
- An Oppurtunity created in Dental Pipeline’s Stage “Consent to Connect”.
After that, the workflow 8.2 – Dental Appointment Scheduled Moved to Dental Pipeline is triggered when the appointment status is marked as Confirmed. It will use an if/else condition to check if the contact has the Dental tag.
If the Dental tag is present, the contact will be removed from the Dental Lead follow-up workflow.
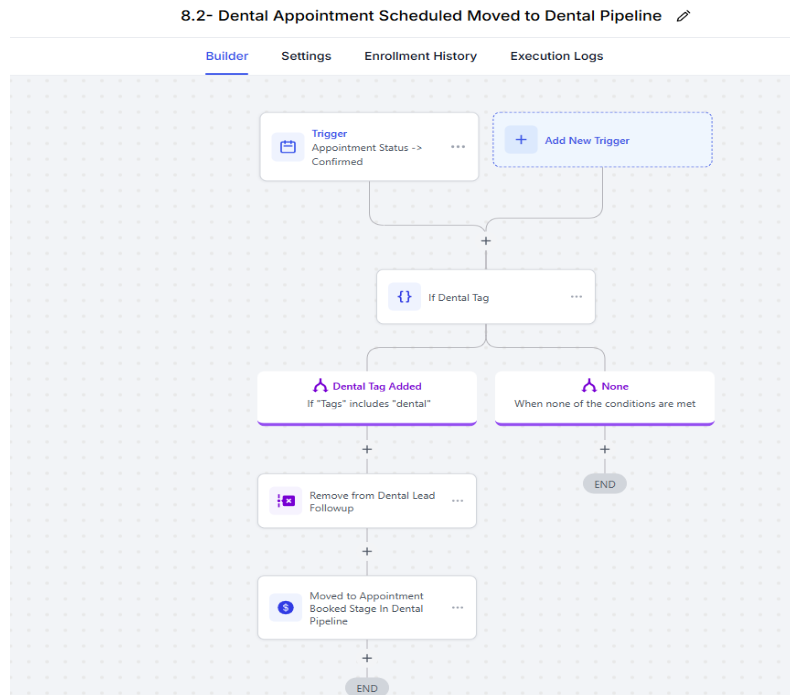
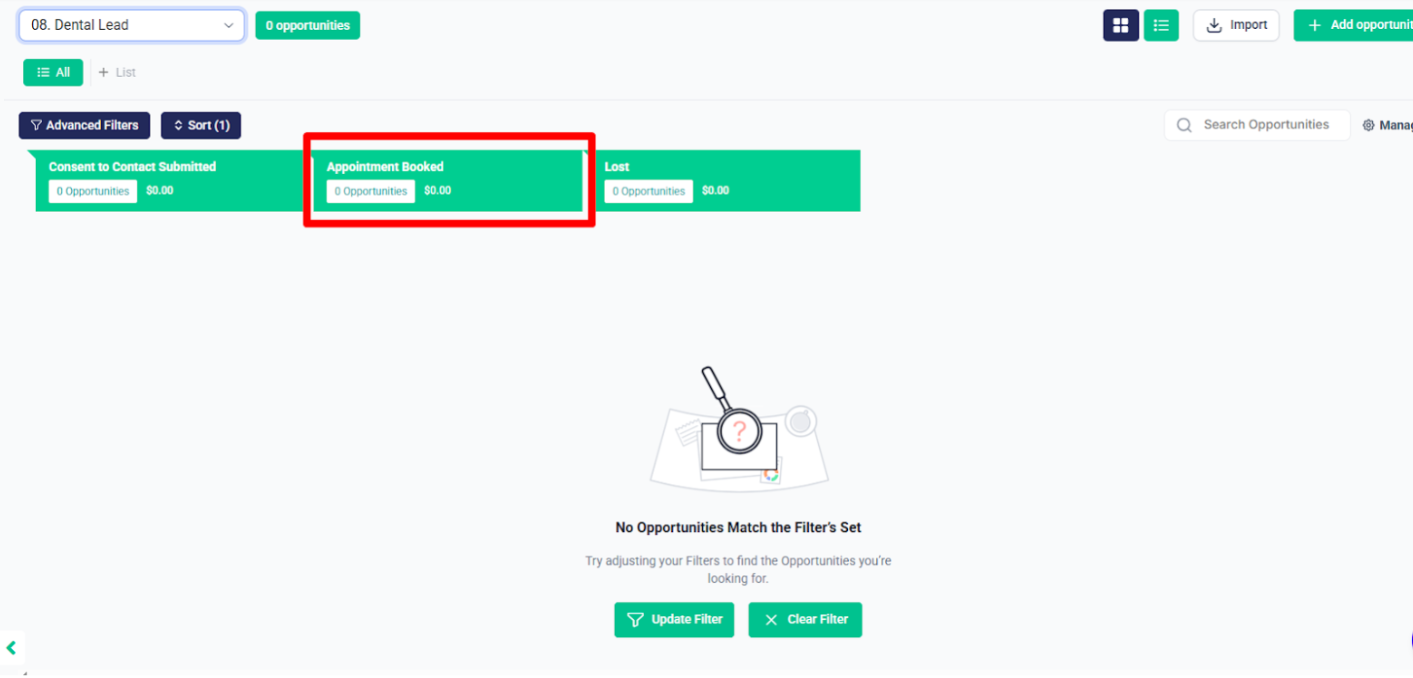
- And an opportunity will be created in the Dental Lead pipeline at the stage “Appointment Booked”.
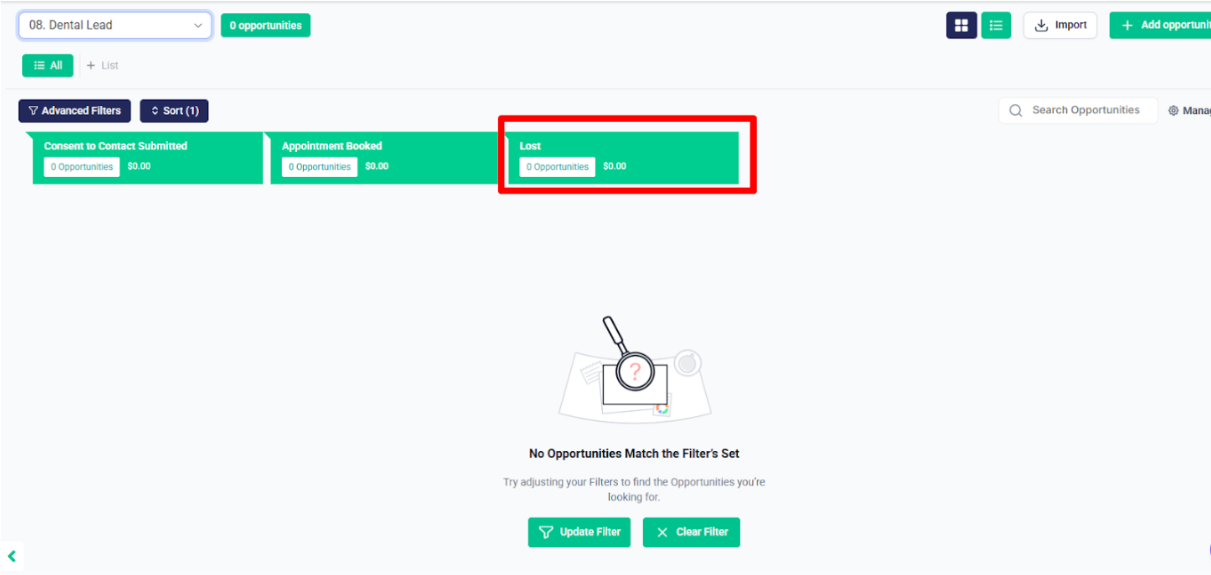
After that, the workflow 8.3 – Wrong Number Tag Added -> Moved to Lost Stage in Dental Pipeline is triggered when the contact is given tags like Negative Conversation, Wrong Number, or Not Interested.
It then uses an if/else condition to check if the Dental tag is included.
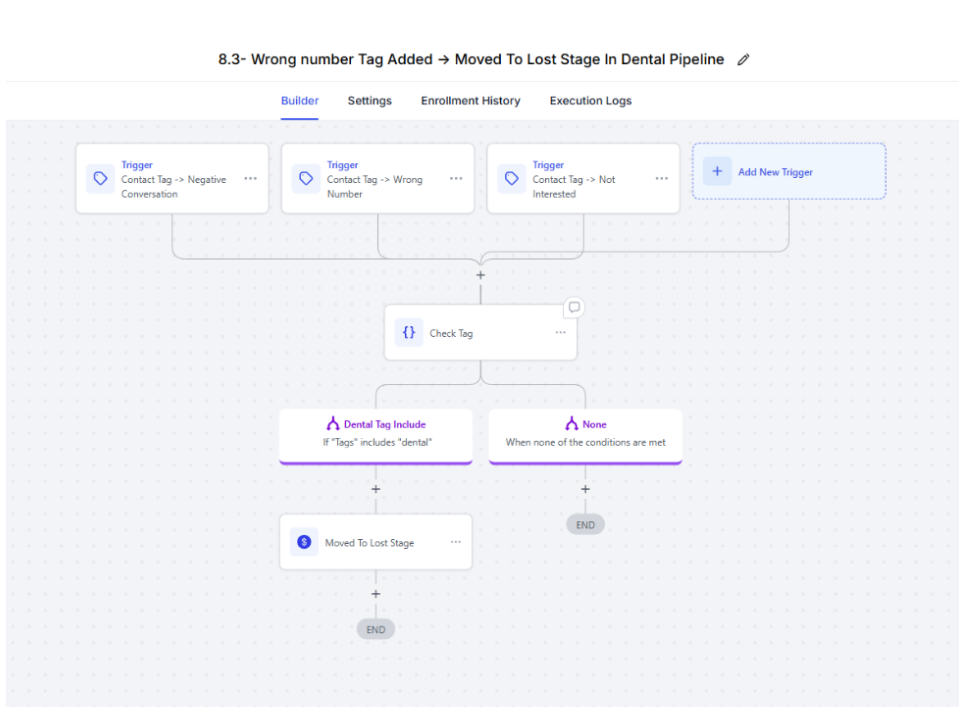
- If the Dental tag is present, an opportunity will be created in the Dental Lead pipeline at the “Lost” stage.